While installing the QuickBooks application, you may encounter different issues that can interrupt the installation process. Fortunately, to address these installation issues, Intuit has developed a robust solution – the QuickBooks Install Diagnostic Tool. You can use the QB install diagnostic tool to eliminate several errors and issues that can appear while installing or updating QuickBooks, working on the company file, activating QuickBooks Desktop, etc. Apart from this, the install diagnostic tool is also beneficial in resolving several issues related to Microsoft’s core components that QB requires to run smoothly.
This blog will provide detailed instructions on downloading, installing, and running the QuickBooks Desktop Install Diagnostic Tool to troubleshoot common installation issues associated with the QB Desktop application.
Installation is the first step to begin your journey with QuickBooks, and if it fails for some reason, you can get in touch with our support team at +1-(855)-955-1942 for help fixing them using the QuickBooks install diagnostic tool
What is QuickBooks Install Diagnostic Tool?
As discussed earlier, QuickBooks Install Diagnostic Tool is a tool specifically designed to automatically identify and rectify errors and issues that you may face during QuickBooks Desktop installation
A few years back, QuickBooks Desktop troubleshooting tools like File Doctor, Clean Install Tool, and QuickBooks Install Diagnostic Tool were available to users as a standalone utility. One can download the QuickBooks Install Diagnostic Tool from the official site as a QBInstall_Tool_v2.exe file. Later, with the introduction of QuickBooks Tool Hub, all these QB utilities were integrated into a single app: QuickBooks Tool Hub. Now, you will need to install it to access the QB Install Diagnostic Tool.
Manually troubleshooting Microsoft components like .NET Framework, MSXML, and C++ is not possible for a regular QuickBooks user. In such circumstances, the QuickBooks Install Diagnostic Tool comes in handy. The best thing about the QB install diagnostic tool is that it resolves the errors automatically with a few clicks. All you need is to launch it after the installation.
How to Download QuickBooks Install Diagnostic Tool?
Downloading and installing QuickBooks Install Diagnostic Tool is a simple 3-step process. First, you need to Download QuickBooks Tool Hub, install it, and finally launch it to access QuickBooks Tool Hub. Here’s how you can access the QuickBooks Install Diagnostic Tool on your Windows computer.
Step 1: Download QuickBooks Tool Hub On the System
For a better experience, we suggest you use Tool Hub on Windows 10, 64-bit. Also, make sure to close the QuickBooks application before downloading the tool hub on the system.
- Once you have closed the QB application, download the most recent version (1.6.0.3) of QuickBooks Tool Hub. For this, visit the official site of Intuit and download the QuickBooks Tool Hub’s installation file with the .exe extension.
- Now, save the file on the system somewhere you can easily locate it when required. You can choose the Downloads folder or the Windows Desktop to save it.
Note: If you have already installed the Tool Hub application on the system, you need to check its version. You can visit the Home tab and check the version mentioned at the bottom of the window. If you have an older version, then you need to update it to the latest one.
- After that, run the QuickBooksToolHub.exe file by double-clicking it.
- Agree to the terms and conditions displayed by the program installer. Now, you must follow the on-screen instructions to complete the installation.
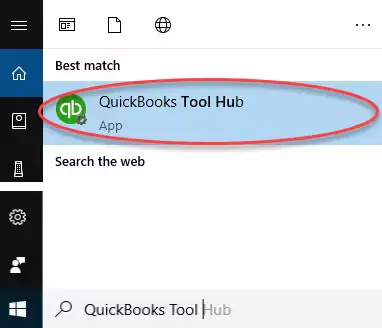
- When the installation is done, double-click the tool hub icon on the Windows desktop and launch it.
Note: If you cannot find the tool hub icon, then perform a manual search using the Windows search for QuickBooks Tool Hub and choose the program.
- Once you have launched the tool hub, you can use the Install Diagnostic Tool from within it.
Step 2: Launch and Run the QuickBooks Install Diagnostic Tool From Tool Hub
- Open the QuickBooks Tool Hub application on the system and go to the Installation Issues tab.

- Now, click the QuickBooks Install Diagnostic Tool option to launch it. Let the diagnostic tool run. It may take about 20 minutes.
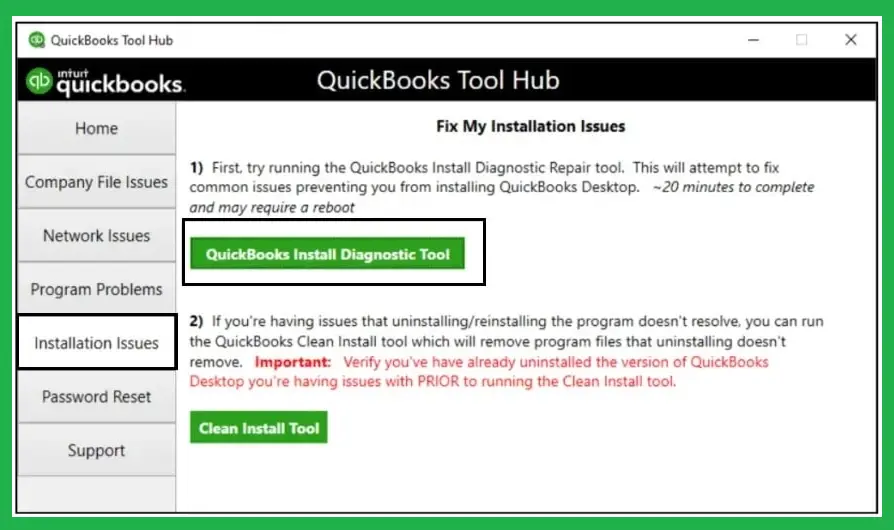
- When the tool completes the repair process, restart the system and the QB Desktop.
Sometimes, when you try to install the QB Desktop or QB Tool Hub application or even launch the Install Diagnostic Tool, you may face error 1628, which says Failed to complete the script-based install. This error occurs if a Windows service named “Windows Installer” is not working on the system. Go through the next section to check how you can fix it.
Recommended To Read: The Right Way to Use QuickBooks Connection Diagnostic Tool
How To Fix Error 1628 While Installing Tool Hub?
If you get the error code 1628 while installing the Tool Hub application, try using the Windows account with the admin account. The standard account has limited access rights, so using the administrator account can fix this issue. The error can also appear if the tool hub is incompatible with the Operating System, so you can fix it by right-clicking the tool hub application’s program file and choosing the Troubleshoot compatibility option. Sometimes, renaming the Install Shield folder can also help you fix the error code 1628.
What Errors Can Be Fixed Using the QB Install Diagnostic Tool?
The Install Diagnostic Tool is designed to address a range of errors and issues encountered during installing or updating QuickBooks software. Some common errors that can be resolved using this tool include:
- Installation Errors: The tool can tackle errors that occur during the installation of QuickBooks, such as QuickBooks Error Code 1904, Error 1603, Error 1935, Error Code 1402, and others.
- .NET Framework Issues: It can also address issues related to the Microsoft .NET Framework, like error code 1935.
- MSXML Errors: The install diagnostic tool can also rectify the errors related to the damaged MSXML file, another essential component for QuickBooks.
- C++ Runtime Errors: Issues occurring because of Microsoft Visual C++ can be resolved using the tool.
- QuickBooks Desktop Update Errors: It can also resolve update errors like QB Error 15270, Update Error 15223, Error 1328, Error Code 12007, etc.
- Miscellaneous Errors: It can also resolve issues where QuickBooks has stopped working while opening, QuickBooks Unrecoverable Error, etc.
What To Do If Install Diagnostic Tool For QuickBooks Desktop Failed to Resolve Installation Errors?
If the Install Diagnostic Tool cannot fix the installation issues for you. In that case, you can use the below-given methods to resolve the QuickBooks Installation Errors manually.
Solution 1: Completely Uninstall and then Reinstall a Fresh Copy of QB Desktop
Before you uninstall and reinstall QuickBooks from the system, make sure to download the installer for your version of QuickBooks and take note of your license number.
Step 1: Remove QuickBooks From the System
- Open the Windows Start menu.
- Then, search for Control Panel using the Windows search bar and open it.
- Select the Program and Features or Uninstall a Program option.
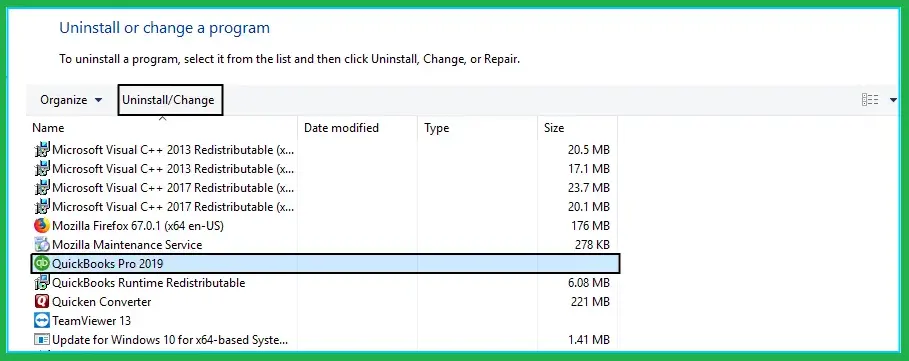
- Select the QuickBooks Desktop version you want to remove from the system.
- Hit the Uninstall/Change button followed by Remove and Next.
Note: If you do not find the option to uninstall or remove the QB Desktop application, sign out and sign in to Windows as admin.
Step 2: Reinstall QB Desktop Application
- Open the QuickBooks.exe file (QuickBooks Program Installation File) that you downloaded earlier.
- Then, follow the on-screen instructions and accept the software license agreement to complete the process.
- After this, hit Next.
- Enter the product and license numbers and hit Enter.
- After this, select the installation path you want to continue with. You can either go with the express or custom and network install. Choose accordingly and complete the installation process.
Solution 2: Switch to Selective Startup Mode
Switching to the selective startup mode makes sure that no other application interrupts the installation process. So, follow the below-given steps to switch to the selective startup mode:
- Press the Windows and R keys on the keyboard to open the Run command window.
- Then, enter the command msconfig and click OK.
- Select the Selective Startup and Load System Services options in the General tab.
- Then, move to the Services tab and select the Hide All Microsoft Services option.
- Click the Disable All option.
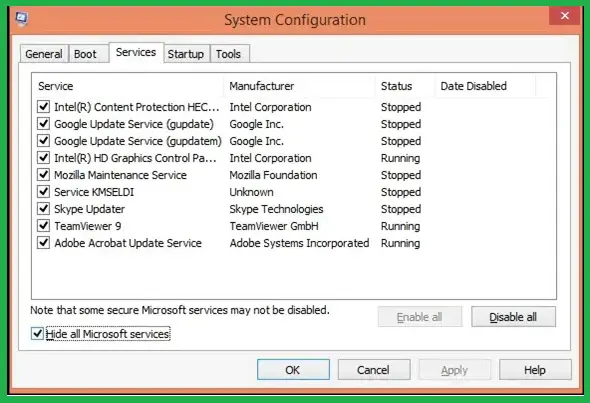
- Then, uncheck the option that says Hide all Microsoft Services to proceed further.
- Select the Windows Installer option from the list of services.
- Hit Ok.
- From the System Configuration window, click Restart.
Solution 3: Update Windows
- Click the Windows icon.
- Then, go to the Settings of your Windows operating system and click Windows Update.
- Click on the Check for Updates option.
- It will show the available updates.
- Click the Download and Install button.
- When the update process ends, restart the system.
- Open the QB Desktop application and try to install QuickBooks Desktop to check if updating Windows resolves the error.
Solution 4: Manually Fix Windows Components
You can repair the Windows component manually with the help of the following steps.
Repair or Reinstall Microsoft .NET Framework
- You can repair or reinstall the .NET Framework on Windows 10 and newer versions with the help of the following steps:
- Using the Task Manager, exit all the programs running in the background of your system.
- Go to the Windows Start menu, type Control Panel in the search bar, and open it.
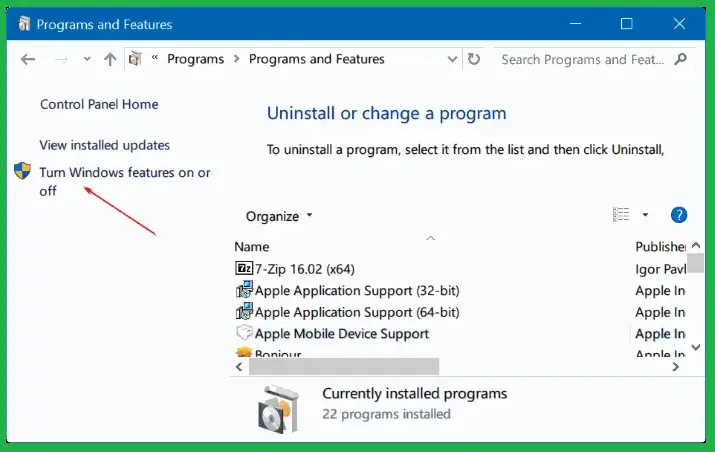
- Now, go to the Programs and Features tab.
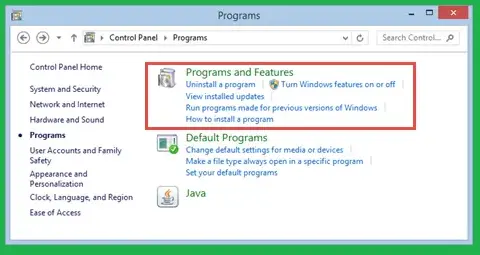
- Then, select the Uninstall a Program option. Don’t worry; it won’t uninstall any program from the system.
- Select the Turn Windows features on or off option and find the .NET Framework on the list.
- Now, you need to check the settings for both .NET Framework 4.5 (or later) and .NET Framework 3.5 SP1.
Note: The steps to fix .NET Framework 4.5, 4.6, 4.7, and 4.8 are the same.
Steps to Check .NET Framework 4.5 or later
Follow the steps given below if the .NET Framework 4.5 or later checkbox is not checked:
- Select the checkbox to enable the .NET Framework 4.5 (or later).
- Then, hit OK to save changes.
- Restart your system.
Follow the steps below if the .NET Framework 4.5 or later checkbox is already checked:
- Select the checkbox and disable the .NET Framework 4.5 (or later). Make sure not to enable it back on.
- Then, select OK to save changes.
- Restart your system.
- Lastly, after signing in back to the Windows, follow the steps above and re-enable the .NET Framework 4.5.
Steps to Check NET Framework 3.5 SP1
Follow the given steps if the .NET Framework 3.5 SP1 checkbox is not check-marked:

- Select the checkbox next to NET Framework 3.5 SP1 to enable it.
- Then, hit OK and save the changes.
- Now, restart your system.
Follow the instructions if the .NET Framework 3.5 SP1 checkbox is already checked:
- Select the checkbox next to .NET Framework 3.5 SP1 and disable it..
- Then, hit OK to save changes.
- Restart the system.
- When you sign in back to the Windows, follow the above-given steps to enable the .NET Framework 3.5 SP1 again.
Repair Microsoft MSXML
To repair the Microsoft MSXML component, you need to register the MSXML DLL files.
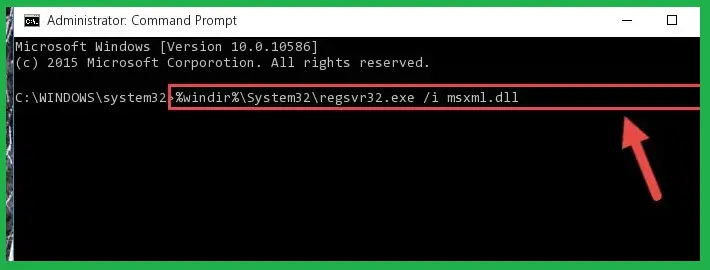
To register the MSXML File on a 64-bit operating system, perform the following steps:
- Click the Windows Start menu and enter cmd as the command in the search box.
- Then, right-click cmd and choose the Run as Administrator option.

- Now, at the C: prompt, enter the command cd\windows\syswow64.
- Type regsvr32 MSXML6.dll and hit Enter.
- Now, install the QB Desktop.
To register the MSXML File on a 32-bit operating system, perform the following steps:
- Open the Run command by pressing the Windows and R keys on the keyboard.
- Then, type the command cmd and hit Enter.
- Type regsvr32 MSXML6.dll and hit Enter.
- Now, Install QB Desktop again.
Need Expert Assistance!
This was all about the QuickBooks Install Diagnostic Tool. Hopefully, you will be able to download and use the tool effectively after following the steps mentioned in the blog above. The tool can help you resolve several major and minor issues while installing the QB application. However, if you still get stuck and even the install diagnostic tool cannot help you rectify the errors, feel free to connect with our experts at the helpline number +1-(855)-955-1942 Our experts are available round the clock to make your QuickBooks experience smooth and error-free.
Frequently Asked Questions
A. The QuickBooks Install Diagnostic Tool is a free utility by Intuit designed to fix installation-related errors in QuickBooks Desktop. It diagnoses and automatically resolves issues with Microsoft components like .NET Framework, MSXML, and C++. These components are essential for QuickBooks to run smoothly. If your installation freezes, fails, or throws mysterious error codes like 1603, 1935, or 1904, this tool can save you hours of frustration. It simplifies troubleshooting by scanning and repairing corrupted files with a single click. Use it before reinstalling QuickBooks or making major system changes. It’s your first line of defense during setup failures.
A. Use the QuickBooks Install Diagnostic Tool whenever you experience installation errors, failed updates, or system crashes related to QuickBooks Desktop. Common signs include errors like 1402, 1903, or a stuck install window. This tool is also effective if QuickBooks refuses to open after an update or throws system file-related issues. Before manually repairing components, always run this tool first—it often resolves the problem without further steps. Best practice? Run it after every failed install to ensure system integrity. It works for both fresh installs and upgrades of the software.