
QuickBooks, developed by Intuit, is a widely used accounting software designed to help users manage business, accounting, and financial tasks efficiently. However, like any other software, QuickBooks is not immune to errors and technical issues. Common problems include slow performance, printing errors, and damaged company files.
To address these issues, Intuit provides a range of troubleshooting tools within the QuickBooks Tool Hub. You can download and install this tool on your computer to fix various errors.
This guide will walk you through the step-by-step process of downloading and using the QuickBooks Tool Hub on your system.

This tool acts as a centralized hub, bringing together various features and utilities designed to efficiently resolve technical issues in QuickBooks Desktop. Additionally, Intuit continuously enhances the QuickBooks Tool Hub with updates, ensuring its effectiveness remains up to date.
Alright, then, let’s continue reading this blog to explore everything you need to know about QuickBooks Tool Hub.
If you need immediate guidance to install & utilize QuickBooks Tool Hub 1.6.0.8, you can dial +1-(855)-955-1942 to contact a QB professional.
Discover More About QuickBooks Desktop Tool Hub 1.6.0.8
Intuit developed the QuickBooks Tool Hub 1.6.0.8, a free desktop application designed to help users troubleshoot various QuickBooks issues. This all-in-one toolkit provides essential diagnostic tools to fix technical, installation, functional, data transfer, and migration-related errors. Since its introduction, it has eliminated the need for multiple separate tools, offering a unified solution instead. You can simply download and install it from the official website to keep QuickBooks running smoothly without interruptions.
Your system must meet a few technical requirements before you can run QB Tool Hub. Let’s navigate to the next section to learn about that.
Basic System Requirements Related to QuickBooks Tool Hub
Before downloading and installing QB Tool Hub, ensure your system meets the two basic requirements for QuickBooks Tool Hub. Let us check out the two basic requirements that you need to fulfill before downloading the QuickBooks Repair Tool.
- Microsoft Visual C++ – Redistributable Package and
- Microsoft .Net. Framework
These two are the basic applications that you must install on your computer before you download and open the downloaded QuickBooks tool hub installation file. If you don’t have them already installed on your computer, then you can easily find them on Microsoft’s official website and download and install them first. After successfully installing these two applications, proceed with the next steps of downloading and installing QuickBooks Tool Hub.
Use These Steps to Download & Install QuickBooks Tool Hub
It is a three-step process to download and install the QuickBooks Tool Hub. However, before downloading and installing QB Tool Hub, ensure your system meets the two basic requirements for QuickBooks Tool Hub.
Step 1: Download QuickBooks Tool Hub
The QuickBooks tool hub download process starts by downloading the QB tool hub .exe file. The below steps can help you download the latest version of QuickBooks tool hub.
- Go to the official website of QuickBooks on your web browser.
- Depending on your system configuration, look for the file (that is either 32-bit or 64-bit) and hit the Download button.Save the downloaded file (in .exe format) to a convenient location.
- The name of the file would be QuickBooksToolHub.exe.
- A popup list would appear in front of you; right-click on the direct link and select Save Link As option from the popup list.
- Now a window will open and will ask you to choose the desired folder to download the .exe file.
- Select the folder and click on the Save option.
Depending upon your internet connectivity, it will take time to download the QuickBooks Tool Hub application. Once completed, the browser will pop up a notification for the same.
Note: If you have already installed the Tool Hub, update it to the latest available version. However, sometimes you may get issues while downloading the QBToolhub.exe file, so check out the steps below to resolve it.
Step 2: Install QuickBooks Tool Hub
- Go to the folder you had previously used to download the QuickBooks Tool Hub file.
- Double-click on the .exe file.
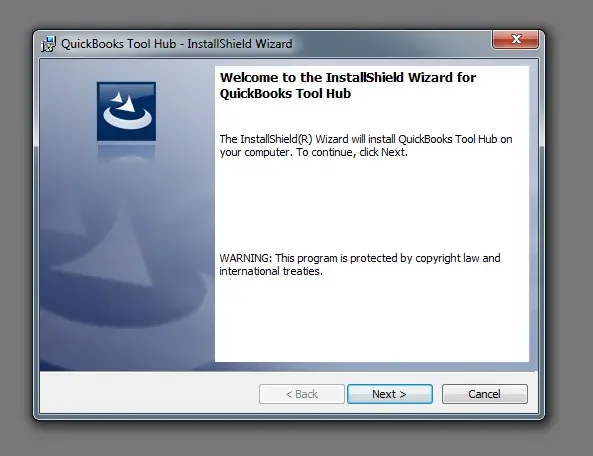
- After that, a new window will pop up, asking you to provide authentication to install the file.
- Click Yes and continue.

- A new installation window will open, asking you to review all the usage and consent policies, read them once, and tap the Yes button.
- The next window will show you the designated folder for the tool hub. By default, it is set to Local Drive C; however, you can choose any folder based on your preference.
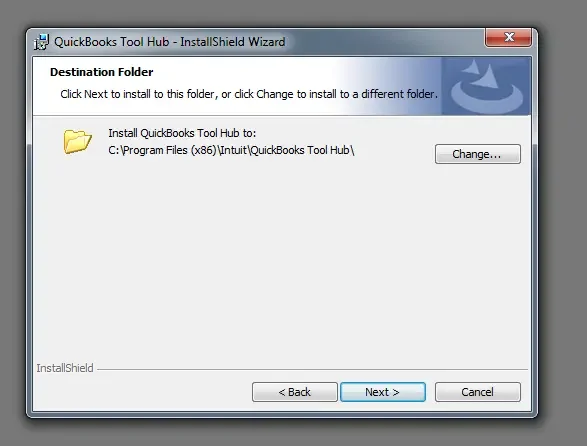
- Click on the Install button after finalizing the respective folder.
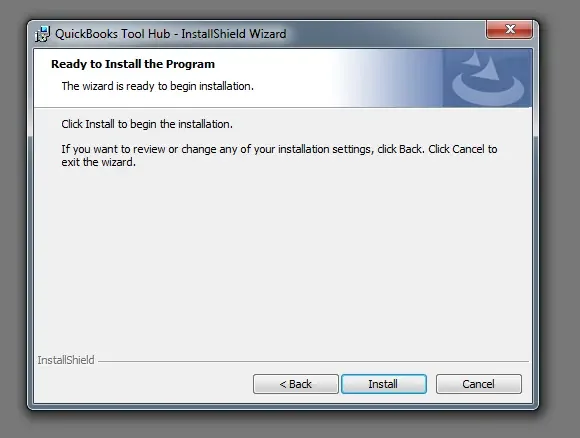
- It will start the installation process. (Do not try to close the window before it completes the entire process; wait until it finishes.)
- Once the required files are installed on your system, a final installation window will pop up with two different options. One is to close the installation window, and the other is to open the tools hub application.
- Tap the Finish button and close the window.
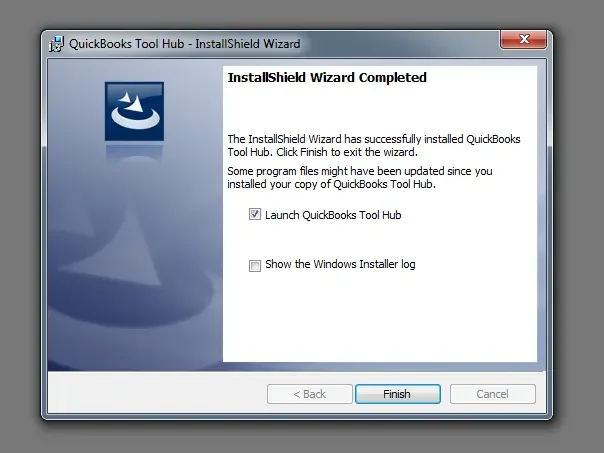
Once the installation is completed, open the QuickBooks Tool Hub by double-clicking the icon on your desktop. If you don’t find the icon, search in Windows for the QB Tool Hub and select the app.
Step 3: Access the QuickBooks Tool Hub
Once you have successfully downloaded and installed the QuickBooks Tool Hub, you need to double-click on its icon on your Windows desktop and open this Tool Hub application. If you cannot find the icon on your desktop screen, then you can search for it in Windows search. Just type QB Tool Hub and choose the program.
Explore the Main Components of Intuit QuickBooks Tool Hub
On opening the Tools hub, you will find eight different tabs on your left, compromising all the essential components of the QuickBooks Tool Hub. These include a Home tab with all the vital information related to the QB Tool hub that you need. At the bottom, a Help & Support tab for getting help and support quickly from the experts and an Advanced Tools option with more advanced features are also present. The other vital components are described below:
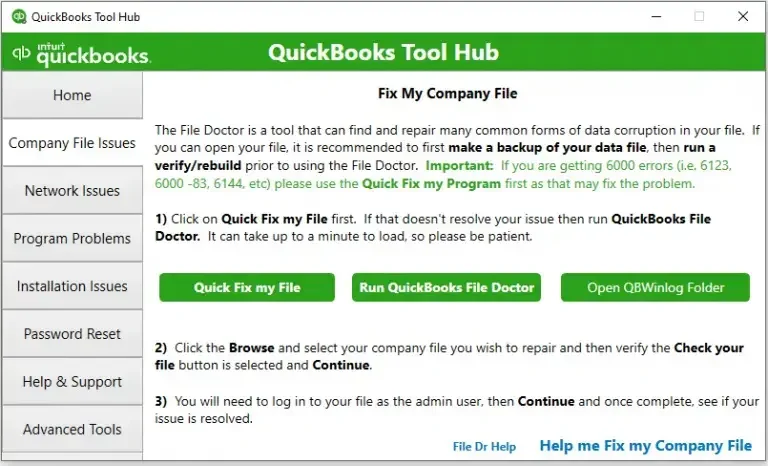
1. Company File Issues Tab
This tab will help you to resolve any issues related to Company File. It will display three options: Quick Fix my File, Run QuickBooks File Doctor, and Open QBWinlog Folder. Choose the second option to open the File Doctor Tool, follow the on-screen instruction, and wait until it rectifies any Company File error. For more assistance, you can also choose the Help option given at the bottom of this window.
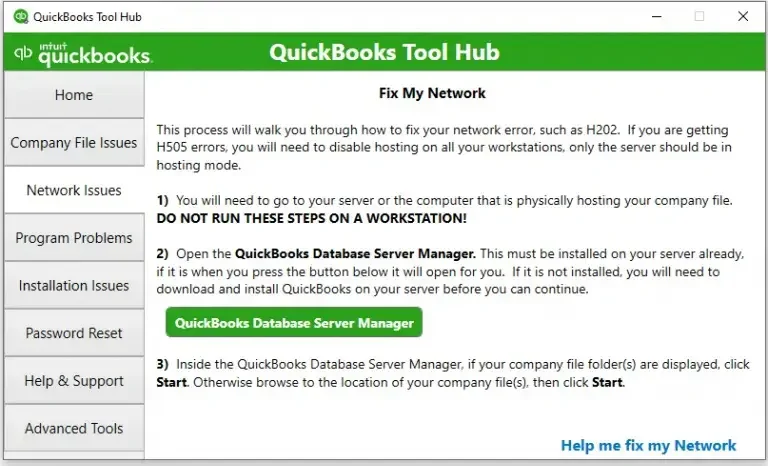
2. Network Issue Tab
Go to the Network Issue Tab with a server computer if you face any network issues. Opt for the QuickBooks Database Server Management button, which will help resolve the issues and provide valuable instructions. This tab can also be used to see the other error messages that indicate network or connectivity issues, like Error Code H202.
3. Program Problems Tab
To deal with any kind of performance difficulties in QuickBooks, tap on the Program Problems tab. It has three options: Quick Fix my Program, QuickBooks Program Diagnostic Tool, and QuickBooks Print & PDF Repair Tool.
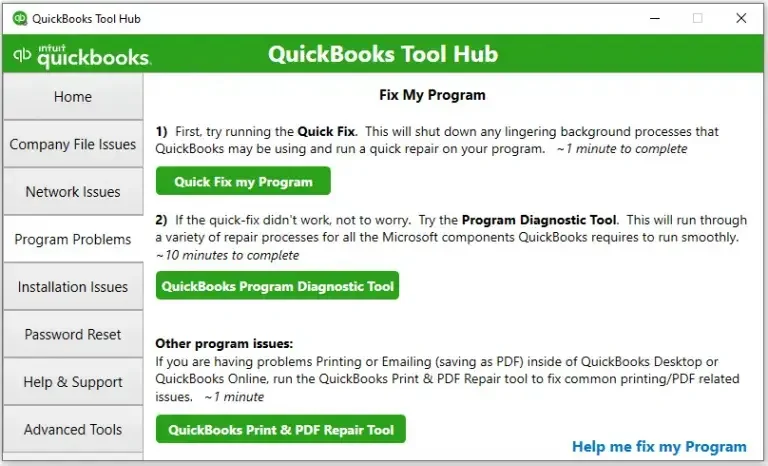
- QuickBooks Fix my Program helps terminate any background process that might be hindering QB’s working and provide a quick repair on the program.
- QuickBooks Program Diagnostic Tool is used to resolve various errors you might be facing while using every Microsoft component with QuickBooks.
- QuickBooks Print & PDF Repair Tool will help you to fix various print and emailing-related issues within QB.
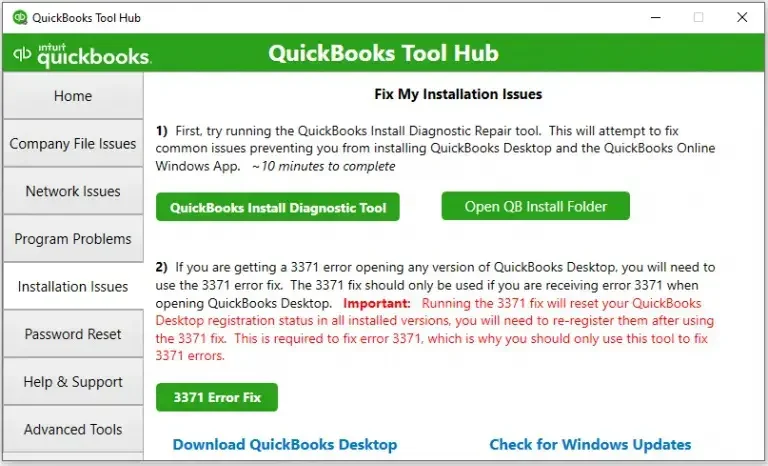
4. Installation Issues Tab
The installation tab will assist you with the issues related to installing, removing, and reinstalling the QuickBooks desktop application. This tab has two options: QuickBooks Diagnostic Tool to automatically rectify installation issues or QB Clean Install Tool to perform a clean installation of the QB desktop application. QB install diagnostic tool usually referred to as QB tool hub program diagnostic tool.
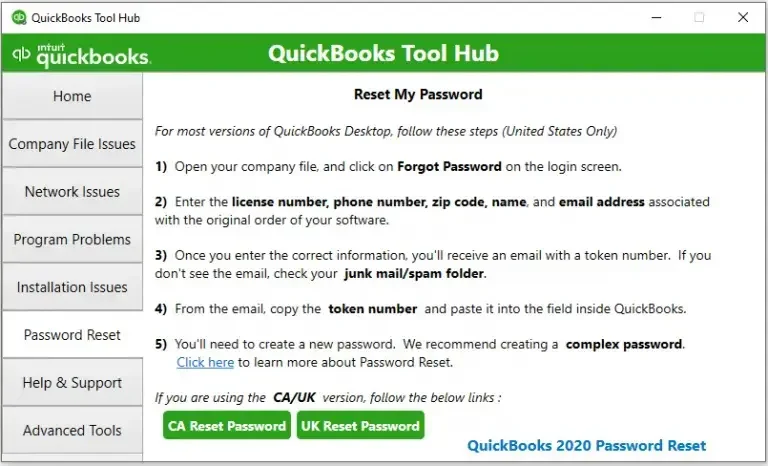
5. Password Reset Tab
If you forget your password, need to change it, or have any other queries regarding password-related issues, go to Password Reset Tab. Here you will find two options, CA Reset Password and UK
Reset Password. Choose the option as per your needs.
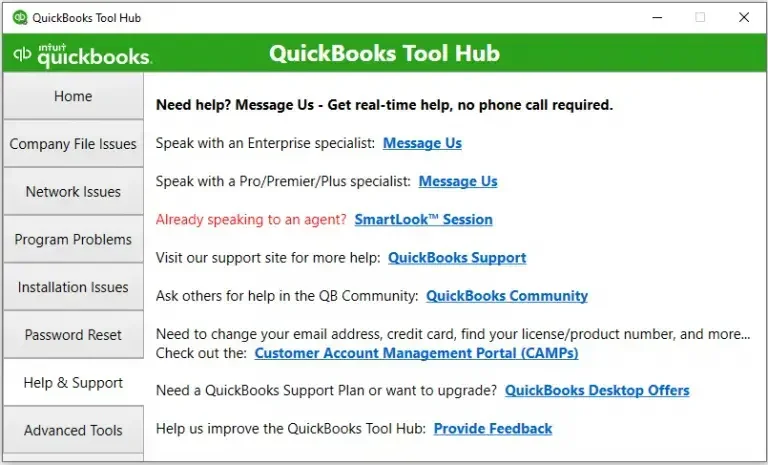
6. Support Tab
The next component is Support Tab. It will assist you in different ways to avail the QuickBooks support. This tab includes options like message us, visit the site, and smart-look session.
7. Advanced Tools Tab
This advanced tools tab helps you fix some of the very common QuickBooks issues and errors. These issues include the 6000 error series, QuickBooks crashing, or general issues like sudden crashing or hanging while working on the application, etc.
Breaking Down the Options in the Advanced Tools Tab
In the QuickBooks Tool hub, the advanced tools tab has some impressive and easy-to-use shortcuts that can be effectively employed. Therefore, you can troubleshoot additional issues in the QuickBooks Desktop software. Moreover, the shortcuts mentioned here will direct you toward a new window or the control panel, which you usually access through the start menu in the system. So, while resolving any error in QB, these shortcuts will save you time and effort. Let us break them down and briefly explain it.
Note: If you are not utilizing the QuickBooks program on the Windows 10 operating system, this tab is not recommended for you.
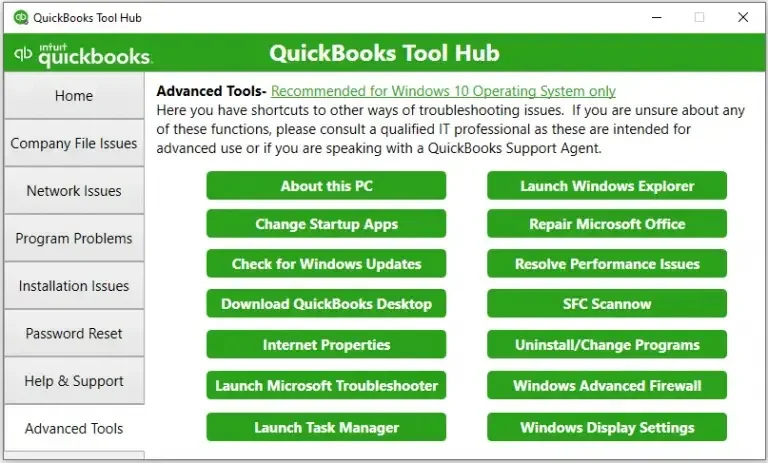
About This PC
As you click this shortcut, it will direct you to the system’s configuration window. In case you need to check the system’s configuration in case of an error, this shortcut can help you. This PC section contains the details of Device Specifications, Windows Specifications, Support, and Device Protection.
Launch Windows Explorer
Using this shortcut, you can launch Windows Explorer or File Explorer on the system. It is a file management application that displays the content of the folders and manages the files and folders in one place. You can change the settings and add new programs. With the help of this section, you can organize the downloaded QuickBooks files and place them in appropriate folders.
Change Startup Apps
It will launch a list of the auto-startup applications on your system. You can easily enable or disable your system’s startup apps using this Tool Hub section.
Repair MS Office
It will launch the program for repairing any of the Microsoft product that is not working correctly on the system. So, following the instructions given on this page will help you fix the MS 365 application-related issues.
Check for Windows Updates
While troubleshooting multiple QB errors, sometimes you are required to update the Windows OS. You can do that by checking for recent updates and installing the updates by rebooting the system if they are available.
Resolve Performance Issues
You can crosscheck the minimum system requirements to rectify the QB Desktop performance issues. Moreover, you can further manage the data files in QB and optimize the server and workstations to rectify several problems.
Download QuickBooks Desktop
If you select this option, it will direct you to the Download and Updates page. Enter your country, version, and product for downloading the QB Desktop version of your choice.
SFC Scannow
SFC scan is conducted to find and repair any corrupted Windows OS files. If SFC Scannow finds any corrupted files, it will display affected files as warnings and errors. Moreover, the corrupted files with a cached copy are typically stored in a compressed folder at %WinDir%\System32\dllcache and will be replaced.
Internet Properties
From the Internet Properties window, you can configure Windows Internet settings. It will enable you to adjust and adequately re-configure settings and give more permissions to QuickBooks to run smoothly on the system. Using this section, you can fix the issues that get provoked due to the wrong Internet settings.
Uninstall/Change Program
If you need to uninstall or repair the QuickBooks software to rectify errors, you can easily manage to do so under the apps and features window.
Launch MS Troubleshooter
Numerous issues in the Windows operating system can be accessed and fixed from the MS troubleshooter program. For instance, issues with your internet connection, Windows update, Bluetooth, printer, audio, etc, can be fixed with a few troubleshooting steps.
Windows Advanced Firewall
After selecting this option, it will automatically launch the Windows Defender advanced settings window. You can modify the firewall settings to make it compatible with the QB Desktop application through this shortcut of QuickBooks Tool Hub.
Launch Task Manager
If you want to terminate any QB Desktop background process that might interrupt the software from opening or running on the system, you can do it from the Task Manager. You can launch the task manager from this option rather than manually searching it or pressing the shortcut keys.
Windows Display Settings
As you click on this option in the QuickBooks Tool Hub, It prompts the Display Settings to launch on the screen. From here, you can adjust or modify the settings that, when improperly configured, can trigger several display-related issues in QuickBooks.
Errors That You Can Fix Using QuickBooks Tool Hub
Fixing common problems with the QuickBooks tool hub is a very easy task, some of the common errors that users generally face and that can be resolved through QB Tool Hub are given below.
1. QuickBooks Company File Errors
- QuickBooks Error 6123: The error code 6123 appears in the QB desktop app and restricts the users from using the company files. It is displayed as We are Sorry, QuickBooks can’t open the company file”, and to rectify this error, users are advised to run QuickBooks File Doctor and Updating Database Server Manager Manager.
- QuickBooks Error H202: QuickBooks Error H202 is connected to multi-user mode and occurs when a user tries to open a QuickBooks company file that is on a networked computer. The error message states, “You are trying to work with a company file located on another computer, and this copy of QuickBooks can not reach the server(H202).” This simply means that the multi-user connection of the server is blocked and can be rectified easily with the QBD Tool Hub.
2. QuickBooks Installation Issues
Generally involves errors caused due to any missing components that lead to installation errors in QB.
- QuickBooks Error 1642: It states that the error is caused when Microsoft. NET. could not verify the digital signature of the files.
- QuickBooks Error 1304 is displayed as “Error writing to file [THBImg45.dll]. Verify that you have access to that directory.” It mostly occurs because of issues with the installation CD containing the QB setup files.
- QuickBooks Error 1706: A POS installer error appears when the user tries to install the application from a removable disk such as a DVD or CD. It reads, “No valid source could be found when opening Point of Sale.”
- QuickBooks Install Error 1712: This install error is caused by reasons like insufficient permissions and application file damage.
3. Errors Related to QB Crashing
Many a time, QB crashes abruptly, and the user experiences an unexpected shutdown with a displayed message saying, “Crashing with an unrecoverable error, QuickBooks has ceased working” This results in the loss of data and other information from company files. QB can also crash while displaying an error message saying “Com Error.” All these errors and crashing can be resolved through the 2022 QuickBooks Tool Hub kit.
4. Errors Related to PDF and Printing
Creating and Printing invoices through QuickBooks is an amazing feature of the app. However, this feature sometimes faces certain issues. For example, QuickBooks Tool Hub can easily tackle the issues like QuickBooks freezing while printing invoices or QB printing blank invoices.
5. Errors Related to Networking
We can easily resolve networking errors that occur due to the misconfigured firewall with QuickBooks Tool Hub.
6. Other Miscellaneous Errors
Apart from the above specific errors, the other errors that can be fixed with QB Tool Hub include:
- Payroll Errors
- 6000-series errors.
- PDF and printing errors
- QuickBooks Desktop Update errors
- Company file issues
- QuickBooks 1500 series errors
- QuickBooks crashing error
Get to Know About the Advantages Of QuickBooks Tool Hub
Here are the main advantages that you can gain by running QuickBooks Tool Hub:
1. Free to Use: It is a free tool to use and has no cost associated with any of its features. Thus, you can use it to fix any issue without paying a penny.
2. Simple User Interface: It has well-defined components that would help you diagnose your issue easily, even if you are not very much into technical things.
3. Better Options to fix Company File Issues: It can help you fix the company file issues that are most common.
4. Helps to Troubleshoot Network Issues Easily: You can quickly resolve network-related issues with QuickBooks Desktop Tool Hub and save time and effort.
5. Regular Updates – Intuit continuously improves the Tool Hub with new features and bug fixes.
6. Accessible Anytime – Once installed, users can access and run diagnostic tools whenever needed.
Wrapping Up
In this detailed guide, we have discussed how to download, install, and utilize QuickBooks Tool Hub. Hopefully, you can now effortlessly run different tools located in QB Tool Hub to fix various errors. If, however, you need more guidance or have a query, you can contact a QB professional.
Frequently Asked Questions
A. QuickBooks Tool Hub is a free utility provided by Intuit to diagnose and fix common QuickBooks Desktop issues. Instead of manually troubleshooting errors, the Tool Hub combines various repair tools—like the File Doctor, Install Diagnostic Tool, and Network Issues Tool—into one central dashboard. It’s especially helpful for resolving problems like company file corruption, H series errors, installation failures, and performance lags. Using Tool Hub saves time and reduces frustration for both new and experienced users. Always download the latest version from Intuit’s official site for best results.
A. QuickBooks Tool Hub is designed to fix a wide range of issues such as:
a. Company file errors (6XXX series) using File Doctor
b. Install/update errors (15XXX, 1935, 1904) via Install Diagnostic Tool
c. Network connection issues with the Network Issues tab
d. Password reset issues using the Password Reset Tool
e. Program crashes or freezes via the Program Problems tab
Each section in the Tool Hub is dedicated to a specific error category, helping users troubleshoot effectively without needing advanced technical knowledge. It simplifies error resolution into easy steps.
A. Yes, when downloaded from the official source. It does not modify financial data directly. Instead, it repairs software components and system-related configurations. Always back up your company file before running any repair tool.
A. It helps fix payroll update errors caused by connectivity or file damage issues. However, subscription-related payroll problems may require account verification separately.
A. There’s no need to use it daily. Run it only when errors appear. Keeping your QuickBooks Desktop updated reduces the frequency of technical problems.