QuickBooks error 15225 interrupts the process of downloading and installing the updates. This error occurs when the QuickBooks application attempts to verify the digital signature certificate of the files downloaded by the program. Several other reasons might provoke error code 15225, which must be eradicated soon.
What are the Major Causes for QuickBooks Update Error 15225?
Due to one or more of the reasons given below, you might be getting error 15225 while updating QuickBooks:
- If something goes wrong while installing QuickBooks Desktop.
- In case your Internet Explorer is not working properly due to misconfiguration.
- If the digital signature is not registered, it prevents QuickBooks Desktop updates from getting downloaded.
- Error 15225 also appears when the Windows Security Certificate expires.
- If Internet Explorer is outdated, it might provoke QuickBooks error 15225.
- If the Windows Firewall or a third-party antivirus application is not correctly set, it can restrict QB from downloading the latest updates.
How to Get Rid of QuickBooks Error Code 15225?
A thing to do before you start troubleshooting is to backup the company file. The backup is done to avoid data loss if something goes wrong while troubleshooting. After backing up the data, implement the following solutions to effortlessly eliminate the 15225 error message from QuickBooks.
1st Solution: Install Latest Windows OS Updates
By getting the recent Windows update or downloading an updated Microsoft certificate, you can eliminate QuickBooks error code 15225. The following are the steps to run a Windows update:
- Hit the Windows + I keys to open the Settings windows on the screen.
- Choose the Update and Security option from the left pane and select Windows Update.
- Select the Check for Updates button to get the available updates.
- To reboot the system, choose Restart Now and install the Windows updates.
- Launch QuickBooks Desktop to check if error code 15225 in QuickBooks is fixed.
If the above troubleshooting methods do not work, move to the next one.
2nd Solution: Install QuickBooks Update as an Administrator
To make changes to the QuickBooks application, like updating, you must have appropriate admin privileges. Know how to run QB as an admin and resolve QuickBooks payroll update error 15225 by following the steps given below:
- Close the company files and the QuickBooks program.
- By right-clicking the QuickBooks Desktop icon, click the option to Run as Administrator.
- Choose Yes when you see the message, ‘Do you want to allow this program to make changes to your computer?‘
- Launch QuickBooks Desktop and go to the Help tab.
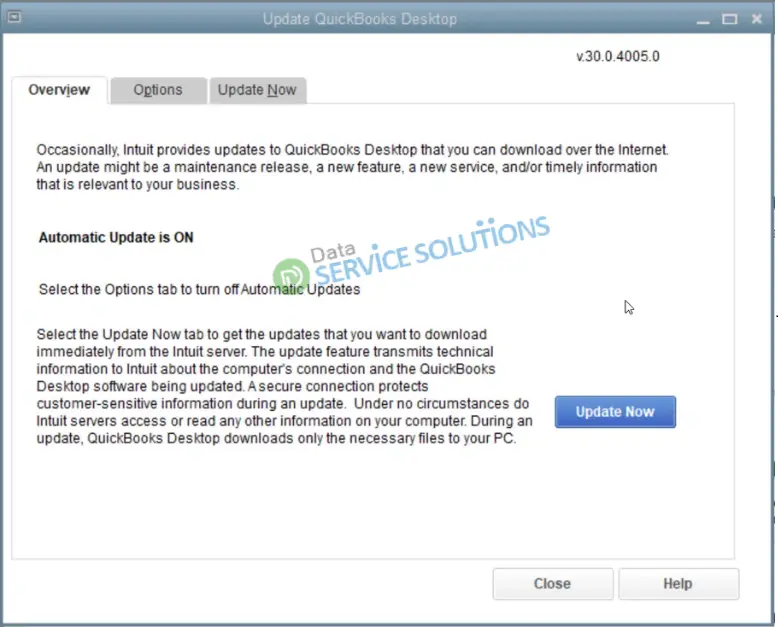
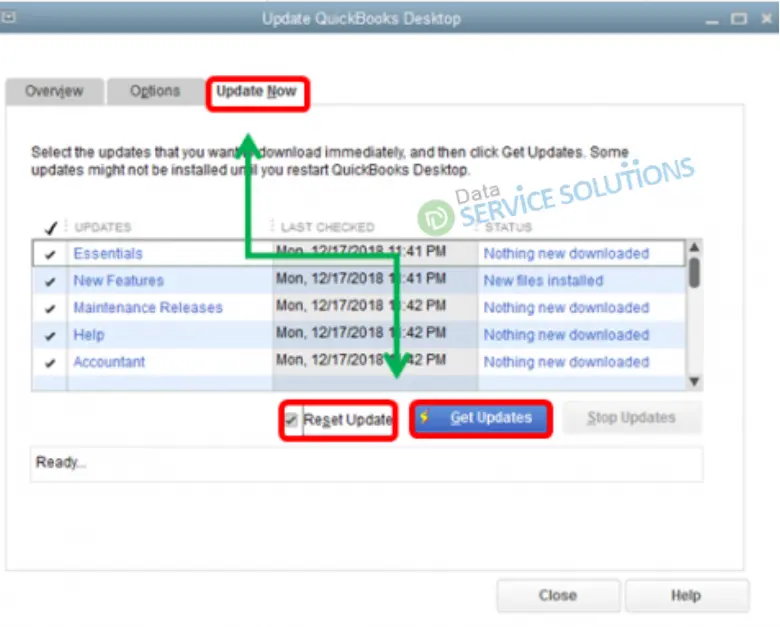
- Click Update QuickBooks Desktop, select the Update Now option, and tap Get Updates.
- Close and re-open the QuickBooks program and select Yes to install the recent update.
If you still get the QuickBooks error code 15225 message, move to the next solution.
3rd Solution: Add Intuit as a Trusted Website
By adding Intuit’s website to the list of trusted websites, Internet Explorer will no longer see QuickBooks as a threat, and you can download the recent updates.
- Open Internet Explorer and click the Gear icon at the top-right.
- Click Internet Options and choose the Security tab.
- Click the Trusted Sites icon and Sites button and add www.intuit.com as a trusted website.
- Click Add and also check all the series for Require server verification (https:) in this zone.
- Click Close, choose Apply, and then OK.
If adding Intuit to the list does not resolve error 15225 in QuickBooks, implement the troubleshooting method mentioned below.
4th Solution: Install the QuickBooks Digital Signature
To resolve QuickBooks payroll update error 15225, follow the instructions to install and re-register the digital signature certificate in QuickBooks Desktop.
- If the company files are open, close them and then close QuickBooks Desktop.
- Navigate to C:\Program Files(x86)\Intuit\QuickBooks and search for QBW32.exe. When you find QBW32.exe, right-click on it.
- Click Properties, choose the Digital Signature tab, and ensure that Intuit Inc. is selected in the list.
- Hit the Details option, and under the Digital Signature details windows, select View Certificate.
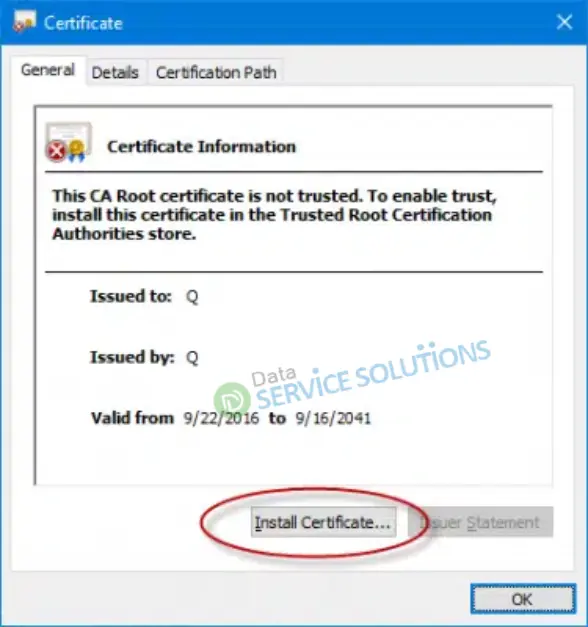
- From the Certificate window, choose Install Certificate and select Next until you see the Finish option.
- Choose Finish, restart the system, and then open the QuickBooks application.
Re-download the updates to check if implementing this solution helps fix QuickBooks Update error 15225. If the problem persists, move to the next troubleshooting method.
Important: Error 15203 will occur if you try to open a QB. Check out “How to Fix QuickBooks Error 15203” for comprehensive guidance on avoiding errors.
5th Solution: Repair Installation Issues in QuickBooks Desktop
You can resolve problems in the QuickBooks installation files by running the QuickBooks Install Diagnostic Tool. To access and run this utility, you must download QuickBooks Tool Hub and follow the instructions in step one below to install it on the system. However, if you already have QuickBooks Tool Hub, open it and directly follow the instructions in step two.
1st Step: Install the QB Tool Hub
- To access the downloaded file, choose the Start tab, type File Explorer in the search panel, and hit Enter.
- Under the File Explorer window, move to the Downloads section from the left side pane.
- Find and double-click the QuickBooksToolHub.exe file to open it.
- When the QuickBooks Install wizard displays on the screen, follow the on-screen instructions carefully.
- Agree to all the Terms and Conditions and further choose an installation location.
- Click Install and double-click the QuickBooks Tool Hub icon on the desktop.
2nd Step: Utilize the Install Diagnostic Tool
- Select the Installation Issues option from the left pane and click the QuickBooks Install Diagnostic Tool option.
- The tool can take a few minutes to complete the process, and as it ends, reboot the system.
Open the QuickBooks Desktop application and re-download the updates to check if the issue has been rectified. If you still cannot update QB, implement the next solution.
6th Solution: Properly Setup the Windows Firewall Settings for QB Desktop
A misconfigured Windows Firewall must be correctly configured to eliminate QuickBooks payroll update error 15225. Initially, try to reset the settings of the Firewall with File Doctor, and if it does not work, you must do it manually.
1st Step: Run the QB File Doctor using the QuickBooks Tool Hub
- Go to the desktop screen and launch QuickBooks Tool Hub.
- From the left pane, choose the Company File Issues option.
- Select the QuickBooks File Doctor option and wait for it to open. If it doesn’t open, you can search for the QB Desktop File Doc and open it manually.
- In QB File Doctor, select the company file in the drop-down list. But if you cannot find the company file, select Browse and Search.
- Choose the Check your file and network option, select Continue, and enter the QB admin credentials.
- Choose Next.
Important: The time required to scan the company file is about 5 minutes. However, if the company file size is extensive, the scanning process can take more time to end. When the process finishes, launch QB and the company file. Also, the results might say scanning was unsuccessful, even if it eliminates the issue.
But if you are still getting QuickBooks error code 15225, move to the following step.
Step 2: Manually Reset the Windows Firewall Settings
If the QuickBooks file doctor did not resolve the issues with the firewall configurations, you need to do it manually by creating a firewall port exception. This can help you fix QuickBooks error 15225. Likewise, if you are running several versions (years) of the QuickBooks software on a single system, follow the process mentioned below for every version:
- Hit the Windows key to open the Start menu.
- In the search bar, type Windows Firewall and press Enter.
- Select the Advanced Settings option under the Windows Defender Firewall window.
- Right-click the Inbound Rules option in the drop-down list and then New Rule.
- Select the Port option and click Next. Afterward, ensure that the TCP option is selected.
- In the Specific local ports field, enter the ports given below, which are required for the QB year version
- QuickBooks Desktop 2020 and later: 8019, XXXXX.
- QuickBooks Desktop 2019: 8019, XXXXX.
- QuickBooks Desktop 2018: 8019, 56728, 55378-55382.
- QuickBooks Desktop 2017: 8019, 56727, 55373-55377
- Select Next as you enter the port number in the field and click Allow the Connection.
- Click Next, confirm all profiles are marked when prompted, and click Next again.
Create a rule and then name it, for instance, QBPorts(year). When you are done, click the Finish option.
Important: Like you created inbound rules, use the above instructions to create outbound rules.
Note: QuickBooks Desktop 2019, 2020, and all future desktop versions utilize dynamic ports. Dynamic ports will be assigned at the time of QuickBooks installation. These are specific ports (not a range), which assures that the QuickBooks program gets exclusive use of a given port.
To learn how to get the dynamic port number, follow the instructions below carefully:
- Click the Start menu, enter QuickBooks Database Server Manager in the search field, and press Enter.
- From the Port Monitor tab, move on to find the Port Number for making the firewall port exceptions.
Important: You can change the assigned port number by selecting the Renew option. To do that, go to the Scan Folders tab and select Scan Now to reset the Windows firewall permissions. Remember, you can only renew ports beginning from QB Desktop 2019 and later versions.
After creating the ports shown in Step 2, try to re-download or install QuickBooks updates. If QuickBooks update error 15225 persists, move to the next step.
Step 3: Creating Windows Firewall Exceptions for QuickBooks
The QuickBooks program executes different tasks smoothly using executable files (.exe). But to do that, you must create firewall exceptions for each file listed in the table. To make a Windows Firewall exception, follow the procedure given below:
| Executable files | Location |
| AutoBackupExe.exe | C:\Program Files\Intuit\QUICKBOOKS YEAR |
| Dbmlsync.exe | C:\Program Files\Intuit\QUICKBOOKS YEAR |
| DBManagerExe.exe | C:\Program Files\Intuit\QUICKBOOKS YEAR |
| FileManagement.exe | C:\Program Files\Intuit\QUICKBOOKS YEAR |
| FileMovementExe.exe | C:\Program Files\Intuit\QUICKBOOKS YEAR |
| QuickBooksMessaging.exe | C:\Program Files\Intuit\QUICKBOOKS YEAR |
| QBW32.exe | C:\Program Files\Intuit\QUICKBOOKS YEAR |
| QBDBMgrN.exe | C:\Program Files\Intuit\QUICKBOOKS YEAR |
| QBServerUtilityMgr.exe | C:\Program Files\Common Files\Intuit\QuickBooks |
| QBCFMonitorService.exe | C:\Program Files\Common Files\Intuit\QuickBooks |
| QBLaunch.exe | C:\Program Files\Common Files\Intuit\QuickBooks |
| QBUpdate.exe | C:\Program Files\Common Files\Intuit\QuickBooks\QBUpdate |
| IntuitSyncManager.exe | C:\Program Files\Common Files\Intuit\Sync |
| OnlineBackup.exe | C:\Program Files\QuickBooks Online Backup |
Note: If you see Program Files (x86), you are working on a 64-bit Windows Operating system.
- Hit the Windows Start button and type Windows Firewall into the search field.
- Click Advanced Settings and then right-click Inbound Rules (later on, you should create Outbound Rules).
- Choose a New Rule, click Program, and choose Next.
- Select the This Program Path option and select Browse to find and choose one of the executable files in the table.
- Click Next, then choose Allow the Connection, and click Next again.
- If prompted, re-check if all profiles are chosen and select Next.
- Create a rule and give it a name: QBFirewallException(name.exe).
Note: Repeat the procedure given in step three above to create outbound rules.
Once you have completely reset the Windows firewall settings, it is essential to reboot the system. Launch QB and try to re-download the recent QuickBooks updates.
However, if you still fail to get the updates and encounter QuickBooks error code 15225, implement the following method to disable the Firewall.
7th Solution: Turn Off the Windows Firewall and Network Protection
To get rid of QuickBooks error 15225, temporarily turn off the Firewall protection on the system. To do that, follow these instructions:
Note: After following the steps below, if you can get QuickBooks Desktop updates, turn back on the Windows Firewall for safety concerns.
- Select the Windows Start button and enter Settings in the search bar.
- Hit Enter.
- Choose Update & Security, and under the left pane, select the Windows Security tab.
- Choose the Open Windows Security option.
- Click the Firewall and Network Protection option.
- Select the Domain, Private, and Public Network one by one and disable the Microsoft Defender Firewall with all types of network.
Finally, try to install the latest updates of the QuickBooks software to check if QuickBooks update error 15225 is resolved. If not, implement the next solution.
8th Solution: Re-installing the QB Desktop Application
If nothing works, you must start from a clean state. Utilize the clean install procedure by removing and installing QuickBooks Desktop again. By doing it, you can ensure that all components are installed and registered correctly, which is crucial to fixing QuickBooks error 15225. Before you start, note the QB license number, which you will find on the packaging or in the purchase verification email if you bought it online.
1st Step: Uninstalling the QuickBooks Program
To install a new QuickBooks Desktop version, you must remove the same existing version from the system. To do that, follow the procedure given below:
- Move to the desktop screen and select the Windows Start tab.
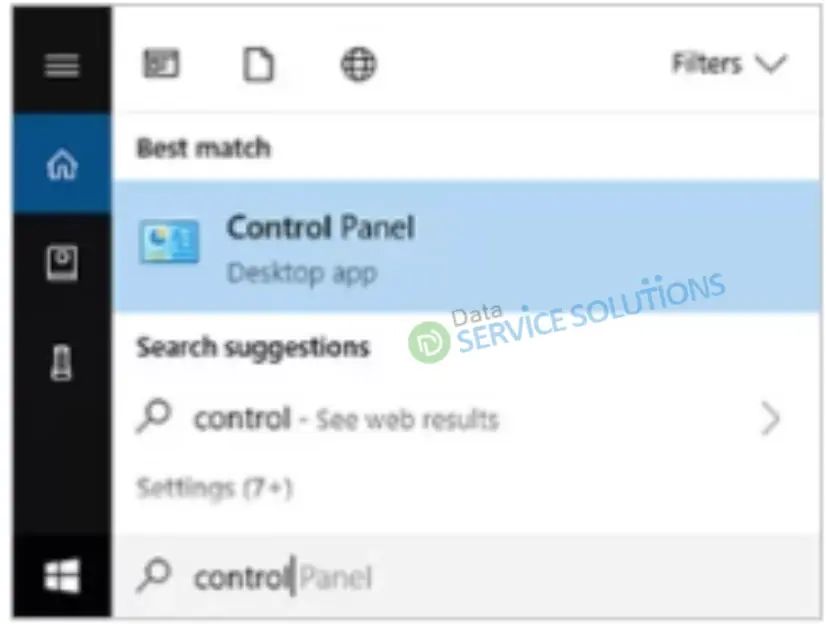
- Enter Control Panel in the search panel and then press Enter.
- Click Programs and Features or Uninstall a Program and search for the QuickBooks Desktop version you want to remove from the list.
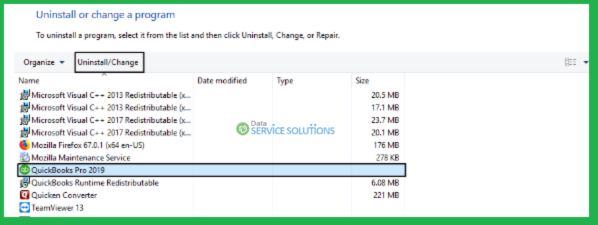
- Choose Uninstall/Change, Remove, and then select Next. If you do not see the Uninstall/Change, Remove option, sign out of Windows and sign back in as an admin.
2nd Step: Changing the Name of QB Installation Folders
Restricting the QuickBooks software from using the leftover QuickBooks folders is important. Therefore, it becomes necessary to modify the folder’s name. Manually rename the QuickBooks folders by following the instructions below:
- Move to the Windows Start menu to access the hidden files and folder section.
- Enter File Explorer in the search bar and press Enter.
- In the File Explorer window, select View.
- Choose the Hidden Items option.
- Move to the following location to find the QuickBooks folder containing the company file:
- 64-bit version C:\Program Files (x86)\Intuit\QuickBooks (year)
- C:\ProgramData\Intuit\QuickBooks (year)
- C:\Users\(current user)\AppData\Local\Intuit\QuickBooks (year)
- C:\Program Files\Intuit\QuickBooks (year)
- Right-click the QuickBooks Desktop folder and select the Rename option under the drop-down menu.
- As you change the name, type the word OLD at the end.
3rd Step: Download the QuickBooks Program File
Visit the Download & Update page and follow the procedure below to download a new QuickBooks installer on the system:
- From the three options, click Yes if you are running the QuickBooks Desktop software in a multi-user environment.
- Choose Next and select the country, product, and version drop-down list options.
- Select the Search option, and under the next window, click the option to Download.
- If you choose the No or Not Sure option, click Download from the express setup window.
- The file will be saved in the downloads section when the downloading process finishes. You can also manually select a location accordingly.
4th Step: Install the QB Software
Before you start the process of installing QB, make sure you have an active internet connection. Follow the procedure given below to re-install QuickBooks Desktop and rectify QuickBooks error 15225:
- Double-click and open the QuickBooks.exe file.
- Follow all the instructions the QuickBooks install shield wizard gave on the screen.
- Read the QuickBooks Desktop license agreement in the next window, select Accept and Continue.
- Enter the license number and then the product number.
- Click Next.
- Choose the express option if you want to install QB on a local system. But if you want to install QuickBooks on a server, select Custom and Network options.
- Choose Install and reboot the system.
- Try to update QuickBooks Desktop to see if the issue is resolved.
Conclusion
We hope all the information in this article was relevant enough to help you resolve QuickBooks error 15225. But if you feel having a certified QuickBooks expert by your side is a much better option, do not hesitate to contact one. Dial +1-(855)-955-1942 and get in touch with our skilled and experienced support team, which will surely assist you in fixing error code 15225 in less time with constructive methods.
Frequently Asked Questions (FAQs)
A. Whether you back up the data manually or automatically, it will include the accounting data, templates, letters, logos, and images. Moreover, crucial QuickBooks files like Statement Writer, Cash Flow Projector, Loan Manager, and Business will also get backed up. But it does not back up the payroll forms; you must do it separately.
A. The QuickBooks software can automatically download updates in intervals when it’s available. After the updates are downloaded, the Update Available option will be visible on the status bar at the top right corner. For the next step, the updates will get automatically installed, even when you close QuickBooks Desktop and keep the system tuned on. To manually install the updates, choose Update available, then click Install now. Finally, launch the QuickBooks program after successfully installing it.
