Multi-user collaboration is a feature that takes accounting applications to the top, and this was introduced first by Intuit. However, being an application, it is bound to get errors, and in one such circumstance, you could find your QuickBooks Hosting Mode is Off and no solutions are working out. With this descriptive guide, we will discuss why exactly you can’t switch your QuickBooks to multi-user mode and what needs to be done to avoid any issues along the way to work efficiently with QuickBooks.
Major Reasons Why QuickBooks Multi-User Mode is Disabled
Go through the reasons below to quickly identify which solution will work to resolve issues hosting the company file in your case.
- If QuickBooks Database Server Manager is not installed on the server.
- If the multi-user settings are improperly configured on the server or workstations.
- If the Windows Firewall or antivirus program interferes with the communications between the server system and workstations.
- For some internal reasons, if the QB database server manager cannot open the company file.
- If Windows file permissions are improperly set for QuickBooks Desktop.
- When the workstations can’t connect to the server system due to network issues.
- If the server system is not added to the Windows host file, you might find QuickBooks Multi-User Hosing Not Working.
As you are now well aware of why your Turn on Hosting Mode QuickBooks is Disabled, let’s discuss the solutions and key considerations to resolve this issue.
Key Points to Consider When You are Find ‘How to Turn on Hosting Mode in QuickBooks’
You must check and meet the following prerequisites before you move forward to fix multi-user mode issues in QuickBooks. If you checkmark both the conditions and still can’t enable QuickBooks hosting mode, then move on to implement the troubleshooting methods.
Prerequisites 1: System Configurations
Ensure the QuickBooks Desktop installed on the server and the workstations meet the minimum system requirements to run smoothly. If not, review the system configurations and take the necessary actions to fix it.
Prerequisites 2: Check if the Workstation is Hosting the Company File
On the Server System:
- Launch the QuickBooks software and choose the File menu.
- From the drop-down, select Utilities.
- If the Host Multi-User Access option is displayed, click on it. But if the Stop Hosting Multi-User Access option appears, do not select it.
On the Workstation:
- Launch QuickBooks and move to the File tab.
- Click the Utilities option.
- If the Host Multi-User Access option appears on the screen, do not click it.
- If the Stop Hosting Multi-User Access appears, select it and repeat these instructions on all workstations.
Once the prerequisites are checked, it’s time to troubleshoot the error with instant solutions suggested by the experts.
8 Effective Solutions for Resolving ‘QuickBooks Desktop Company File Hosting Not Working’
Use the following effective solutions to eliminate the issue and enable the multi-user mode in QuickBooks.
1st Solution: Download and Install the QuickBooks Database Server Manager
If the Hosting Mode is Off in QuickBooks, you can’t host the company files on the server system. Therefore, ensure that you install QuickBooks Database Server Manager on the server so you can easily share the company files with workstations over the network. Click on this LINK to download the Setup_QuickBooks.exe and update it. Now, follow the instructions step-by-step.
Important: If you are an accountant or someone who hosts several versions of QuickBooks on the network, install them in order. Start by installing the oldest version and end with the most recent one.
Step 1: Install QDSM on the Server Computer
- Close any open program on the server system, including QuickBooks, and then open the File Explorer.
- In the File Explorer window, move to the downloads folder to find and open the install Setup_QuickBooks.exe file.
- Follow the onscreen instructions by the installation wizard.
- When QuickBooks asks you to select the installation type, click Custom or Network Options and choose Next. Do not select Express.
Note: The Express option installs QuickBooks Desktop based on the previous version of QuickBooks Desktop, and you may need the previous version for comparison and troubleshooting purposes.
- Choose the best option for the network setup and click Next. Both options will install the QB Database Server Manager. If QuickBooks Desktop is already installed on the server system, it won’t overwrite any existing company data.
- If you want to install Database Server Manager and QuickBooks Desktop on the server system, click, ‘I’ll be using QuickBooks Desktop on this computer, AND I’ll be storing our company file here so it can be shared over the network.’ We strongly advise you to choose this option.
- If you only want QDSM on the server system, choose ‘I will NOT be using QuickBooks Desktop on this computer.’
- After following the instructions, choose Install. Windows might ask you for permission.
Note: QuickBooks creates a new Windows user for each version of QDSM. For instance, Database Server Manager 2023 displays as QBDataServiceUser33. Another key point is that you must give QBDataServiceUserXX permission to access the folders that contain the company files. You might see these users whenever you set system-level permissions.
Step 2: Configure the Database Server Manager
You can skip this step if you want to use the default settings. However, if you wish to configure the QuickBooks services manually, follow the instructions below.
- Click the Windows Start button.
- In the search bar, type Services and hit Enter to open it.
- Choose and open QuickBooksDBXX (XX is the version number).
- Move to the General tab and find Service status. If it shows ‘Started’ or ‘Running’, click Stop.
- From the Startup type, choose Automatic and then go to the Logon tab.
- Click Local System account.
- Under Recovery, click Restart the Service from each of the following:
- First failure
- Second failure
- Subsequent failures.
- Go back to the General tab and choose Start to restart Database Server Manager.
Open QuickBooks Desktop on the server system and try to enable the multi-user mode. If still QuickBooks hosting mode off, move to the next troubleshooting solution.
Solution 2: Create a Windows User and Give Admin Rights
If QuickBooks multi-user mode not working, you must sign in as a Windows Administrator on the server system. Windows admin rights are important to make changes or re-configure firewall settings and folder permissions on the server. Moreover, you also need to give programs like Database Server Manager admin rights, and to do so, follow the steps mentioned below:
Step 1: Create a Windows User with Administrator Rights
Initially, you need to create a local user and change the account to a Windows admin account.
To create a local user account, follow the instructions below:
- Select the Start menu, and in the search field, type Settings.
- In the Settings window, choose the Accounts option and click Family & Other Users. (In some versions of Windows, you will only see Other users option.)
- Choose to Add someone else to this PC and then select the ‘ I don’t have this person’s sign-in information’ option.
- From the next page, choose Add a user without a Microsoft account and enter a username and password.
- You can also add a password hint or select a security question and choose Next
To change the local account to an administrator account, follow these instructions:
- Go back to Start > Settings > Accounts.
- From the Family & Other users, choose the account owner’s name. To find it, see “Local Account” below the name and select Change Account Type.
Note: If you selected an account that shows an email address or does not say ‘Local account’, you’re giving administrator rights to a Microsoft account and not local.
- Under Account type, choose the Administrator option.
- Select OK and sign in with the new administrator account.
Step 2: Give admin access to QuickBooks components
When you install QDSM, QuickBooks automatically creates a new Windows user. However, the new user must have admin rights to host a company file in a multi-user environment. Perform the instructions given below to grant the QuickBooks application or the Windows users admin privileges.
Note: Remember that after giving QuickBooksDBXX admin permissions, repeat the same instructions for QBCFMonitorService.
- Close the QuickBooks software, and from the desktop, click Start
- Type Control Panel in the search box.
- Choose User Accounts and find the QBDataServiceUserXX for your version of QuickBooks Desktop. For example, in QuickBooks Desktop 2020, look for QBDataServiceUser20.
- Choose Change Account Type and click the Administrator option.
- Select Change Account Type and choose Apply to save the changes.
If you use more than one version of QuickBooks Database Server Manager, repeat these steps for each version.
After creating a Windows admin user and giving admin privileges to both QB services, open QuickBooks and try switching to multi-user mode. But if you still find that QuickBooks hosting mode is off, go to the next solution.
3rd Solution: Check Folder and Windows Access Permissions
To access folders in the multi-user mode, the folders require the right Windows permissions. If not, follow the procedure given below to set up the folder and Windows access permissions to fix the issue where you find your ‘QuickBooks hosting mode is off on the server system.’
Step 1: Verify That the Folder Permissions are Set Correctly
Start by verifying if the folder permissions are set correctly. Go to the server system and follow the instructions given below:
- Click the Windows Start menu, type File Explorer in the search bar, and then hit Enter to open File Explorer.
- Choose Properties after right-clicking the folder that contains the company file.
- Move to the Security tab, choose Advanced, and then select QBDataServiceUserXX.
- Click Edit and set the following options to Allowed:
- Traverse Folder/Execute File
- List Folder/Read Data
- Read Attributes
- Read Extended Attributes
- Write Attributes
- Write Extended Attributes
- Read Permissions
- Create Files/Write Data
- Create Folders/Append Data
If the permissions are not set correctly, follow these instructions:
- Right-click the folder that has your company file and select Properties.
- Click Security, choose Edit, and then choose QBDataServiceUserXX.
- Click Full Control and select Allow.
- Click Apply, then OK.
Step 2: Modify the folder permissions
In case the permissions are set correctly, but you want to adjust the folder permissions, follow the instructions below:
- Click the Windows Start menu on the desktop, type File Explorer, and press Enter to open it.
- Search for these folders:
- C:\Program Data\Intuit\Entitlement Client\v8
- C:\Program Data\Intuit\Entitlement Client\v6.0
- C:\Program Data\Intuit\Entitlement Client\v5
- C:\Program Data\Intuit\Entitlement Client\v3
- C:\Program Data\Intuit\Entitlement Client
- C:\Program Data\Intuit\QuickBooks Enterprise Solutions X.0 (X = version) or C:\Program Data\Intuit\QuickBooks 20XX (XX = year)
- C:\Program Data\COMMON FILES\INTUIT
- C:\Program Data\COMMON FILES\INTUIT\QUICKBOOKS
- C:\Users\Public\Public Documents\Intuit\QuickBooks\FAMXX (XX = year)
- C:\Users\Public\Public Documents\Intuit\QuickBooks\Company Files
- C:\Users\Public\Public Documents\Intuit\QuickBooks\Sample Company Files\QuickBooks Enterprise Solutions X.0 (X = version) or C:\Users\Public\Public Documents\Intuit\QuickBooks\Sample Company Files\QuickBooks 20XX (XX = year)
Now, perform the steps listed below for any folder that you have. Remember that you might not have all of these folders as some of these are specific to particular versions of QuickBooks Desktop:
- Right-click the folder.
- Choose Properties, and from the Security tab, click Everyone.
- If the Everyone option is not listed in the Group or User Name checkbox, click Add, type in Everyone, and then select OK.
Step 3: Set up Windows Access Permissions to Share Company Files
If QuickBooks hosting mode is off, you must grant QuickBooks the right level of Windows access permissions to prevent future issues while working with the company files over the network.
For Windows 10,
- Select the Windows Start menu.
- In the search field, type File Explorer and hit Enter to open it.
- Right-click the folder with company files and select the Properties option.
- Click Sharing and then Share Add.
- Click the corresponding QBDataServiceUserXX for your version and set the permission level of both users to Full Control.
- Lastly, click Share to conclude.
If configuring Windows folder permissions doesn’t help resolve this company file hosting issue, follow the next solution.
4th Solution: Fix QuickBooks Stop Hosting Multi User Access Issues Using QuickBooks File Doctor
The QuickBooks File Doctor can automatically eliminate the company file and network connectivity issues on the server computer where QuickBooks hosting mode is off. But, to get access to the File Doctor, you must initially download QuickBooks Tool Hub by clicking Here. As the downloading process completes, follow the steps below:
Step 1: QuickBooks Tool Hub Installation
- To install Tool Hub on the system, press the (Windows + E) to open the File Explorer.
- Move to the Downloads folder from the left pane.
- Find and double-click the QuickBooksToolHub.exe file in the Downloads window and follow the on-screen instructions from the Install Shield wizard to install.
- Then, agree to the Terms and Conditions.
- Double-click the QuickBooks Tool Hub icon on the desktop when the installation ends to open it.
Step 2: Run the QuickBooks File Doctor Utility
- From the left pane, select the Company File Issues tab.
- Choose Run QuickBooks File Doctor and wait until it opens.
Note: If the QuickBooks File Doctor does not open, go to the Windows Start menu and search QB Desktop File Doc to open it manually.
- From the QuickBooks File Doctor drop-down menu, select the company file. If you’re unable to find the file, choose Browse and Search to find the company file.
- Select the middle option, i.e., Check your file, click Continue, and enter the QuickBooks Desktop admin password.
- Lastly, click Next.
Note: The time taken to scan the QuickBooks company file mostly depends on the file size. File Doctor may take up to 10-15 minutes to finish scanning, and as the process finishes, try to turn on the multi-user mode. Secondly, the File Doctor scan may say it was unsuccessful, even if it fixes the issue.
However, if QuickBooks File Doctor fails to fix the network issues, go to the next solution to configure the Windows firewall manually.
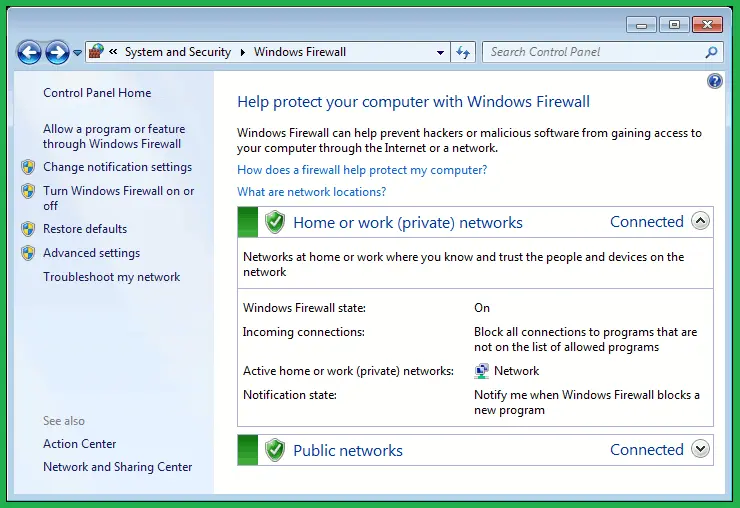
5th Solution: Configure the Firewall and Security Settings Manually
If QuickBooks multi-user mode not working, you need to reset the Windows firewall on the server system. To manually re-configure the settings, follow the procedure given below:
Step 1: Add Firewall Port Exceptions for QuickBooks
In step one, you must add port exceptions for the QuickBooks program if the QuickBooks hosting mode is off. If you use multiple versions of QuickBooks Desktop on the server system, implement the instructions for each version:
- On the desktop, click the Windows Start button.
- As the search bar opens, type Windows Firewall and hit Enter to open it.
- Choose Advanced Settings from the Windows Firewall and right-click Inbound Rules.
- Select New Rule, click Port, and then hit Next.
- After ensuring that TCP is selected, enter the specific ports for your QB Desktop (year) version in the specific local ports field:
- For QB Desktop 2020 and later: 8019, XXXXX.
- For QB Desktop 2019: 8019, XXXXX.
- For QB Desktop 2018: 8019, 56728, 55378-55382.
- For QB Desktop 2017: 8019, 56727, 55373-55377.
Important Note: QuickBooks Desktop 2019, 2020, and all the upcoming versions use dynamic ports. These are Windows firewall ports (not a range) assigned while installing the QuickBooks program. It makes sure that QuickBooks gets the exclusive use of a given port.
- Click the Windows Start menu to open the search bar.
- Type QuickBooks Database Server Manager and press Enter.
- Click the Port Monitor tab.
- Find the QuickBooks version and note the Port Number. You will need this while adding the firewall port exceptions.
Important: If you want, you can change the assigned port number by choosing Renew. To do that, move to the Scan Folders tab > Scan Now to reset the firewall permissions. Note that you can only renew ports starting from QB Desktop 2019 and later versions.
- After adding the port number, choose Next and select Allow the Connection.
- Click Next, and verify if all the profiles are marked.
- Select Next.
- Make a new rule, name it ‘QBPorts(year), and Click Finish.
Note: Follow the same instructions as given above to create Outbound rules separately.
Launch QuickBooks and try to switch to multi-user mode. You can also open QuickBooks over the network from one of the host computers. However, if QuickBooks multi-user mode not working even after adding the firewall port exception, proceed with the next step.
Step 2: Create Windows Firewall Exceptions for QuickBooks Executable Files
The QuickBooks program uses executable files (.exe) to perform various operations in the application. To create firewall exceptions for these executable files, follow the instructions below.
Note: Remember to create exceptions for each file mentioned in the table below.
| Executable files | Location |
| AutoBackupExe.exe | C:\Program Files\Intuit\QUICKBOOKS YEAR |
| Dbmlsync.exe | C:\Program Files\Intuit\QUICKBOOKS YEAR |
| DBManagerExe.exe | C:\Program Files\Intuit\QUICKBOOKS YEAR |
| FileManagement.exe | C:\Program Files\Intuit\QUICKBOOKS YEAR |
| FileMovementExe.exe | C:\Program Files\Intuit\QUICKBOOKS YEAR |
| QuickBooksMessaging.exe | C:\Program Files\Intuit\QUICKBOOKS YEAR |
| QBW32.exe | C:\Program Files\Intuit\QUICKBOOKS YEAR |
| QBDBMgrN.exe | C:\Program Files\Intuit\QUICKBOOKS YEAR |
| QBServerUtilityMgr.exe | C:\Program Files\Common Files\Intuit\QuickBooks |
| QBCFMonitorService.exe | C:\Program Files\Common Files\Intuit\QuickBooks |
| QBLaunch.exe | C:\Program Files\Common Files\Intuit\QuickBooks |
| QBUpdate.exe | C:\Program Files\Common Files\Intuit\QuickBooks\QBUpdate |
| IntuitSyncManager.exe | C:\Program Files\Common Files\Intuit\Sync |
| OnlineBackup.exe | C:\Program Files\QuickBooks Online Backup |
- On the desktop, click the Start menu to open the search bar.
- Type Windows Firewall in the search bar and Hit Enter.
- Choose the Advanced Settings in the Windows Defender Firewall window.
- Right-click Inbound Rules (you will need to create Outbound rules later), and when the drop-down list displays, choose New Rule.
- Click Program and choose Next.
- Select This Program Path, and then Browse.
- Find and then select one of the executable files mentioned in the table above.
- Click Next and select Allow the Connection.
- Choose Next, and if you are prompted, ensure all the profiles are marked and then click Next.
- Create a rule and consider naming it as ‘QBFirewallException(name.exe).’
Note: Repeat the same set of instructions given above to create Outbound Rules.
Open QuickBooks Desktop and switch to multi-user mode to check whether the issue has been resolved. If not, try using QuickBooks Database Server Manager in the next solution.
Important: If Can’t Enable QuickBooks Hosting even after creating exceptions for the QuickBooks executable files (.exe), you must also re-check the antivirus settings on the server system. The antivirus needs to be set correctly so that it gives general permissions to QuickBooks Desktop. To know more, you can visit the official website of the specific third-party antivirus software you are using for detailed instructions.
6th Solution: Scan the Folders Using QuickBooks Database Server Manager
If you find that QuickBooks hosting mode is off, then scan the folders with the help of QDSM. These are the specific folders containing the company file. This will help you and others on the network work together in QuickBooks Desktop from multiple computers. To learn how to scan, follow the procedure given below:
- On the server system, click the Windows Start menu, type QuickBooks Database Server Manager in the search bar, and hit Enter to open it.
- Move to the Scan Folders tab, click Browse, select the folders with the company files (QBW), and then click OK.
- When you are ready, click Start Scan.
The folders will appear in the QuickBooks company files found section when the scanning finishes. You can now access the company files in these folders from the workstations over the network.
Open QuickBooks to check if Can’t Enable QuickBooks Hosting. If you still cannot switch to multi-user mode on the server, move to the next troubleshooting.
7th Solution: From the Workstations, Ping the Server System
If you find QuickBooks hosting mode is off, verify the connection between the server and the workstations. Follow the steps below to ping the server from each workstation connected to it:
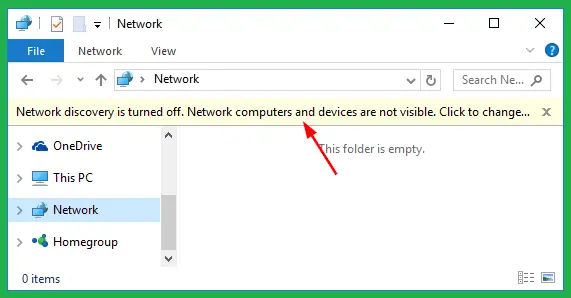
- Turn on Network Discovery on the server and any one of the workstations
- Open the Start menu on the server and workstations.
- Type ‘Network’ in the search panel to open the Network and Sharing Center.
- Choose Change Advanced Sharing settings. Also, ensure that the Turn on Network Discovery option is chosen in the Network Discovery and File and Printer sharing sections.
- From the server system, get the server name.
- Click Start to open the search bar.
- Type Run and press Enter.
- In the Run command window, type ‘CMD’ and choose OK.
- Type ‘ipconfig/all’ in the CMD window and hit Enter.
- You can find the Host Name in the Windows IP Configuration section; the server name will be on the right side.
- Write down or copy the hostname in the Word document.
- Go back to the workstation and open the Windows Start menu.
- Type Run into the search field and hit Enter.
- In the Run dialogue window on your screen, enter CMD and click OK.
- Type “ping [your server name],” Ensure that you do not add the brackets around the server name.
- Press Enter and repeat these steps for each workstation to check the connection.
The server works fine if you get a reply for each packet with no loss. However, if there is packet loss or a very slow response, stop and immediately ask a professional for help by dialing +1-(855)-955-1942.
8th Solution: Edit the Windows Hosts File on the Server and Workstations
If you have already used all the solutions given above and still QuickBooks multi-user mode not working, then try this one last troubleshooting. Follow the instructions mentioned in these three steps to edit the Windows hot file on the server system.
Step 1: Get the Names and IP Addresses
You need to note down the names and IP addresses of the server system and the workstations. Also, before you begin, make sure to access the server system and workstations as a user with admin privileges. First, follow the instructions on the server where QuickBooks hosting mode is off and then on the workstations.
- Hit the Windows+R keys on the keyboard and type CMD in the Run command window.
- Hit Enter.
- Type ipconfig /all (make sure to give space after ipconfig), and press Enter.
- Note down the hostname and IP address (or IPv4).
Step 2: Edit the Windows OS Hosts File
Follow the procedure given below on the server system and then the workstations.
- Close the QuickBooks.application and click on the Windows Start tab.
- Choose My Computer or This PC and move to either one of the paths:
- C:\Windows\System32\Drivers\Etc
- C:\Windows\Syswow64\Drivers\Etc
- Search the host file, and when you find it, double-click on it.
- Choose Notepad.
- Enter the IP address followed by the system name and use the Tab key to enter space
- The server must have the workstation’s IP address and system name.
- The workstation must have the server system’s IP address and system name.
Step 3: Save All the Changes to the Hosts File
After you finish updating the IP addresses in Notepad on both the server and workstations, save the file and follow the procedure below:
- In Notepad, choose the File tab.
- Select Save, and in the file name, enter “hosts”. Ensure to add the quotation marks.
- Click Desktop and choose Save.
- Find the file you just saved and right-click on it.
- From the drop-down, choose Copy.
- Browse to the file location you used in the previous step
- C:\Windows\System32\Drivers\Etc
- C:\Windows\Syswow64\Drivers\Etc
- Find the host file and right-click on it.
- From the drop-down list, click the option to Rename.
- While renaming the host file, add OLD and then select Continue.
- Hit the Ctrl+V keys on the keyboard and choose Continue
After adding the Windows hosts file, launch the QuickBooks software on the workstation and try to access the company file to check if the Hosting Mode is Off QuickBooks.
Conclusion
Hopefully, after implementing the solutions in this article, you have resolved the issue where you find your QuickBooks hosting mode is off. If the solutions are not working out to help you host the company file, or you got stuck while implementing the solutions, reach out to the team of certified experts at +1-(855)-955-1942. The support team will run a thorough scan of the system and figure out the exact cause of the issue to resolve it.
Frequently Asked Questions
Ans: When none of the solutions works to fix multi-user errors in QuickBooks, you can try reinstalling the QuickBooks Desktop program using the clean install method. You can also try repairing the Windows operating system, which can, in rare instances, cause trouble hosting the company file in a multi-user network.
Ans: If you want to disable hosting in QuickBooks, go to the system that is hosting the company file, launch QuickBooks, open the File tab, and select the Stop Hosting Multi-User Access option under the Utilities drop-down.
Ans: Hosting a company file means making it available for every user in the network. This is done with the help of QuickBooks database server manager and a system known as the server.
Ans: You might need to host the company file when you want to let multiple users work in QuickBooks at the same time. This improves productivity and lets users collaborate for better results
