When installing QuickBooks Desktop on your computer, you might sometimes encounter various problems. To easily resolve these issues, you can utilize the QuickBooks Install Diagnostic Tool. Intuit has integrated this tool in QuickBooks Tool Hub, and it is quite easy to download & run on the system.
QuickBooks requires several Windows components to run smoothly on the computer. Any defect in these components can stop you from properly running the software. Fortunately, you can effortlessly run the QB Install Diagnostic Tool to repair various Windows components installed on your system.
Alright, then, let’s move into the article to understand how we can download, install, and run the QB Install Diagnostic Tool on the system to fix different errors.
If you need prompt guidance regarding the QuickBooks Install Diagnostic Tool, dial +1-(855)-955-1942 to contact a QB professional.
QuickBooks Install Diagnostic Tool – An Overview
As discussed in the introduction, the QB Install Diagnostic Tool can help you resolve different errors that generally arise during the QB Desktop installation on the computer. Another important aspect of this utility is that it improves the overall operation of QuickBooks on your system, allowing you to finish your projects at a much faster rate.
It is difficult for an average QB Desktop user to scan & repair different Microsoft Windows components such as the .NET Framework, MSXML, C++, etc. In such cases, the QB Install Diagnostic Tool can help the user seamlessly repair these components.
Once you download & install QB Tool Hub, you can effortlessly access the QB Install Diagnostic Tool and run it on your computer. Let’s scroll down to the following section to learn how to do that.
How Can You Download QuickBooks Install Diagnostic Tool?
Here are the two steps that you need to implement to download & install the QB Install Diagnostic Tool on your system. Ensure that you utilize these steps in the order they are detailed.
Step I: Download QuickBooks Tool Hub On the Computer
QuickBooks Tool Hub acts as a repository of different troubleshooting tools, including the QB Install Diagnostic Tool. Here’s how you can download & install QB Tool Hub:
- Firstly, you should download the latest edition (1.6.0.8) of QuickBooks Tool Hub on your computer. Ensure that you save the download file at an easily accessible location like Windows Desktop.

Note: If you have already installed QB Tool Hub on your system, you can check its version by accessing the Home tab.
- Launch the download file (QuickBooksToolHub.exe) and follow each step that shows up on your system’s screen.
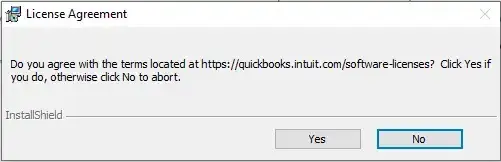
- Accept the terms & conditions detailed on the installation window and finish the process.
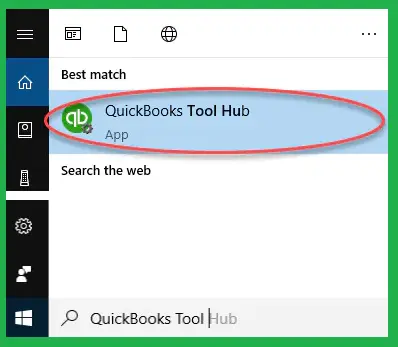
- Finally, you can double-click the QB Tool Hub icon on Windows Desktop to open QuickBooks Tool Hub.

Note: If you are unable to locate the QB Tool Hub icon, you can search for it using the Windows search feature.
Now that you have downloaded QB Tool Hub and opened it on your system, let’s jump to the following step to discover how to run the QB Install Diagnostic Tool using it.
Step II: Run the QuickBooks Install Diagnostic Tool From QB Tool Hub
Here’s how you can run the QB Install Diagnostic Tool using QB Tool Hub on your computer:
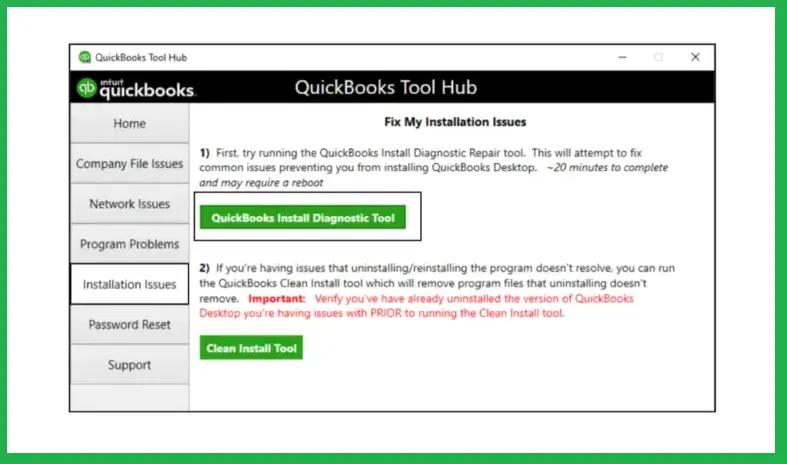
- Go to the QuickBooks Tool Hub window and select the Installation Issues tab.
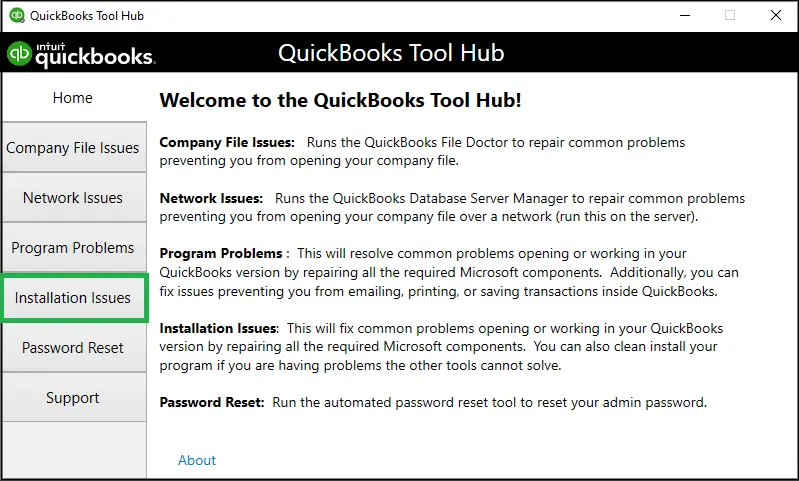
● Now, you have to click the QuickBooks Install Diagnostic Tool icon and wait until the tool runs on your system. The utility may run for more than 20 minutes.
- Once the tool has run, you need to restart your system and start using QB Desktop for different tasks. It is also recommended that you install the latest QuickBooks updates to ensure that you have the latest security patches, fixes, and other features.
There are several unique advantages of using the QB Install Diagnostic Tool. Let’s navigate to the next section to learn about it.
Some Salient Aspects of the QB Install Diagnostic Tool
The following points elaborate on the excellent advantages you can get by utilizing the QB Install Diagnostic Tool on your computer:
- It is a very competent troubleshooting utility that rarely fails to fix different error codes on your system.
- The tool can automatically scan your QB Desktop files and resolve different problems, such as faulty entries in the Windows Registry, corrupted data files, and constant conflict with third-party apps.
- It needs the least human intervention to operate, making it suitable for those users who are not tech-savvy.
- Intuit constantly improves this utility, helping ensure that it remains relevant even in the face of challenging glitches.
You can fix a wide range of error codes using this amazing troubleshooting utility. Let’s jump to the following section to learn about that.
Error Codes That You Can Fix Using the QB Install Diagnostic Tool
Here’s the table that shows various errors that you can effectively resolve by running the QB Install Diagnostic Tool:
| Error Code 1935 | QB Error 1722 | ABS PDF Driver Errors |
| QB Error Code 12029 | C++ Runtime Errors | Error 1402 |
| QB Has Stopped Working | Unrecoverable Error Codes | Subscription Verification Errors |
| QuickBooks Crashing | Error Code 1628 | Error 1712 |
| Update Error 15223 | Installation Error Code 1603 | Error 12007 |
| Error Message Code 12031 | Error Code 1303 | QB Error 1334 |
Sometimes, you might be unable to fix these errors using the QB Install Diagnostic Tool. In such cases, you need to use other troubleshooting methods. Let’s move to the following section to discover them.
What Can You Do If the QB Install Diagnostic Tool Doesn’t Work?
Whenever you are unable to eliminate any error using the QB Install Diagnostic Tool, you can implement the resolutions stated below. Ensure that you use these hacks in the order they are discussed.
1. Use the Quick Fix my Program Tool
The Quick Fix my Program utility is available in QB Tool Hub, and it can help you resolve different error codes. Here’s how you need to run this utility:
- Firstly, you have to download & install QuickBooks Tool Hub on your system.
- Next, you need to launch the QB Tool Hub window and select Program Problems.
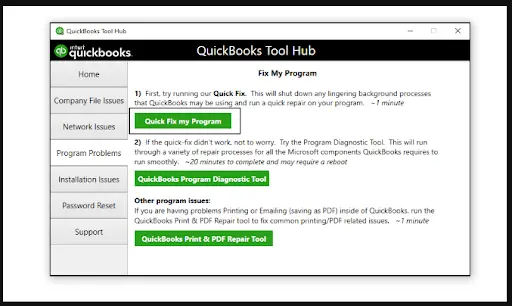
- At this point, click the Quick Fix my Program icon and wait until the tool runs on your computer.
- Finally, you can start using QB Desktop for various projects.
If, however, you still face different error codes, consider installing the latest Windows updates as detailed below.
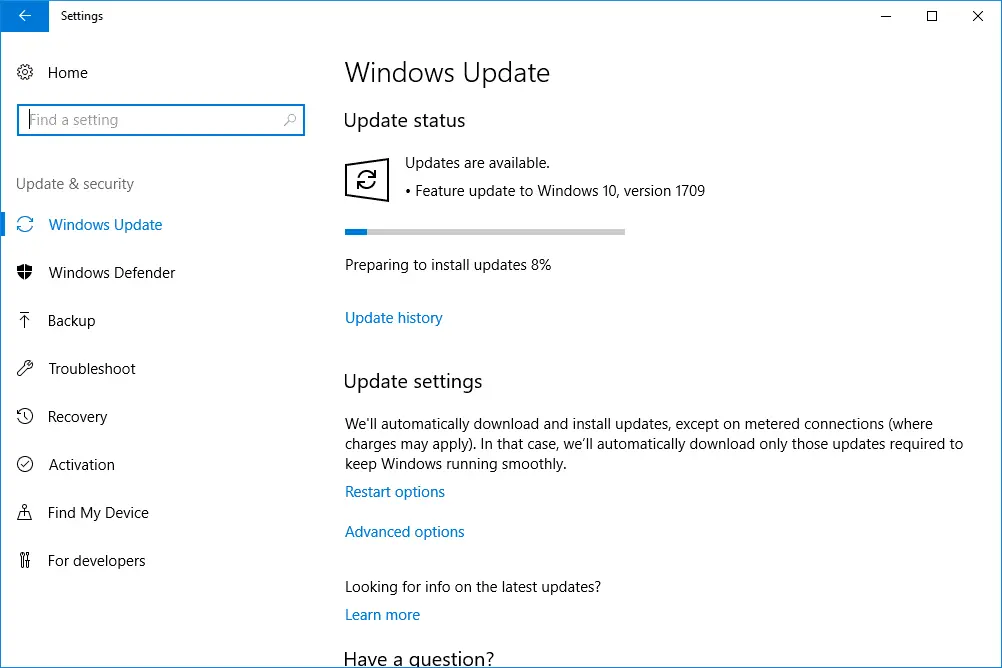
2. Download & Install the Latest Windows Updates
Using an outdated Windows edition on the computer can prevent you from installing QB Desktop. This is because the older Windows versions typically do not remain compatible with the latest QB editions. Once you install the latest Windows updates, you can seamlessly install QB Desktop on your system.
Do you continue to get different errors even after installing Windows updates? If that’s the case, try implementing the next solution.
3. Manually Repair Different Microsoft Windows Components
Damage in various Windows components, such as .NET Framework and MSXML, can hinder you from installing QB Desktop on the computer. Here’s how you can manually repair these components:
A. Fix the Microsoft .NET Framework Component
QB Desktop uses the .NET Framework component for various internal operations. Any corruption in this component will definitely trigger errors when you install, activate, or update the software. Here’s how you can repair it on your system:
- Firstly, open the Start menu on Windows Desktop and click the Control Panel icon.
- Jump to the Control Panel window and select the Programs and Features tab.
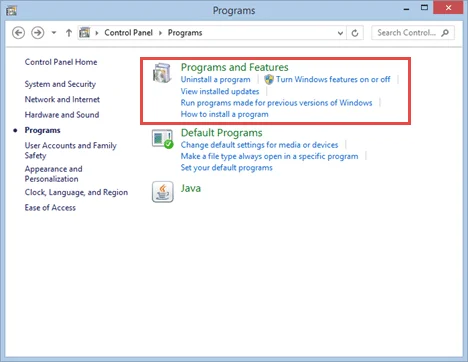
- Click Uninstall a Program and choose the Turn Windows Features On or Off option.
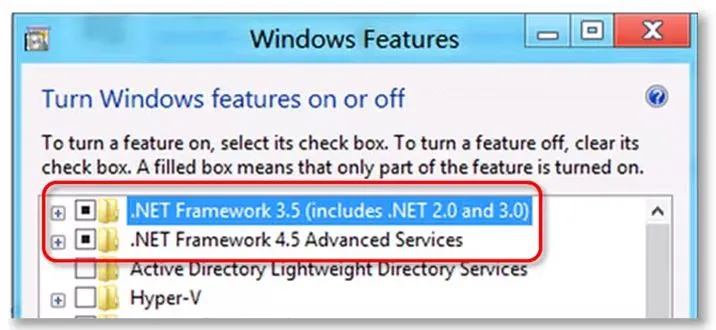
- Locate the .NET Framework 4.5 checkbox and mark it if it is unmarked. On the other hand, if you find that the .NET Framework 4.5 checkbox is already marked, you must clear it.
- Tap OK and reboot your computer. After that, move to the Control Panel and mark the .NET Framework 4.5 checkbox.
- You have now repaired the .NET Framework 4.5 component. In a similar way, you can repair .NET Framework 3.5 SP1, 4.6, 4.7, and 4.8.
- Finally, you should start installing & activating QuickBooks on your computer.
You can also fix the MSXML component as described below.
B. Repair the Windows MSXML Component
QB Desktop uses the MSXML component to read and interpret data in XML format. Damage in this component will prevent you from installing & updating the software. Here’s how you can fix this component:
- Firstly, bring up the Run window on the screen by tapping the Windows + R keys.
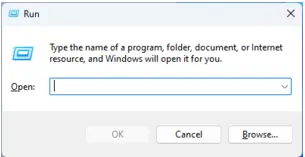
- You need to type CMD in the Run window and tap OK. After that, jump to the Command Prompt window displayed on the screen.
- At this point, type the following two commands: cd\windows\syswow64 and regsvr32 MSXML6.dll
Note: You should type the cd\windows\syswow64 command only if you have a 64-bit operating system.
- Tap Enter, and after that, you should be able to finish the QuickBooks installation process.
If, however, you still run into various installation & update error codes, try repairing QB using the Control Panel as explained below.
4. Repair QuickBooks Using the Control Panel
The Control Panel maintains the list of various installed apps on your computer. You can easily repair QuickBooks using the Control Panel. Here’s how you can do so:
- Firstly, open the Start menu and you should select the Control Panel icon.
- Move to the Control Panel window and you need to choose Programs and Features.
- From the list of installed programs, you must identify the QuickBooks icon and right-click it.
- Choose Uninstall/Change, and after that, click Continue.
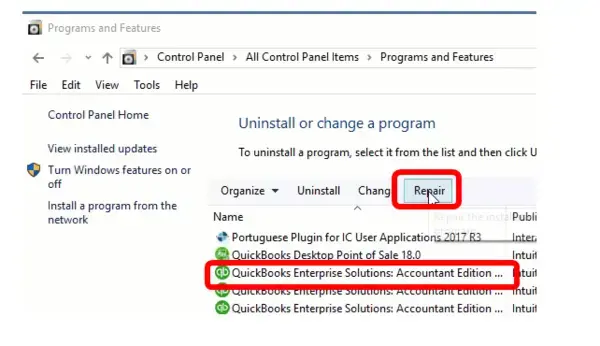
- Tap Next and click Repair, and after that, you should wait until the repair process is completed.
- Click Finish, restart your computer, and you can open QB Desktop to complete your tasks.
If you continue to face installation problems, try implementing the following resolution.
5. Install QB Desktop in Selective Startup On Your System
If you find an issue when installing the software or its update, try the same in selective startup mode.
When you run Windows in selective startup, you disable certain programs & services. This enables you to install & update specific apps on your computer without facing various difficulties. Here’s how you can run your computer in selective startup and install QuickBooks:
- Tap Windows + R to open the Run window and execute the msconfig command. Go to the System Configuration window.
- Click OK and navigate to the General tab. After that, you should choose Selective Startup and Load System Services.
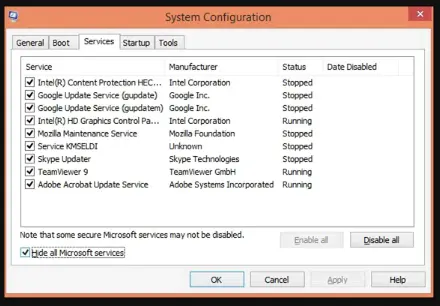
- In the Services tab, you must mark the Hide All Microsoft Services checkbox. After that, tap the Disable All option.
- Clear the Hide All Microsoft Services checkbox and choose Windows Installer using the list of services displayed on the window.
- Click OK and tap Restart on the window. After that, you can seamlessly install QB Desktop on your system.
- Open the System Configuration window once again and click Normal Startup via the General tab.
- Tap OK and click Restart to reopen your computer.
Finally, you can open QB Desktop and start working on your projects.
Winding Up
In this exhaustive article, we have discussed how to download, install, and run the QuickBooks Install Diagnostic Tool on the system. Moreover, we walked you through several alternative ways that you can implement if the QB Install Diagnostic Tool doesn’t work.
Hopefully, you can now install and activate QB Desktop on your computer. If, however, you still face different error codes or have a query, you can connect with a QB professional for real-time assistance.
Frequently Asked Questions
A. The QuickBooks Install Diagnostic Tool is a free utility designed by Intuit to automatically detect and fix common installation errors related to Microsoft components like .NET Framework, MSXML, and C++. It simplifies troubleshooting by scanning your system for issues that might prevent QuickBooks from installing or updating properly.
A. Download the tool from the official Intuit website. Once downloaded, run it as an administrator. The tool will automatically scan your computer, detect installation problems, and attempt to repair them. This process may take up to 20 minutes depending on your system.