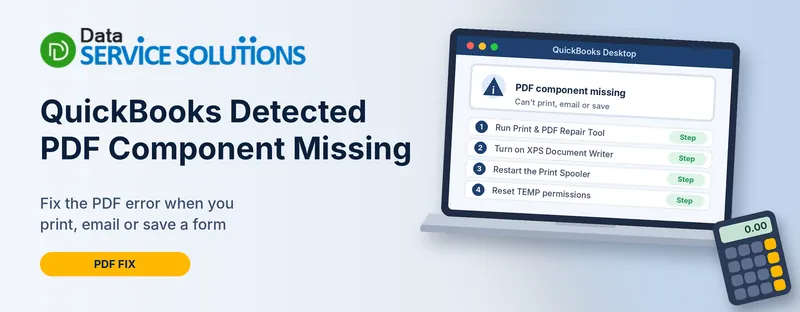
It’s the end of the month. The invoices are done, the customers are waiting, and you click Email. QuickBooks stops you with a message: “QuickBooks detected PDF component missing.”
Nothing is wrong with your invoices, and nothing is wrong with your company file. The message means QuickBooks tried to turn a form into a PDF and couldn’t find or use one of the Windows tools it needs to do it. That’s a computer-side problem, and it’s usually fixable in a few minutes.
This guide does three things. It gets a PDF out the door right now, it helps you work out which part is broken, and then it walks through ten fixes in the order QuickBooks recommends, with extra detail for Windows 10 and Windows 11.
The Short Answer
If you want the quickest route, do these three things in order:
- On Windows 11, turn on Microsoft XPS Document Writer in Windows Features, then restart.
- Close QuickBooks and run Program Problems > QuickBooks Print & PDF Repair Tool in the QuickBooks Tool Hub.
- Open QuickBooks and try again.
If that didn’t do it, don’t worry. The rest of this guide covers every other common cause.
Send Your PDF Right Now (Before You Fix Anything)
You don’t have to wait for the repair to get a document to a customer.
- Open the invoice, statement or report and click Print.
- In the printer list, choose Microsoft Print to PDF and print.
- Windows asks where to save the file. Save it, then attach it to a normal email.
This sidesteps QuickBooks’ built-in PDF maker, so it often works while the error is still showing. It’s a workaround, not a cure, and it won’t help if your computer has no PDF printer at all. Fix the cause later today so batch emailing and saving work again.
What “PDF Component Missing” Actually Means
QuickBooks Desktop doesn’t create PDF files entirely on its own. For Save as PDF and for emailing forms, it relies on a Windows feature called the Microsoft XPS Document Writer. QuickBooks’ own help page tells you to test this writer outside QuickBooks when PDFs fail, which tells you how closely the two are linked.
So when you see “PDF component missing,” think of a chain with several links:
- QuickBooks asks Windows to build the document.
- The XPS Document Writer has to be turned on and listed as a printer.
- The Print Spooler service has to be running.
- QuickBooks needs to write temporary files to your TEMP folder.
- Your security software has to let .xps files through.
- Your Windows user needs permission to print to that writer.
If any link is broken, QuickBooks reports the PDF component as missing. The fixes below test each link in turn.
Other Messages That Point to the Same Problem
QuickBooks lists these among the errors its Print & PDF Repair Tool is meant to fix. If you see one of them, this guide applies too:
| What QuickBooks says | What it usually means |
|---|---|
| “QuickBooks detected PDF component missing” | The PDF-building tools can’t be found |
| “QuickBooks can’t complete the current action due to a missing component: Missing pdf file component” | Same problem, longer wording |
| “Unable to save as .pdf file” | PDF creation fails when you save |
| “PDF Converter shows offline” | The converter can’t reach its printer |
| “There is a problem connecting to your currently selected printer” | A print component is not responding |
| “Could not print to printer” | The same chain, failing at the print step |
| QuickBooks PDF Converter Activation Error -20, -30 or -41 | The converter did not activate properly |
| Error 1722 or 1801 when installing the PDF Converter | The converter’s installation failed |
Why QuickBooks Detects a Missing PDF Component
These are the causes that come up again and again:
- The Microsoft XPS Document Writer is turned off or missing. This is the big one, especially on a brand-new Windows 11 PC or after a Windows reinstall.
- The Print Spooler is stopped. Without it, nothing prints, including to PDF.
- QuickBooks can’t write to your TEMP folder. It builds the PDF in temporary files first.
- The form’s template is damaged. One invoice style may fail while others work.
- Security software blocks .xps files. The antivirus sees the temporary file and stops it.
- Your Windows user lacks permission. Some users can’t print to the XPS writer.
- QuickBooks is out of date. An old release can miss fixes for newer Windows.
- Adobe Reader is damaged or out of date. QuickBooks staff list this as a possible cause.
- QuickBooks’ own printer settings file is damaged. Rare, and a later step.
A Two-Minute Test to Find the Broken Link
Before you try ten things, run these quick tests. They tell you which fix to start with.
Test 1: Does the XPS writer work outside QuickBooks? Open Notepad, type a word, choose File > Print, pick Microsoft XPS Document Writer, print, save the file to your Desktop and open it.
- It opens: the writer works, so the problem is inside QuickBooks, your permissions or your TEMP folder. Start with Fix 2.
- It fails or the writer isn’t in the list: start with Fix 3.
Test 2: Does Microsoft Print to PDF work outside QuickBooks? Print the same Notepad page to Microsoft Print to PDF. If that works but the XPS writer doesn’t, your computer can make PDFs and the XPS part is the broken link.
Test 3: Does another Windows user have the problem? Sign in to the PC as a different Windows user (an administrator if you can) and try the same form. If it works there, your user’s permissions or profile are the cause. Go to Fix 6 and Fix 8.
Test 4: Does another computer have the same error? If only one PC fails, the problem is that PC’s Windows setup, not your QuickBooks data.
Which Fix Should You Start With?
| What you notice | Likely cause | Start with |
|---|---|---|
| New PC, new Windows 11 install or a recent Windows reinstall | XPS writer not turned on | Turn On Microsoft XPS Document Writer |
| Notepad can’t print to XPS either | Windows feature problem | Turn On Microsoft XPS Document Writer, then Restart the Print Spooler Service |
| Notepad works, QuickBooks fails | QuickBooks-side or permission problem | Run the Print & PDF Repair Tool, then Reset TEMP Folder Permissions |
| Only one type of form fails | Damaged template | Create a New Template |
| Only one Windows user fails | Permissions | Check Security Software and Windows Permissions |
| Error returned after several fixes | Damaged settings or install | Reset QBPrint.qbp and Repair QuickBooks |
| You use hosted QuickBooks | Server-side feature | Hosted and Remote Desktop Users |
Before You Start
- Back up your company file. Go to File > Back Up Company > Create Local Backup. See how to back up a QuickBooks Desktop company file.
- Sign in to Windows as an administrator. Some steps won’t work without it.
- Note your versions. Your QuickBooks year and release (press F2 or Ctrl + 1) and your Windows version (type winver into the search box).
- Keep antivirus and firewall on. None of these fixes needs them switched off.
- Keep a short note of what you change. If something goes wrong, you can undo it.
Fix 1: Restart and Update QuickBooks Desktop
Start simple. A restart clears a stuck print process, and an update brings in fixes.
- Close QuickBooks and restart your computer.
- Open QuickBooks, then go to Help > Update QuickBooks Desktop > Update Now.
- Tick Reset Update and click Get Updates.
- Restart QuickBooks, install the update when it asks, and try your PDF again.
If the update itself fails, see QuickBooks update stuck and how to update QuickBooks Desktop.
Fix 2: Run the QuickBooks Print & PDF Repair Tool
This is the first solution QuickBooks itself offers, and it takes about a minute.
- Close QuickBooks completely.
- Download and install the latest QuickBooks Tool Hub. QuickBooks currently lists version 1.6.0.8. See how to download QuickBooks Tool Hub.
- Open the Tool Hub from your Desktop icon (or search Windows for “QuickBooks Tool Hub”).
- Select Program Problems.
- Click QuickBooks Print & PDF Repair Tool and let it run.
- Open QuickBooks and print, email or save a PDF again.
On Windows 11, turn on the XPS Document Writer (Fix 3) before you run this tool. Some people have reported that it only helps once the writer is in place.
Fix 3: Turn On Microsoft XPS Document Writer
For a lot of people, this is the fix.
- Search Windows for Control Panel and open it.
- Go to Programs > Turn Windows features on or off. You can also press Windows + R, type optionalfeatures and press Enter.
- Sign in as an administrator if Windows asks.
- Find Microsoft XPS Document Writer and tick the box. Click OK.
- Restart your computer.
- Open Settings > Bluetooth & devices > Printers & scanners (Windows 11) or Settings > Devices > Printers & scanners (Windows 10), and check that Microsoft XPS Document Writer is listed and that you’re allowed to print to it.
If the box is already ticked but the writer isn’t in the printer list, try this: untick the box, click OK, restart, tick it again, click OK and restart once more. If it’s still missing, ask your IT person to reinstall it.
Fix 4: Test the XPS Document Writer Outside QuickBooks
If you haven’t run Test 1 yet, do it now. It separates a Windows problem from a QuickBooks problem.
- Open Notepad and type any word.
- Choose File > Print, select Microsoft XPS Document Writer and print.
- Save the file to your Desktop, then open it.
If it opens, Windows can make the file, so the rest of the chain needs checking. If the print fails or the file won’t open, go back to Fix 3 or ask IT or Microsoft to repair the feature. QuickBooks notes that this step shouldn’t be done on a server that runs Terminal Services without your IT team.
Fix 5: Restart the Print Spooler Service
The Print Spooler is the Windows service that manages everything you print. If it’s stopped, PDF creation fails.
- Press Windows + R, type services.msc and press Enter.
- Find Print Spooler and double-click it.
- Set Startup type to Automatic.
- Click Apply, then OK.
- Right-click Print Spooler in the list and choose Start (or Restart if it’s already running).
- Open QuickBooks and try again.
Fix 6: Reset TEMP Folder Permissions
QuickBooks writes temporary files to your TEMP folder while it builds a PDF. If it can’t, you get the error.
- Press Windows + R, type %TEMP% and press Enter.
- Right-click an empty space in the folder and choose Properties.
- Open the Security tab and click Edit.
- Make sure your own user account and Administrators have Full Control.
- Click Apply, then OK. Try your PDF again.
QuickBooks’ own page says to give all users and groups Full Control. We suggest starting with your own account and Administrators, because this is a system folder. If it still fails, widen it only with your IT person’s agreement.
Fix 7: Create a New Template
If one form fails and the others work, its template may be damaged.
- Go to Lists > Templates.
- Right-click the template you use and choose Duplicate, or click Templates > New and pick the same form type.
- Give it a new name and save it.
- Open the transaction that failed, select the new template from the Template list and try again.
Fix 8: Check Security Software and Windows Permissions
Antivirus and firewall tools sometimes block .xps files, which QuickBooks uses as a stepping stone to a PDF.
- Look in your antivirus and firewall logs for blocked .xps files or blocked QuickBooks activity.
- Add exclusions for QuickBooks and for .xps files. Don’t switch protection off. See Windows Firewall blocking QuickBooks.
- Check that your Windows user can print to the Microsoft XPS Document Writer. A user without permission can’t create PDFs, and an administrator may need to change it.
- As a test, right-click the QuickBooks icon and choose Run as administrator. If PDFs work there, the cause is permissions.
Running as administrator is a test, not a permanent fix. If you aren’t sure how to add an exclusion for your security software, ask your IT person or the vendor.
Fix 9: Check Your Default PDF Viewer and Adobe Reader
QuickBooks staff list a damaged or outdated Adobe Reader as a possible cause, and a wrong default viewer can cause odd behaviour too.
- Go to Settings > Apps > Default apps and choose a PDF viewer for .pdf files.
- Update Adobe Reader or Acrobat from its Help menu.
- If it’s damaged, close it and all your browser windows. Press Windows + R, type appwiz.cpl, select Adobe Reader or Acrobat, click Uninstall/Change and choose Repair.
- Restart your computer and try again.
If QuickBooks says it can’t find a PDF viewer at all, see QuickBooks unable to locate PDF viewer.
Fix 10: Reset QBPrint.qbp, Repair QuickBooks, Then Reinstall If Needed
This is for stubborn cases. Do these in order, and stop when it works.
Reset the printer settings file (QBPrint.qbp):
- Close QuickBooks.
- In File Explorer, open C:\ProgramData\Intuit\QuickBooks 20XX (20XX is your year). Turn on hidden items if you can’t see ProgramData.
- Right-click QBPrint.qbp, choose Rename and add .old to the end.
- Open QuickBooks, go to File > Printer Setup, select any form and click OK. QuickBooks makes a fresh file.
- Re-enter your printer settings for checks and forms, then try again.
Install Diagnostic Tool:
- Open Tool Hub and choose Installation Issues.
- Click QuickBooks Install Diagnostic Tool. It can take up to 20 minutes.
- Restart your computer. See the QuickBooks Install Diagnostic Tool guide.
Reinstall as a last resort:
- Back up your company file. Keep your license number and product number handy.
- Follow our QuickBooks Clean Install Tool guide.
- Reinstall, activate and update QuickBooks.
Renaming QBPrint.qbp comes from community reports. It isn’t on QuickBooks’ own page, so treat it as a later step.
Hosted and Remote Desktop Users
If your QuickBooks runs on a hosting provider or a remote desktop:
- The XPS writer, Print Spooler and TEMP folder that matter are on the server, not on your own computer.
- Don’t change server settings unless you manage that server.
- Send your host the exact message, your QuickBooks year, the form you were printing and the time it happened.
- In the meantime, try the Microsoft Print to PDF workaround if the server offers it.
Common Situations and What Usually Fixes Them
You just got a new computer or reinstalled Windows. The XPS Document Writer may simply not be switched on. Start with Fix 3, then Fix 2.
It only fails when you email, not when you print. Emailing needs the PDF step more than printing does. Run the tests above, then check Fix 8 for security software and Fix 9 for the default viewer.
It only fails for one customer’s invoice or one form. That points to the template. Try Fix 7.
Only one person in the office has the problem. The cause is on that person’s Windows profile or PC. Check Fix 6 and Fix 8.
You see it with batch emailing or statements. Send one form first. If that works, send a small batch, then the full batch.
It appeared after a Windows update. Check Fix 3 again to make sure the XPS writer is still on, then run the repair tool.
What Not to Do
- Don’t turn off your antivirus or firewall to “test.” Add exclusions instead
- Don’t give Full Control on system folders to everyone without your IT person’s approval
- Don’t edit the registry
- Don’t download “PDF repair” tools from pop-ups or unknown sites
- Don’t reinstall QuickBooks without a backup
- Don’t pay anyone who contacts you out of the blue to fix the error
How to Check That It’s Really Fixed
Don’t stop at one successful PDF. Run through this list:
- [ ] Save an invoice as a PDF
- [ ] Email an invoice as a PDF to yourself
- [ ] Save a report as a PDF
- [ ] Email a statement if you use them
- [ ] Print a paycheck, if you use payroll. See how to print paychecks in QuickBooks
- [ ] Take a fresh backup
If checks print in the wrong order, see QuickBooks print checks in reverse order. If a form prints off the page, see QuickBooks form does not fit on the page.
How to Keep the PDF Component Error From Coming Back
- Keep QuickBooks and Windows up to date
- Check that the Microsoft XPS Document Writer is still on after big Windows updates or a new PC
- Keep the Print Spooler on Automatic
- Add QuickBooks to your security exceptions before updates
- Keep the Tool Hub installed so the repair tool is a click away
- Test one PDF after any change to your PC, before month-end
When to Get Help
Get help if the error is still there after Fix 10, if you can’t change Windows or security settings on your own, or if you use a server or host. Before you reach out, write down the exact message, your QuickBooks year and release, your Windows version, the results of the four tests above and which fixes you tried. That saves a lot of time. The Data Service Solutions team can walk through it with you.
If the problem is that QuickBooks can’t save PDFs but shows no component message, see QuickBooks unable to save as PDF. If the print preview won’t open, read QuickBooks print preview not working. For receipts, see QuickBooks cannot print receipts.
Frequently Asked Questions
What does “QuickBooks detected PDF component missing” mean?
QuickBooks can’t find or use the Windows tools it needs to create a PDF. The most common culprit is the Microsoft XPS Document Writer being switched off or missing.
Is my company file damaged?
No. This error is about printing and PDF tools on your computer, not about your data. It’s still wise to back up before you change anything.
What’s the fastest way to fix it?
Turn on Microsoft XPS Document Writer in Windows Features, restart, then run the QuickBooks Print & PDF Repair Tool in the Tool Hub.
Why did the error start after I got a new PC?
New Windows 11 PCs can have the XPS Document Writer switched off. QuickBooks says to enable it in Windows Features before you start.
Can I still send invoices while it’s broken?
Yes. Print to Microsoft Print to PDF, save the file and attach it to your email. It’s a workaround, so fix the cause afterwards.
The repair tool didn’t help. What now?
In a 2023 QuickBooks community thread, one user got it working by installing the XPS Document Writer and then running the repair tool. Others reported the error stayed. Work through the later fixes in this guide, or ask for help.
Do I need to turn off my antivirus?
No. Add exclusions for QuickBooks and .xps files and leave your protection on.
Can Adobe Reader cause this?
QuickBooks staff list a damaged or outdated Adobe Reader as a possible cause, so update or repair it.
Why does it only fail on one form?
That form’s template may be damaged. Make a new template and use it.
Why does it fail on one computer or one user only?
That PC may have the XPS writer off, a stopped Print Spooler, TEMP folder permission problems or security software blocking .xps files. A different Windows user may need different permissions.
Is it safe to rename QBPrint.qbp?
Yes, if you rename it and don’t delete it. QuickBooks makes a new one, but you’ll need to re-enter your printer settings.
What if I use hosted QuickBooks?
The missing component is on the server, so contact your host with the exact message and the time it happened.
Wrapping Up
“QuickBooks detected PDF component missing” sounds serious, but it almost always comes down to the XPS Document Writer, the Print Spooler or a permissions problem. Send your PDF with the workaround first, run the quick tests, then work through the fixes in order with your security software left on. If you get stuck, the Data Service Solutions team is happy to help.