
Are you struggling to find a proper solution for the Quickbooks error code 196? If yes, follow this complete article to learn more about error code 196 in QuickBooks. This article will explain to you why
Quickbooks error code 196 appears on your screen, and what reasons trigger it? We will also discuss some basic and advanced troubleshooting steps for the same error.
Need expert’s advice to resolve Quickbooks error code 196? Talk to our professionals at +1-(855)-955-1942 and get your issue resolved in minimum time.
What is QuickBooks Error Code 196?
QuickBooks Error Code 196 is a common error code that appears on your screen if there is some mismatched or invalid information or formatting in the .qbo file provided by your Financial Institution. This interrupts QuickBooks from reading the data from your Web Connect (.qbo) file, and thus it displays the error.
The users generally get the error message saying QB found some problems with the company file…but don’t worry :), they can be fixed by running a rebuild.
However, when it performs a rebuild, many times the rebuild results can also not able to fix the error and displays it as Error 196(2).
Error: Verify Account information: Invalid Cust ID number
Details: List: ‘Account’ record name. “WA Trust Bank – (Automatic Account Setup).
In such cases, you need to follow the advanced troubleshooting steps to fix the QuickBooks Error Code 196.
Things to do before troubleshooting the QuickBooks Error Code 196
Before troubleshooting the QuickBooks Error Code 196, you must create a backup of your QuickBooks company file as well as Schedule automatic backups. This will help you restore your data after fixing the error.
Backing up your company files saves everything currently in your company file. This data includes your accounting data, templates, letters, logos, images, and related files. There are two ways you can create the backup.
There are two ways for you to back up your data. You can either back up your data automatically or do it manually.
Step 1: Manually create a backup company file
- Go to the File menu and then choose the Switch to Single-user Mode option.
- After that, visit the File section again and then go to the Backup Company option. Then choose the Create Local Backup option.
- In the current window, you need to select the Local Backup option and then hit Next.
- In the Local Backup Only section, tap on the Browse button and select where you want to save your backup company file.
- Now, set the number of backups you want to keep. This is an optional step.
- After that, run a test to ensure the backup file is in good shape before you save.
- Once done, tap OK and then select Save it now, and hit Next.
These steps will create a backup of your company files on your system.
Step 2: Scheduling automatic backups for company file
- First, go to the File menu in QuickBooks and then select Switch to Single-user Mode.
- Again, go to the File menu and hover over the Backup Company option. Now you need to select Create Local Backup option.
- In this window, select Local Backup and then click Next.
- In the Local Backup Only section, then select Browse and choose the location where you want to save your backup company file.
- After that, you need to set the number of backups you want to keep. This is an optional step.
- Tip: You do not need to pencil it in on your calendar. You can use the options in the Online and Local Backup section to set backup reminders.
- Next, in the Online and Local Backup section, select the Complete verification option. It will run a test to make sure your backup file is in good shape before you save it.
- When you find all the things good, select OK.
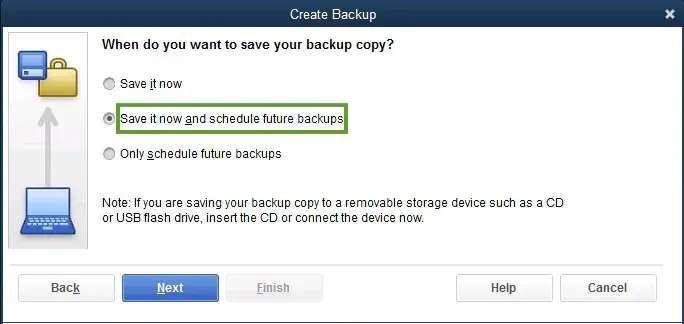
- Select the Save it now and schedule future backups option, and then tap on Next. Or if you don’t wish to save a backup now, you can also choose the Only schedule future backups option.
- Here, select the Save backup copy automatically when I close my company file checkbox. Then you need to select the number of times between backups.
- After that, in order to create a schedule, select New. Now, fill out the data fields to create a backup schedule. You can also set a specific time or day of the week.
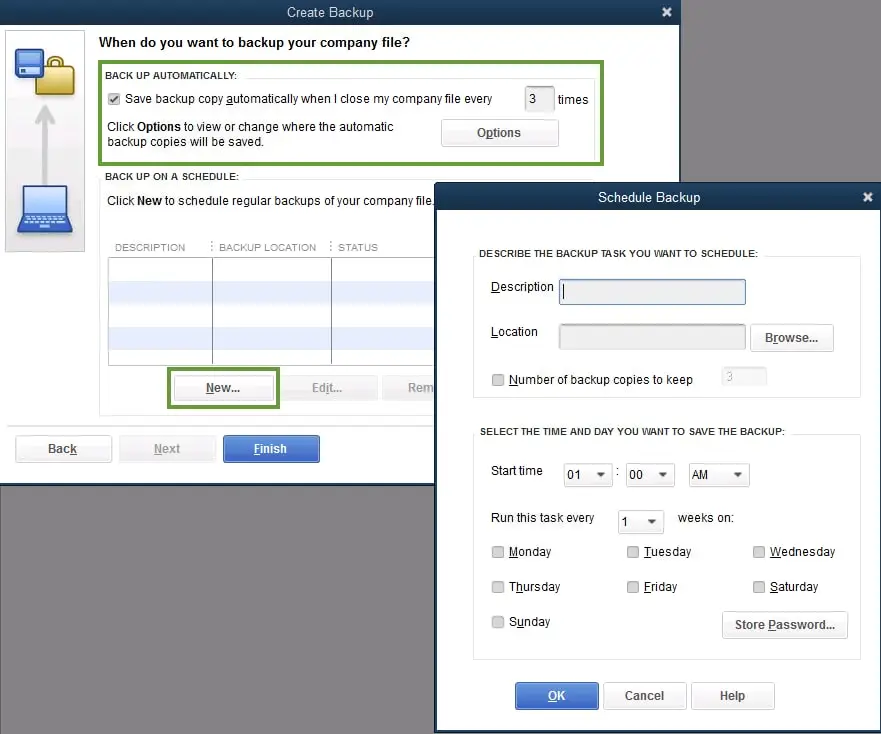
- After you are done setting your schedule, select OK. QuickBooks will now ask you to enter your Windows sign-in password. It will give QuickBooks permission to run the scheduled backup.
- Once done with this and you’re ready to create your backup, select Finish.
After following this step, QuickBooks will create a backup and schedule your future backups simultaneously. You will get a confirmation message when it is done creating the backup.
Read Also- How to backup quickbooks company file
Advanced Troubleshooting Methods to fix the QuickBooks Error Code 196
Once done with the backup of your company file, try the troubleshooting methods to fix the QuickBooks Error Code 196.
Fix 1: Back up your Company file.
One of the basic troubleshooting for the QuickBooks error code 196 is to back up the company file. The steps for both manual and automatic backup are given above. However, if you are not able to follow them, try the alternative backup method.
In case you are not able to back up the company file via the QuickBooks menu due to crashing or some error. You can also make a copy of the entire directory, which contains your *.QBW files and sub-directories as the backup.
Fix 2: Export IIF to fix the QuickBooks error code 196.
Intuit Interchange Format (.IIF) files are the ASCII text and TSV (Tab-Separated Value) files that QB Desktop uses to import or export lists or transactions. These files make it easy to transfer data from one platform to other in order to better manage company records in QuickBooks. Follow the given steps to export the IIF files:
- To export the IIF files, first go to the File menu, then to the Utilities tab.
- Then select the Export option and then go to the Lists to IIF Files.
- Then select the Chart of Accounts option and click OK.
- Now, you need to browse to the folder where you want to save the file and then click on the Save button.
Fix 3: Edit the saved IIF to fix the QuickBooks error code 196.
- First, find the file on your computer and then open it with Microsoft Excel. It is a TAB-separated file, so it may ask you to import settings, but the default settings should also suffice.
- Now, you need to scroll down to the bottom of the sheet to the !QB ONLINE row.
- Below this, you will find the routing number, and the account info is displayed there. There would be messed-up routing (ROUTNUM) and account (OLACCNT) numbers.
- You can either replace the characters in the cell with the actual account/routing numbers or set them to 0 (zero).
- Next, change the OLFEDID value to 0 (zero).
- After that, change the Y to N for the OLBANKING, OLBILLPAY, OLENABLED, and OLTAB columns to disable the bank feeds. You need to do this step for the row with the messed-up account only and not for all of them.
- Lastly, Save the file. Sometimes, Excel may prompt you that some features may not be saved for the TAB-separated format, but that’s fine press OK.
Fix 4: Import the Edited IIF to fix the QuickBooks error code 196.
- To import the Edited IIF, first go to the File option, then to the Utilities.
- Move your cursor to the Import options and then to the IIF files.
- Remember you do not need to import via the big blue obvious “Import IIF” button.
- You need to look for the smaller text link given below that. The line says Import it for me. I’ll fix it later.
- Another warning will flash up on your screen, asking you to back up your files. But you need to click on the blue “Import IIF” button.
- Now, you will see a message saying Your data has been imported.
- Lastly, you can open the chart of accounts and check to see if your account numbers are fixed.
The Conclusive Note!!
The above-mentioned step should help you to resolve the QuickBooks error code 196. However, you can also adopt the manually advanced system user resolutions. For that, first, start your system and log in as an administrator. Next, go to the Start button and select Choose All Programs and then select the Accessories option followed by System Tools. Finally, you need to press the System Restore option.
When a replacement window appears on the screen, click on the Restore my laptop to an earlier time option and then hit Next. After that, go to the On this list option and then choose the restore system to an earlier time option. Then, click the restore point list and tap on the Next button. Lastly, hit the Next button again on the confirmation window and restart your device once the restoration completes. Even after that, if you need any kind of assistance, contact our QuickBooks Support Experts.
Still having issues? Call us at +1-(855)-955-1942
Frequently Asked Questions
The main reason for the appearance of the QuickBooks error code 196 is the invalid information or formatting in the .qbo file provided by your Financial Institution.
To fix the QuickBooks error code 196, first backup your company file, then Export, Edit and Import the IIF.
Related Posts-
How to Fix QuickBooks Error 40003
Check QuickBooks Validation Code in Registry Issue
Fix Intuit Data Protect has Stopped Working
