No matter what action you perform in QuickBooks, be it updating payroll, sending usage data, updating account info, or processing payroll, QuickBooks Error 40003 can appear anytime. Most users have reported this error while trying to update payroll when QuickBooks prompts them with a message that reads, ‘We strongly recommend that you go online again before DATE.’ If you are also one of those users unable to work with payroll in QuickBooks due to error code 40003, this article will help you understand the causes and explain detailed troubleshooting solutions to fix it like a pro.
If running payroll has become a challenge due to QuickBooks Desktop error 40003, Contact us at +1-(855)-955-1942!! Our technical team of experts is highly skilled and proficient in handling errors in QuickBooks Desktop and payroll
Causes that Trigger Error Code 40003 in QB Desktop
One or more reasons listed below is why you get QuickBooks error 40003. Try to identify the cause in your case and proceed accordingly. If unsure why you get error code 40003, follow all the solutions in the given sequence.
- Incorrect configuration of the Windows firewall setting might interrupt tax table updates and trigger error code 40003.
- You might be unable to update the payroll account due to an outdated QuickBooks Desktop application.
- If Internet Explorer is not correctly configured, it might restrict QuickBooks from downloading the payroll updates.
- When there is damage or corruption in the QuickBooks application data.
- If there are paychecks in QuickBooks payroll that are stuck and weren’t sent to Intuit.
- Interruptions by a third-party antivirus application or Microsoft Defender antivirus can also restrict the updates.
How to Eliminate QuickBooks Error 40003?
Implementing these solutions can help you to fix error code 400003 in QuickBooks.
1st Method: Update the QuickBooks Desktop Program
Updating QuickBooks Desktop to its latest release can eliminate QuickBooks error 40003.
Follow the steps below to download QuickBooks updates as an administrator:
- On the Windows desktop, right-click the QB Desktop icon.
- From the drop-down list, click the option to Run as Administrator.
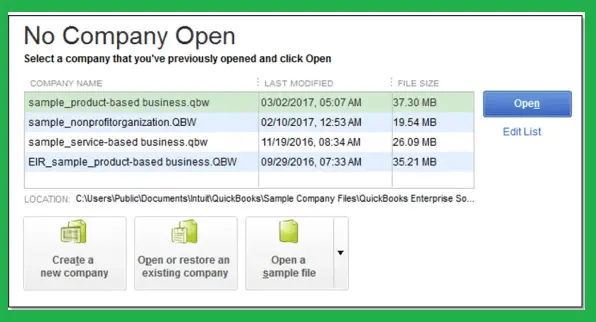
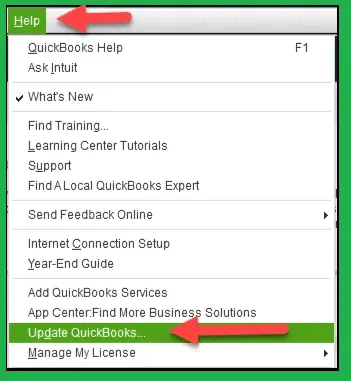
- Move to the Help tab from the No Company Open window.
- Click Update QB Desktop, and as you move to the Options tab, choose Mark All and Save.
- Go to the Update Now tab and checkmark the box next to Reset Update.
- Select the Get Updates option.
- Close and re-launch the QuickBooks program, and when prompted, select Yes to install the updates.
- Reboot the system and launch QuickBooks to verify if error code 40003 is rectified.
If updating QuickBooks software does not resolve the issue, implement the solution below.
The Following Article Can Help You: Easy Guide to Fix QuickBooks Company File in Use Please Wait
2nd Method: Ensure Your QuickBooks has the Latest Built-in Browser
If you use QuickBooks Desktop 2019 or an older version, you need to upgrade to the most recent version to eliminate QuickBooks error 4003. This is because Intuit has replaced Internet Explorer 11 with a built-in browser in the latest QuickBooks Desktop version. On June 10, 2022, all supported QuickBooks Desktop versions will begin to use the QuickBooks custom browser. You don’t have to worry; using QuickBooks won’t change. Instead, it has become more reliable, including crucial security updates and pre-configured internet settings for QB.
However, if you encounter error 40003 in the latest QB Desktop version, you must update the application for the new custom browser.
Note: While Internet Explorer might not be used for some online services, it is still required for QuickBooks to function correctly on the system. Therefore, ensure that the Internet Explorer is not turned off.
3rd Method: Re-configure Window Firewall Settings for QuickBooks
If you cannot download the recent tax table updates due to QuickBooks error 40003, check and adjust the Windows Firewall settings for QuickBooks Desktop.
1st Step: Add Windows Firewall Port Exceptions
Note: If you are running more than one version (years) of the QuickBooks application on the same system, use these steps for each version:
- Move to the desktop and select the search panel from the taskbar.
- Type Windows Firewall in the search panel and press Enter.
- From the Advanced Settings drop-down, right-click the Inbound Rules option (later, you need to create Outbound Rules).
- Choose the New Rule, click Port, and then select Next.
- Ensure TCP (Transmission Control Protocol) is selected.
- Type specific ports in the Specific local ports field, which is needed for the QuickBooks year version:
- QuickBooks Desktop 2020 and later: 8019, XXXXX.
- QuickBooks Desktop 2019: 8019, XXXXX.
- QuickBooks Desktop 2018: 8019, 56728, 55378-55382.
- QuickBooks Desktop 2017: 8019, 56727, 55373-55377
Important Note: QuickBooks Desktop 2019, 2020, and later versions utilize dynamic ports. These are specific Windows firewall ports (not a range) assigned during QB installation. It ensures that the QuickBooks application gets exclusive use of a given port.
To get a dynamic port number:
After typing the port number in the field, choose Next.
Choose to Allow the Connection and again click Next.
If prompted, verify if all profiles are marked, click Next.
Create a rule, like: “QBPorts(year).”
Choose Finish.
After creating the Inbound Rules, repeat the same steps to create outbound rules by selecting the Outbound Rules option in the third step.
2nd Step: Create Windows Firewall Exceptions for QuickBooks Desktop
QuickBooks uses executable files (.exe) to perform various tasks. To let QuickBooks download the updates without restrictions, you must create exceptions for every executable file in the table below.
- Click the Start button.
- In the search field, type Windows Firewall and press the Enter key.
- From the Advanced Settings drop-down, right-click the Inbound Rules option (later, you have to create Outbound Rules). Choose the New Rule option.
- Choose the Program option and click Next.
- Choose This Program Path, click Browse, and one by one, choose the executable files in the table below.
- Select Next.
- Click Allow the Connection, then Next, and ensure all profiles are marked afterward.
- Click Next.
- Finally, create a rule, for example, QBFirewallException(name.exe).
| Executable files | Location |
| AutoBackupExe.exe | C:\Program Files\Intuit\QUICKBOOKS YEAR |
| Dbmlsync.exe | C:\Program Files\Intuit\QUICKBOOKS YEAR |
| DBManagerExe.exe | C:\Program Files\Intuit\QUICKBOOKS YEAR |
| FileManagement.exe | C:\Program Files\Intuit\QUICKBOOKS YEAR |
| FileMovementExe.exe | C:\Program Files\Intuit\QUICKBOOKS YEAR |
| QuickBooksMessaging.exe | C:\Program Files\Intuit\QUICKBOOKS YEAR |
| QBW32.exe | C:\Program Files\Intuit\QUICKBOOKS YEAR |
| QBDBMgrN.exe | C:\Program Files\Intuit\QUICKBOOKS YEAR |
| QBServerUtilityMgr.exe | C:\Program Files\Common Files\Intuit\QuickBooks |
| QBCFMonitorService.exe | C:\Program Files\Common Files\Intuit\QuickBooks |
| QBLaunch.exe | C:\Program Files\Common Files\Intuit\QuickBooks |
| QBUpdate.exe | C:\Program Files\Common Files\Intuit\QuickBooks\QBUpdate |
| IntuitSyncManager.exe | C:\Program Files\Common Files\Intuit\Sync |
| OnlineBackup.exe | C:\Program Files\QuickBooks Online Backup |
Repeat the steps above and select the Outbound Rules option in the third step to create outbound rules for these QuickBooks executable files.
After creating a Windows Firewall exception, launch QuickBooks to check if QuickBooks error 40003 is rectified. If not, follow the next troubleshooting method below.
4th Method: Disable the Antivirus Application
Antivirus applications safeguard the system from malware and virus attacks. But sometimes, it blocks the necessary QuickBooks updates. By temporarily disabling the antivirus, you can get rid of QuickBooks error code 40003 and update your payroll account without any issues. Follow the steps below to disable Microsoft Defender antivirus protection in Windows Security:
- Hit the Start button, type Windows Security in the search field, and hit Enter.
- From the search results, choose the Windows Security application.
- Move to the Virus and Threat Protection; under it, click the Virus & Threat Protection settings option.
- Choose to Manage settings and turn off the Real-time protection. Remember the scheduled scans will continue to run. However, downloaded or installed files will not be scanned until the next scheduled scan.
- Also, disable any third-party firewall or antivirus application installed on the system. You can find detailed instructions on the support sites of those specific applications.
- Reboot the system and re-launch QuickBooks Desktop.
Important: If the issue gets resolved, ensure that you turn on the Windows Defender or any antivirus application you are using, as the system can be vulnerable to threats.
You May Also Like To Read – Quick Fixes to Resolve QuickBooks Error 15107
5th: Method: Send the Payroll or Usage Data
Before you implement the steps in this method or other methods below, create a backup of the QuickBooks company file. Backup will safeguard the data from accidental loss while troubleshooting QuickBooks error 40003. After creating a company file backup, follow the steps below to send your payroll or usage data to Intuit.
- Under the Employees tab, choose My Payroll Service and click Send Usage Data.
- If you do not get the above option, move to the Employees tab again and click Send Payroll Data.
- From the Send/Receive Payroll Data window, select Send All and then type your payroll service PIN if prompted.
If you can send the payroll data, get the recent tax table updates.
If you cannot send the payroll or usage data to Intuit, contact our support team for immediate help.
6th Method: Try to Identify your Stuck Paychecks
If you still get the QuickBooks error message 40003, try to identify and remove the stuck paycheck by following the steps below:
- Move to Edit, click Find, and choose the Advanced tab.
- Go to the Choose Filter section.
- Under the Filter list, click Detail Level and choose Summary Only.
- Go back to the Filter list and choose Online Status from there.
- Click Online to Send.
- Finally, click Find to identify the paychecks to be sent to Intuit.
Under the Find window, note the number of matches, then follow the next method.
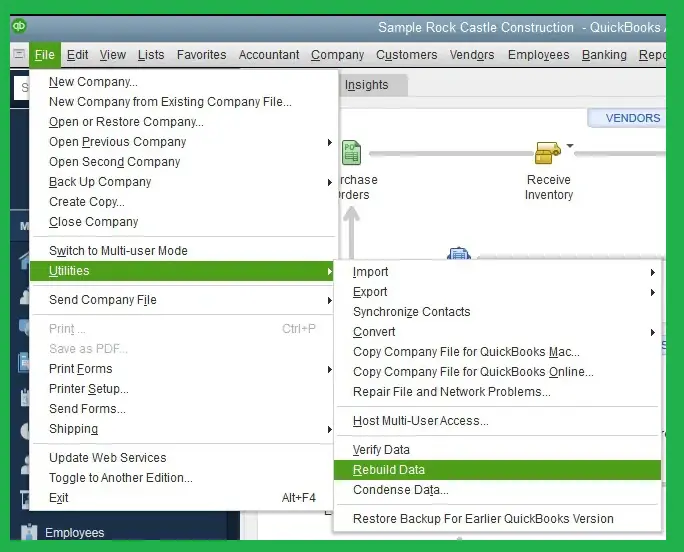
7th Method: Verify and Rebuild the QB Company File
Verify/rebuild tool will help you find and eliminate the issues provoking QuickBooks Desktop error 40003.
- Close the Find Window, move to the Window tab, and choose Close All.
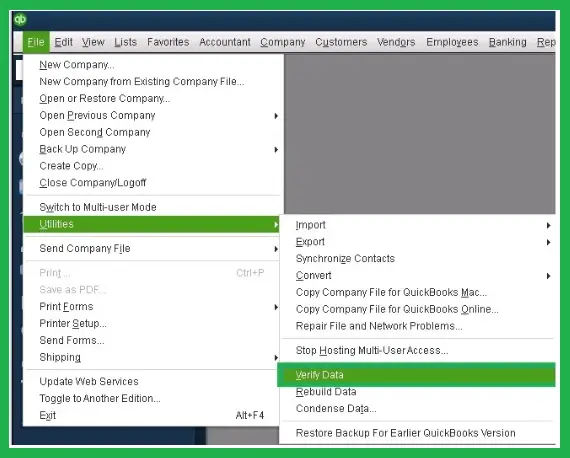
- Click File, choose Utilities, and select the Verify Data option. Verifying the data will get you the stuck paychecks waiting to be sent.
- If you see a message, ‘QuickBooks detected no problems with your data,’ then you are not required to run the rebuild data tool.
- Run the Rebuild tool if you get a message that reads, ‘Your data has lost integrity.’
Implement the following steps to rebuild the company data:
- Choose the File menu and then click Utilities.
- Choose the Rebuild Data option, and QuickBooks will ask you to create a backup before rebuilding the data. If you have already created a backup, skip it; if not, choose OK. A backup is required before you can rebuild.
- If you select OK, choose a location to save the backup and click OK. Type a name for the backup file and choose Save.
Note: Ensure you do not replace another backup file while saving the backup.
- When you get the message saying Rebuild has been completed, select OK.
Note: If you want, use the Verify data tool again to search for any additional problems in the company file. You can restore a recent backup if no issue is found.
After following the solution above, try to get the recent payroll updates to check if QuickBooks error 40003 has been rectified. If you still get an error, follow the troubleshooting solution below.
8th Method: Toggle the Stuck Paychecks in QuickBooks
Instead of deleting the unsent paychecks in QuickBooks, you can toggle them and eliminate QuickBooks error 40003. The stuck paychecks you toggle are the ones you found in the above troubleshooting method.
- Open the oldest stuck paycheck and click the Paycheck Detail button.
- From the Review Paycheck window, move to Earnings, and in the list, add the same earnings item as the last earnings item.
Example: If the final item in the list is Hourly Rate, add another earnings item as Hourly Rate in the list.
- Choose OK when you see a Net Pay Locked message. Further, ensure that there are no modifications to the tax amounts and net pay, and then click OK.
- If a Past Transaction message displays on the screen, select Yes.
- Click the Save & Close option to close the paycheck.
- Click the Yes option in the Recording Transaction warning message.
- Click the Paycheck Details option after opening the paycheck again.
- From the Earnings section, delete the earnings items that were recently added.
- Ensure no modifications to the tax amounts and net pay, and select OK.
- Do repeat all the above steps to toggle each stuck paycheck found.
After implementing all the steps above, try to update the payroll again.
Conclusion
We tried our best to frame each troubleshooting solution step-wise so that you can fix QuickBooks Error 40003 without external help. However, if you are new to QuickBooks or the solutions do not help resolve the issue, contact us at +1-(855)-955-1942. Our team is well-equipped to handle user queries and offers instant solutions to errors and issues in QuickBooks.
Frequently Asked Questions
Ans: Payroll updates include the latest information about the accurate rates and calculations necessary for federal and state taxes, payroll tax forms, e-file, and e-pay options. You can download updates whenever available if you have an active QuickBooks payroll subscription. It applies to QuickBooks Desktop payroll. As for QB Online, the tax table gets automatically updated.
Ans: QuickBooks error 40003 might be triggered due to damaged components in the application, Windows firewall restrictions on QB Desktop, misconfiguration in browser settings, and an outdated QuickBooks program.
Ans: You cannot get QuickBooks error 40003 in QuickBooks Online, as payroll updates are automatically downloaded.
