Sometimes, while updating the QuickBooks Desktop software, you may stumble upon different types of errors occurring due to some connectivity issue while downloading the update file from the internet. One such common error is QuickBooks Error Code 12157, which occurs due to a problem in your internet connectivity or Windows Firewall issues. Though there are multiple-step solutions to rectify the QuickBooks Error Code 12157, before that, one must understand the signs and causes behind the appearance of this error. To help you with this, we have come up with a handy guide for you on how to rectify Error 12157 in 6 easy steps. Go through the article to understand this in detail.
What is QuickBooks Error Code 12157?
QuickBooks Error 12157 falls under the category of the 12000 series and occurs when users try to update the software either to get the latest features or to run payroll. You can encounter this error due to web connectivity issues in your Windows Operating System, mostly while downloading or setting updates for the software.
Indication Signs that show if You are dealing with QuickBooks Error Code 12157
You can get an idea if you are dealing with QuickBooks Error Code 12157 if you see any of these signs:
- The most common and basic sign is the appearance of the error code itself on the screen and the simultaneous crashing of the current Windows.
- The firewall setting and the internet security apps can also give continuous error pop-ups.
- The system frequently crashes on opening the QuickBooks application.
- The slow performance of the system or the QuickBooks app is also a sign of Error 12157 in QB Desktop.
What are the Reasons Behind QuickBooks Error Code 12157?
Let us quickly look at the reasons that trigger QuickBooks Error Code 12157 while updating the QuickBooks Desktop application. Knowing the reason will help you better understand the issue and take appropriate steps to rectify the error.
- The internet connection on your computer is not good or stable.
- The firewall programs are restricting Internet safety applications and set-ups on your system.
- There is a comprehensive selection of framework conflicts, Pc registry errors, and Active X problems.
- You have multiple copies of the QuickBooks software released in the same year installed on your computers, such as QuickBooks Desktop Pro 2016 and QuickBooks Desktop Enterprise Solutions 16.0
- Windows application on your system is displaying the wrong date and time.
- You might be encountering some conditional firewall software settings and web protection applications while updating the QuickBooks desktop software.
Read Also- How to Transfer Quickbooks to New Computer
6 Easy Troubleshooting Solutions to Rectify QuickBooks Payroll Error 12157
Before rectifying error 12157 in QB Desktop, create a backup of your company files to ensure no data loss during the troubleshooting process. For this, go to the File in your QuickBooks, then Back Up Company, and then press Create Local Backup. Then, follow the given steps to resolve the error.
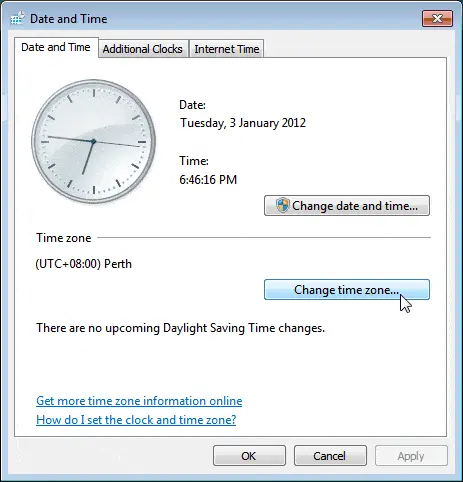
Troubleshooting Solution 1: Set the Correct Date and Time on your system.
- Look on the right corner of your computer screen and right-click on the Clock icon.
- Choose the Adjust Date/Time option.
- Now, select the Change date and time options and then enter the correct date and time there.
- Press OK and close the tab.
- Now once again, open the QuickBooks software and opt for updating the QuickBooks Desktop option.
Troubleshooting Solution 2: Check if Multiple Versions of the QuickBooks Application are Installed on your Computer.
As discussed above in the reasons section, the same versions of the QuickBooks software installed on your PC can also cause QuickBooks Update Error 12157, for example, QB Pro 2019 and QB Premier 2019. Now, say if you need to get the latest version of QB Pro 2019, follow the given steps.
- Go to QuickBooks Downloads and then Update Pages.
- Next, choose your Country.
- Select the Product you want to update, like QuickBooks Pro, etc.
- Now select the desired version.
- Tap on Search.
- Now, tap on the Get the latest updates button, which would be below the Download button.
- Now, follow the instructions given on the screen to install the latest version.
You need to follow the exact same process for other QuickBooks versions that you use on your computer.
Troubleshooting Solution 3: Verify Internet Connection Settings on your system
- To start with this step, open the webpage of Chase banking and Test the secure internet connection.
- You will not be able to update the QuickBooks software if you are not able to open Chase banking on your system. In that case, try contacting your Internet Service Provider (ISP) for more help and support.
- If the webpage of the Chase banking page opens up, proceed with the following steps as mentioned below:
- Go to the Help option and click on Internet Connection Setup.
- Now, choose the Use my computer’s Internet connection settings option to establish a connection when the application accesses the Internet & click on Next.
- Go to the Advanced Connection Settings.
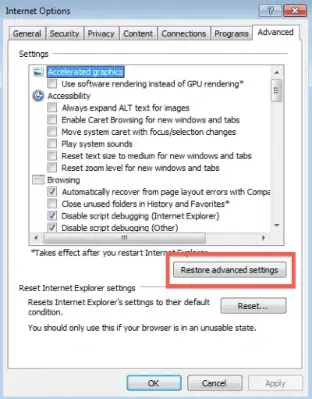
- Now from the Advanced tab, select the Restore Advanced Settings option.
- Once done, hit Apply and then OK.
- At last, press Done and close.
- Now update your QuickBooks application and see if QuickBooks error message 12157 is still appearing.
Troubleshooting Solution 4: Configure the Internet Security or Personal Firewall Application Settings for QuickBooks
Ensure that the internet security & personal firewall settings are accordingly configured. Enable Port 80 and 443 and provide access to the following files:
- QuickBooksMessaging.exe
- QBServerUtiltyMgr.exe
- IntuitSyncManager.exe
- Dbmlsync.exe
- AutoBackupEex.exe
- DBManagerExe.exe
- FileMovementExe.exe
- QBCFMonitorService.exe
- QBDBMgrN.exe
- QBLaunch.exe
- QBGDSPlugin.exe
- QBW32.exe
- FileManagement.exe
- QBDBMgr.exe
Troubleshooting Solution 5: Restore the Advanced Settings
- To restore the advanced settings, first, close the QuickBooks application and open Internet Explorer.
- From the top right corner, go to the Tools tab and select the Internet options from the drop-down menu.
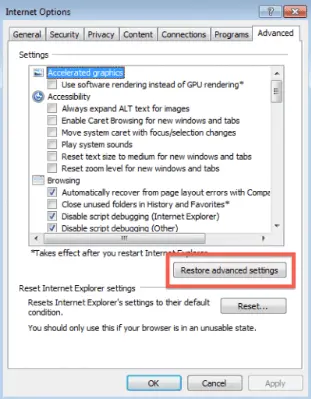
3. Click on the Advanced tab and choose the Restore Advanced Settings option.
4. Then Press OK and Close this window.
Troubleshooting Solution 6: Restore Your System
- Restoring the System can also help you resolve the QuickBooks Error Code 12157
- First, Log-in to your QuickBooks Desktop application as an Administrator.
- You can either press the Windows key on your keyboard or can click on the Start button on the bottom left corner of your desktop screen.
- Choose the All Program option and then tap on Accessories.
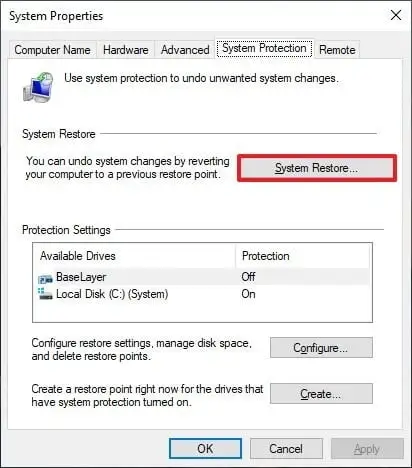
5. Now, click on the System Tools option and press System Restore button.
6. In the next step, open a new window.
7. Click on the Reinstall this PC option and then hit the Next button.
8. Choose the System Restore option and click Next.
9. Now, press the Advanced System option to restore your computer.
10. Press Next on the confirmation window.
11. At last, Reboot your system to save changes.
Final Note
Sometimes, you can also face QuickBooks Error Code 12157 when the download manager applications like the Internet Download Manager (IDM) take the majority of your internet bandwidth and make it difficult for other applications or programs to access the data from the internet. So, ensure that no such application as a download manager is running in the background while updating the QuickBooks.
Still having issues? Call us at +1-(855)-955-1942
Frequently Asked Questions
The QuickBooks Payroll Error 12157 means that the QB has failed to establish a link with Microsoft Win32 internet or WinInetAPI. It can appear on your screen while downloading or setting up updates related to the software.
You might be getting QuickBooks Error Code 12157 because either you have multiple copies of QB software on your system or some firewall program is restricting QB from working. The other reasons that trigger the error 2157 in QB are described in detail in the blog above.
Restrictions in UAC (User Account Control) can also lead to error 12157, do fix this by launching the Run box and opening the Control Panel. Then, go to the System and Security settings and hit the Security maintenance option. After that, go to User Accounts > Change user accounts. Lastly, hit the Never Notify option in the User Account Control settings.


