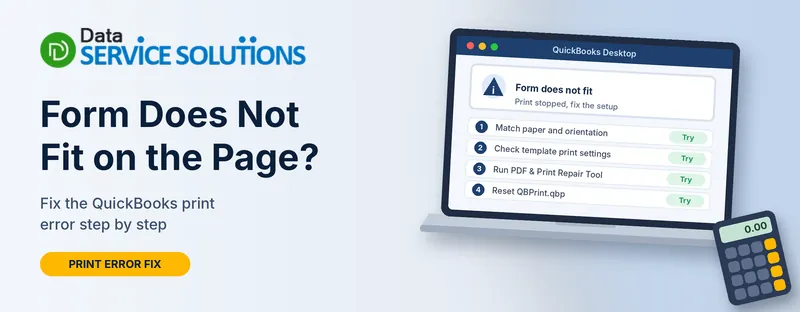
You click Print on an invoice, and QuickBooks stops you with a warning: “The form you are about to print does not fit on the page.” It suggests changing the orientation and gives you two buttons, one to print anyway and one to cancel.
The message is annoying, but it’s usually a settings mismatch, not a broken QuickBooks. This guide explains what it means, why it appears, and eight fixes in an order that clears most cases quickly. The steps are for QuickBooks Desktop on Windows.
What the Message Means
QuickBooks compares the size of your form (the invoice, purchase order, sales receipt or check) to the page it thinks your printer will use. If the form is bigger than that page, or the orientation doesn’t match, QuickBooks warns you before wasting paper.
It’s a warning about a mismatch, so it doesn’t mean your data is damaged.
Don’t Click OK and Print Anyway
Printing anyway can cut off text or push totals onto a second page. If you only need the form once, you can try it, but fix the settings first if the form will go to a customer.
Why QuickBooks Says the Form Doesn’t Fit
These are the common causes:
- The orientation in Printer Setup doesn’t match the printer or the template (portrait vs landscape)
- The wrong paper size is selected for that form
- The template’s page is larger than what the printer can print, or a field or logo sits outside the page edge
- QuickBooks is using the wrong printer for that form, or can’t read the default printer’s paper size
- A receipt or label printer with a small paper size is selected for a full-page form
- Damaged QuickBooks print settings (the QBPrint.qbp file)
- A problem with the PDF or XPS components that QuickBooks uses to email or save forms
The message can also appear on only one computer, for one user, or for one form, which helps you narrow it down.
Match Your Situation to the Right Fix
| What you see | Likely cause | Start with |
|---|---|---|
| Message on every form for one computer | Printer Setup or default printer | Match Paper Size and Orientation in Printer Setup, then Check the Default Printer and Driver |
| Message on only one form, such as invoices | Template print settings | Check the Template’s Print Settings, then Check the Template Layout |
| Print Preview looks right, but printing, email or PDF shows the message | Printer or PDF component | Check the Default Printer and Driver, then Run the QuickBooks Print & PDF Repair Tool |
| Happens only with a receipt printer | Small paper size | The Receipt Printers section |
| Started after an update or a new printer | Printer driver or settings | Check the Default Printer and Driver, then Reset the QBPrint.qbp File |
| Message won’t go away after other fixes | Damaged print settings | Run the QuickBooks Print & PDF Repair Tool, then Reset the QBPrint.qbp File |
Before You Start
- Save and close open forms. Some fixes ask you to log out of QuickBooks.
- Update QuickBooks Desktop. See how to update QuickBooks Desktop.
- Check the printer. It should be on, connected, loaded with the right paper, and free of error lights.
- Note which form shows the message, such as an invoice or purchase order.
Fix 1: Match Paper Size and Orientation in Printer Setup
- Go to File > Printer Setup.
- In Form Name, pick the form that shows the message (for example, Invoice).
- Choose your printer in the Printer name box.
- Click Options and set the paper size to Letter and the orientation to Portrait (unless you use a landscape form on purpose).
- Set the Printer type to match your printer.
- Click OK, then open the form and try Print Preview.
Check the paper size and orientation in the printer’s own properties too. QuickBooks uses the printer’s page setup for the form, so a mismatch in either place can trigger the message.
Fix 2: Check the Template’s Print Settings
If only one form shows the message, the template may be telling QuickBooks to print differently.
- Go to Lists > Templates.
- Double-click the template you use (for example, your invoice template).
- Click Additional Customization, then the Print tab.
- Choose Use specified printer settings below for this invoice, set the orientation, and click OK twice.
- Save any open work, then log out of QuickBooks and log back in.
Menu labels differ slightly by form and version. A template change can affect every form that uses that template, so test one form before you print a batch.
Fix 3: Check the Template Layout
A form that’s too big, or has an element outside the page, can trigger the message.
- In the template, click Additional Customization > Layout Designer.
- Check that the page size reads letter, 8.5 by 11.
- Look for any field box, logo or text that sits past the page edge, and drag it back inside.
- Click OK, then check Print Preview.
To test whether the template is the problem, make a copy of it or use a standard template from the list. If the standard one prints fine, your custom template is the cause.
Fix 4: Check the Default Printer and Driver
- In Windows, set the printer you want as the default printer.
- Open the printer’s properties and confirm it uses the same paper size and orientation as QuickBooks.
- Update the printer driver from the manufacturer’s site.
- Print a test page from Windows, then print from Notepad. If Notepad won’t print either, the problem is the printer or Windows, not QuickBooks.
In QuickBooks, go to File > Printer Setup again and make sure the printer name matches your printer exactly. If you use a network printer, test it from the same computer.
Fix 5: Try a Different Printer in Printer Setup
- Go to File > Printer Setup and select the form.
- Choose a different printer, such as the Microsoft XPS Document Writer or a PDF printer.
- Click OK and try Print Preview.
If it works with another printer, the first printer’s driver or paper settings need attention. If it works only for PDF, see our guide on QuickBooks unable to save as PDF.
Fix 6: Run the QuickBooks Print & PDF Repair Tool
- Close QuickBooks. Download and open the Tool Hub. See how to download QuickBooks Tool Hub.
- Open Program Problems.
- Click QuickBooks Print & PDF Repair Tool. It takes about a minute.
- Reopen QuickBooks and try again.
If you still get the message when emailing or saving as PDF, make sure Microsoft XPS Document Writer is turned on in Windows Features and that the Print Spooler service is set to Automatic. Our guide on the missing PDF component error covers these steps.
Fix 7: Reset the QBPrint.qbp File
QuickBooks saves your printer settings in a file called QBPrint.qbp. If it’s damaged, the paper settings can be wrong.
- Close QuickBooks.
- Turn on hidden files in File Explorer.
- Open C:\ProgramData\Intuit\QuickBooks 20xx (the year you use).
- Right-click QBPrint.qbp, choose Rename, and add .old to the end.
- Open QuickBooks and go to File > Printer Setup.
- Pick any form in the Form Name list and click OK. QuickBooks creates a new QBPrint.qbp.
- Redo your printer settings and try printing.
You only need to do step 6 once. The rename resets your saved printer settings, so you’ll need to set each form’s printer and paper again.
Fix 8: Repair the QuickBooks Installation
If nothing has worked, the installation may be damaged.
- Run the QuickBooks Install Diagnostic Tool from Tool Hub.
- Restart the computer.
- Test printing a form again.
As a last step, reinstall QuickBooks. Back up your company file first.
When It Only Happens With Email or PDF
If Print Preview and printing look fine but emailing or saving as PDF shows the message:
- Run the Print & PDF Repair Tool (Fix 6).
- Turn on Microsoft XPS Document Writer in Windows Features.
- Check that every user has Full Control of your temp folder (press Windows + R, type %TEMP%, open Properties > Security).
- Set the Print Spooler service to Automatic and start it.
- Create a new template and test with that.
Receipt Printers
A thermal receipt printer uses narrow paper, so a full-page form shows the message often. Set the right form and printer in File > Printer Setup, and make sure the receipt template matches the roll width. For more help, read QuickBooks cannot print receipts.
Reports, Checks and Paychecks
- Reports that run off the page: click Print, then tick Fit report to 1 page wide if you see it. Switching the report to landscape often helps too.
- Checks and paychecks that print in the wrong place: see QuickBooks check alignment problems and how to print a paycheck in QuickBooks.
- Pay stubs and forms that aren’t centered: choose Shrink to Printable Area in the print window’s page scaling list.
- Tax forms such as W-2s: see how to reprint a W-2 in QuickBooks.
If Print Preview itself is the problem, see QuickBooks print and preview not working.
How to Stop the Message From Coming Back
- Keep orientation and paper size the same in QuickBooks and in Windows
- Always check Print Preview before a batch
- Keep QuickBooks, Windows and your printer driver up to date
- Don’t move fields outside the page edge in the Layout Designer
- Use a separate template copy for experiments, not your main template
- Write down your printer settings so you can restore them after a reset
When to Get Help
Get help if the message stays after Fixes 1 to 8, if only one user sees it and you can’t tell why, or if you’re printing forms that must be exact, such as checks and tax forms. Our team at Data Service Solutions can go through your settings with you.
Frequently Asked Questions
Why does QuickBooks say the form I’m about to print does not fit on the page?
QuickBooks sees that the form is larger than the page it plans to print on, or that the orientation doesn’t match. It’s usually a paper size or orientation mismatch.
Is it safe to click OK and print anyway?
It’s safe for your data, but the printout can be cut off or run onto a second page. Fix the settings first for anything you send to a customer.
Where is Printer Setup in QuickBooks?
Go to File > Printer Setup, then pick the form you want to print.
Should I choose portrait or landscape?
Most invoices and purchase orders use portrait on letter paper. Pick landscape only if your template is designed that way.
Why does it only happen when I email or save as PDF?
Email and PDF use components such as the XPS Document Writer. Run the Print & PDF Repair Tool, check Windows Features and set the Print Spooler to Automatic.
Why does it happen on one computer but not another?
Printer Setup and printer settings are saved per computer, so check the printer, driver and QBPrint.qbp on the affected one.
Will changing a template affect other forms?
It can, if they use the same template. Test one form first.
Does this mean my company file is damaged?
No. It’s a print setting issue, not a data problem.
What does resetting QBPrint.qbp do?
It clears your saved printer settings for QuickBooks so it can create a fresh file. You’ll need to set each form’s printer and paper again.
Why does my receipt printer show the message?
A receipt printer uses narrow paper, so a full-page form doesn’t fit. Use a receipt template and the matching printer setup.
Can the printer driver cause this?
Yes. An old or wrong driver can report the wrong paper size. Update it from the manufacturer’s site.
When should I get professional help?
If the message stays after all the fixes, or you’re printing exact forms like checks and tax forms and can’t risk misprints.
Wrapping Up
The “form does not fit on the page” message looks like a QuickBooks fault, but it’s almost always paper size, orientation or a template that’s a little too big. Match your settings, check the template, run the Print & PDF Repair Tool, and reset QBPrint.qbp if needed. If you still get stuck, the Data Service Solutions team can help.