
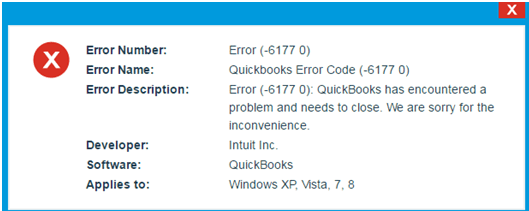
At times, when you open QuickBooks Desktop, you might come across various frustrating errors like QuickBooks Error 6177, 0. This error typically occurs when creating or accessing a company file. When you create a new company file in QuickBooks, it is saved in the designated company file folder, and QuickBooks stores the path to that file for future access. However, if you move the company file to a different folder or location, QuickBooks can’t locate and open it, and this may trigger the error code 6177, 0 in QuickBooks Desktop. However, to resolve this issue, you need to relocate your company file to a different location and make sure that QuickBooks can successfully access it without any interruptions.
Steps To Rectify QuickBooks Error 6177, 0 Cannot Use The Path
To resolve the error code 6177 in QuickBooks, you can follow the steps given below. However, remember the steps to rectify the error differ a bit if you are using the full version of QuickBooks on your server. So, go through both sections and rectify the error.
Condition 1: When you aren’t using Full Version of QuickBooks
If you haven’t installed the full version of QuickBooks on your server computer, then, in that case, you must follow the below-given steps. But before you begin to resolve Error Code 6177 in QuickBooks Desktop, make sure to keep your QuickBooks desktop updated as per the latest available version (QBDB31).
Step 1: Update your File Location
Make sure to change the location of your company file if you have stored it on the server, an external hard drive, or in the cloud. So in order to change the location, you need to move your file to your local drive and back again to where it was. To do so, proceed with the below-given steps:
Note: We would suggest you perform these steps on your server computer. If, for any reason, you don’t have access to it, you can follow these steps on one of your workstations.
- Click on the Windows icon type File Explorer in the text field, and press the Enter key.
- It will open File Explorer, search, and open your QuickBooks folder.
- Find your company file, which ends with QBW. It should look like this: [company name].qbw.
- Make sure to note down the drive name and location. Also, you’ll put the file back here later on. Here’s an example:
- Now, you have to move your company file from this folder to your C: drive.
Note: You just have to move the file, not the whole folder.
Create a portable company file and restore it to your server
By following the above steps, you’ll be able to move your company file to a local drive. After doing so, you can also create a portable company file which is a compact version of your financial data. The below-given steps will help you in doing so:
- Open QuickBooks Desktop on the computer where you have moved your company file.
- Then, select Open or Restore an existing company option.
- Browse for and open the company file you moved to your C: drive.
- Create a portable company file.
- This creates a portable version of your company file that also resets your file location data.
- Select the File menu and select Quit QuickBooks. Then, reopen QuickBooks.
- Go to the File menu and then select Open or Restore Company.
- Select Restore a portable file and then select Next.
- Find and select the portable company file (QBM) you created. Then select Open and Next.
- For the restore location, select the drive you originally moved your company file from. You wrote this down earlier.
- Select Save. This puts your company file back on your network.
- Select the File menu and select Quit QuickBooks.
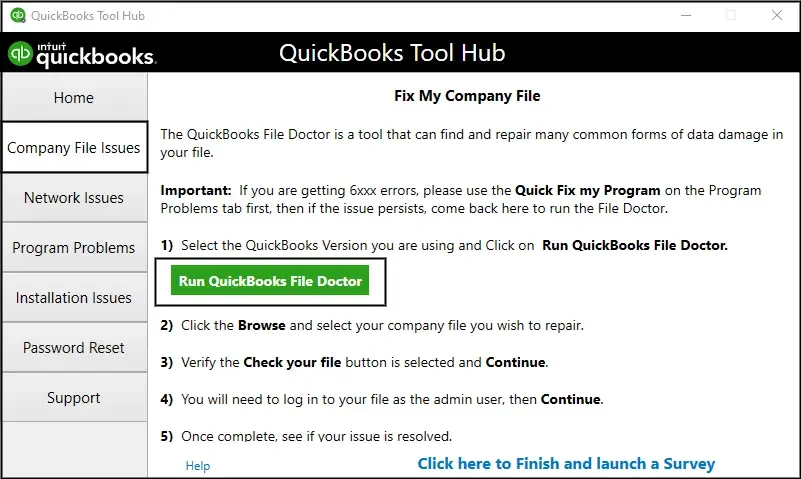
Step 2: Download & run File Doctor on your Server
There might be some damaged company files, due to which you may end up with issues like Error Code 6177 in QuickBooks Desktop. In such a case, you need to clean up these company files. you can download and use the QuickBooks File Doctor Tool. It will scan all your damaged data and later repair it. Along with that, it will also refresh the location of your company file.
Note: If File Doctor resolves your issue, we would suggest you create a backup of your company data.
Step 3: Manually fix the File Path
A: Find your ND File
.ND file is a configuration file that is used to open the company file over the network. If you delete the network configuration file once before starting QuickBooks, it forces it to recreate a fresh copy of the files that might fix QuickBooks Error -6177, 0 while opening the company file.

- Open File Explorer on the server computer and search for the QuickBooks folder.
- Find the file that has your company name and .ND at the end. It will look like this: [MyCompanyFileName].qbw.nd.
- Right-click the .ND file and select Delete.
Related Post: Resolve QuickBooks Error 6175 0
B: Configure QuickBooks Database Server Manager
With QuickBooks Database Server Manager, you can access the company file located on the server and may also fix QuickBooks File Open Failed 6177.
- If you haven’t, make sure to download and install the QuickBooks Database Server Manager.
- Click on the Windows icon on your server computer and type Database in the text field.
- Open QuickBooks Database Server Manager and select the QuickBooks folder holding your company files.
- After that, click on Start Scan, and once it completes, select Close.
- Lastly, you have to set folder permissions to share the company files.
After performing these steps, you can open QuickBooks on all the computers. The error 6177 would be fixed by now
Condition 2: If you have the full version of QuickBooks on your Server
You may proceed with the below-given steps if you have the full version QuickBooks Desktop installed on your server computer i.e. not just Database Server Manager:
Step 1: Reset multi-user Hosting
- Open QuickBooks on your server computer and go to the File menu.
- From there, click on Utilities and select the Stop Hosting Multi-User Access option.
- Further, click on Yes to confirm.
- Again, go to the File menu and select Quit QuickBooks. It will reset your hosting settings.
- Open the QuickBooks application once again go to the File menu and hover over Utilities.
- Then, select the Host Multi-User Access option and click on Yes to confirm.
- Lastly, go to the File menu and select Quit QuickBooks.
Step 2: Move your Company File to the Local Hard Drive of Your Server
If your company file isn’t on your server’s local C: drive, move it and create a portable company file. Do this in the following manner:
- Open the Windows Start menu on the server system (which is the one that hosts your company files).
- Then, type the command File Explorer in the search bar and open the File Explorer.
- After that, search for and open the QuickBooks folder. You can also press the F2 key on your keyboard while QuickBooks is open to get the location.
- Now, find the company file having the .QBW extension. It would look like [company name].qbw.
- Then, note down the drive name and location. You would need to move the file back here.
- After this, move your company file to your server system’s C drive. Make sure just to move the file and not the whole folder.
Step 3: Create a Portable Company File For QB
Once you have moved your company file to your server’s local drive, you need to create a portable company file. It is a compact version of your financial data.
- For this, open QuickBooks Desktop on the system you moved your company file to.
- Then, select Open or Restore an existing company.
- Now, you need to browse for and open the company file that you moved to your C: drive.
- After this, you can create a portable company file.
- Now, select the File menu and then Quit QuickBooks.
Step 3: Create a New Folder for QuickBooks Company File
Open File Explorer and search for your QuickBooks folder.
After that, create a new folder on your server’s local C: drive and give it a name.
Copy everything, including your new portable company file, into your QuickBooks folder, and paste it into the new folder
Also See: Getting QuickBooks Error 6143
Step 5: Reopen Your QuickBooks Desktop
- Open the QuickBooks application and select Open or restore an existing company option instead of selecting a company from the list.
- Then, click on Open a company file option followed by Next.
- Open the portable company file (QBM) that you moved to the new folder.
To make sure, QuickBooks Error Message 6177, 0 is fixed, you can try opening QuickBooks on all of your computers.
Find An Expert To Fix QuickBooks Intuit Error Code 6177, 0!
We hope the troubleshooting steps listed in this blog would have helped you fix QuickBooks Company File Error 6177 0 without much hassle. However, if you get stuck with this issue due to any reason, we would suggest you give us a call on QuickBooks Data Service Solutions Helpline Number +1-(855)-955-1942.
Frequently Asked Questions
Ans: You can fix the QuickBooks error 6177 0 by
1. Moving the Company File to your Local Hard Drive.
2. Deleting QuickBooks Network Data (.ND) File.
3. Moving the QuickBooks Installation Files to a New Folder.
4. Resetting the multi-user hosting.
Ans: To delete the QuickBooks ND file to fix QuickBooks Error 6177, 0, go to the Windows file explorer and then to the folder having the QuickBooks installation folder. Then look for the file with .ND extension and delete it. This ND file will have the same name as your company file.
Ans: You can configure the QuickBooks database server manager by going through the Programs option after clicking on the Start button. There you can click on the Add folder button and then select the folder with the QB company file. Lastly, you have to opt for the Scan button and let it scan the company file. After everything, click on the Close button.
