The QuickBooks Desktop application enables its users to seamlessly connect their application with various Microsoft tools that enhance its functionality and streamline operations. One such tool that can be integrated with QB is QuickBooks Web Connector. The QBWC is a Microsoft Windows tool that allows web services (web-based applications) and QuickBooks Desktop products to exchange data. However, many users sometimes face difficulties in connecting and using this tool and get stuck upon QuickBooks Web Connector Error QBWC1039. The error generally arises when users make an attempt to connect an application to QuickBooks Desktop with the help of Web Connector but fail.
The error code QBWC1039 appears due to several reasons and reflects different error messages accordingly. Thus, the troubleshooting method to fix QuickBooks Web Connector Error 1039 is based on the error message you see on your screen. So, follow the blog ahead to learn more about the Web Connector Error Code 1049.
If you feel that connecting Web Connector with your QuickBooks is getting difficult due to the error code QBWC1039, then you can get assistance from our experts by calling us at the toll-free number +1-(855)-955-1942.
Troubleshooting Solutions to Fix QuickBooks Web Connector Error QBWC1039
As mentioned above, multiple reasons lead to multiple types of error messages. So, we have listed here separate troubleshooting methods for every cause, so let’s have a look at them:
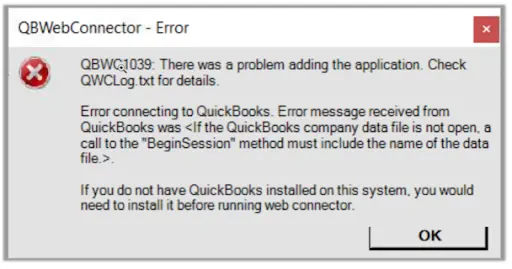
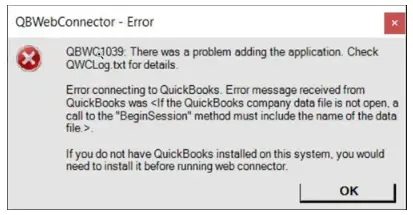
Case 1- QBWC1039 : If the Company data file is not open, a call to the “BeginSession” method must include the name of the data file.
This error message mainly appears if your Web Connector is not correctly set up to run when QuickBooks is not open. It can also appear if you have renamed your company file, moved it to a different location, or if it does not have permission to work with any third-party application. To fix it, you need to undo the changes you have made to the Web Connector configuration and company file location or name.
Solution 1: Undo change in name and location
If this error started arising after you made changes to your company file, the right thing to do is to undo it and check if the error still persists. Here are the two other things that you need to do:
Rename Your QB Desktop Company File
For this, you first need to back up your company file, then follow the other steps:
- Now, check the location of the company file.
- For this, go to the Home Page, then press the F2 or Ctrl + 1 keys and open the Product Information window.
- Then, note down the location listed in the File Information field.
- Now, go to the location specified there.
- After this, you need to right-click on the Windows Start button and then move to File Explorer.
- Next, right-click on the company file and then choose Rename. The company file name will appear as [CompanyName].qbw or just [CompanyName].
- Then, change the file name and then hit Enter.
- Now, hit Yes to confirm the previous action.
Recommended To Read: Quick Fix QuickBooks Web Connector Error QBWC1085
Set up QuickBooks to Use the New Company File Name
- From the QB File menu, select the Open or Restore an existing company option.
- Then, hit the Open a company file option and then Next.
- After that, choose the newly renamed company file and hit Open.
Solution 2: Restore the Company File to the Previous Location
For this, you first need to back up your company file. The steps to create a backup file are given in our blog: How To Backup Company File In QuickBooks Desktop? So refer to the steps given there. After that, follow the below-given steps:
Steps to Restore the Backup Company File To the Previous Location
If your backup file is on an external device like a USB, first move it to the local hard drive, then follow the steps.
- First, go to the File menu in QuickBooks Desktop and select Open or Restore Company.
- After that, select Restore a backup copy and hit Next.
- Then, move to the Local Backup option and again hit Next.
- Now, browse your system for the backup company file, which will look like [Your company name].qbb.
- Then, choose the folder to save the restored company file and hit Open.
- Remember not to overwrite the data in any existing folder. Now, when you are done and ready, click Save.
Solution 3: Make changes to your Web Connector Configuration
You might see this QuickBooks error code QBWC1039 on your system if your web connector is not meant to run after shutting the QB application off. These are the steps you need to follow to correctly configure it:-
- Sign in to QuickBooks as Admin.
- Click on the File menu to select Switch to Single-user Mode if QuickBooks is in Multi-user mode.
- Choose Preferences from the Edit tab.
- Click on Integrated Application and click on the Company Preferences tab.
- Choose a third-party application>Properties.
- Tick-mark the box against the option Allow this application to log in automatically.
- Click on Yes in the Authorization window.
- Choose User to log in then tap on OK.
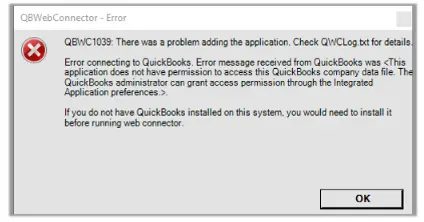
Case 2- QBWC1039: This Application does not have permission to access this QuickBooks company data file. The QuickBooks administrator can grant access permission through the Integrated Application preferences.
The simple reason behind this QuickBooks Error Code QBWC1039 message on your system is that the third-party application has not granted QuickBooks Administrator the required access.
Solution: Make changes to your application configuration to fix it:
- Sign in to your application as Admin user.
- Go to the File menu and choose Switch to Single-user Mode in case your application is running in Multi-User mode.
- Now, Go to the Edit menu to choose Preferences.
- Choose Integrated Applications and click on the Company Preferences tab.
- Untick the box for Don’t allow any applications to access this company file.
- Tap on Yes in the SDK App Authorization pop-up.
- Tick-mark the third-party application you wish to grant access to.
- Click on OK.
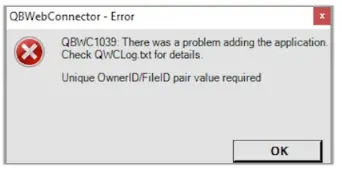
Case 3- QBWC1039: Unique OwnerID/FileID pair value required.
This QuickBooks Web Connector Error 1039 message appears when the application you are trying to add is already on QuickBooks.
Solution: Remove the Existing Owner ID
These are the steps you need to follow to remove the integration:
- Run QuickBooks Desktop.
- Download the CP3 tool and Open it.
- Click on Select File and find the QWC file. It will put the file in the Enter QBWC file location. Now click on Open.
- Choose Remove Stamp.
- Select Yes in the QuickBooks Application Certificate pop-up and then Continue.
- Click on Done in the Access Confirmation window.
- You need to Follow your onscreen instructions and then click on OK.
- A confirmation message will pop-up that the Owner ID has been removed. Click on OK.
- Now close the CP3 tool and add back your third-party application.
Case 4- QBWC1039: Unable to add FileID to company file for this Application.
You might face this QBWC1039 error message if you have made multiple attempts to add an application. You should attempt to add a file just once in one location. If you are witnessing this error message, reach out to experts at +1(855)-955-1942 to fix it.
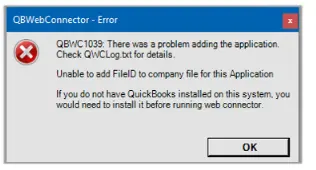
Case 5- QBWC1039: There was a problem adding the Application. Check QBWCLog.txt for Details.
There are multiple reasons that can lead to this QuickBooks error code QBWC1039 such as an outdated application, a change in company file location or unavailability of the company file. There are two different solutions to fix it:-
Solution 1: Undo the Changes Leading To This Error
Undo any modifications you made to your file name or the location of your company file. Return it to its original spot. The error will be resolved as a result of this:-
- Remove the app from QuickBooks Web Connector if you want to rename or relocate your file.
- Change your file name or location.
- Connect to Web Connector.
Solution 2: Installing the Latest QuickBooks Desktop Version
This QBWC1039 error message is caused by an outdated version of the application you are using. You have to reinstall and upgrade the newer product to the most recent version.
Example: QuickBooks 2020 is upgraded to QuickBooks 2021. You opt to utilize QuickBooks 2020 instead of QuickBooks 2021. You’ll need to download and install QuickBooks 2021, as well as update it to the most recent version. The program does not have to be used, but it must be installed and updated.
Download the QuickBooks application and install it to its latest release when this error message appears.
Allow Experts to help you fix QuickBooks Web Connector Error 1039
We discussed various reasons leading to QuickBooks Web Connector Error QBWC1039 and the respective troubleshooting methods for it. If you are still stuck with the issue and have no idea about further troubleshooting steps, we will advise you to reach out to experts at at QuickBooks Data Service Solutions helpline number +1(855)-955-1942 for instant assistance.
Frequently Asked Questions
Ans: You are facing the web connector error QBWC1039 because of the following reasons:
1. You have moved or relocated your company file to a different location.
2. You have tried to integrate the application multiple times.
3. You can also get the issue if your company file name is changed.
4. Having company file compatibility issues can also trigger the error.
5. If your QB admin is restricting the integration of the third-party application, then this error may appear.
