While working on various projects, you might need to import 1099 from ADP (Automatic Data Processing) to QuickBooks Online. This process can help you streamline financial reporting and ensure effective and reliable tax management. In this article, you will discover the simplest steps to transfer a 1099 to QBO from ADP.
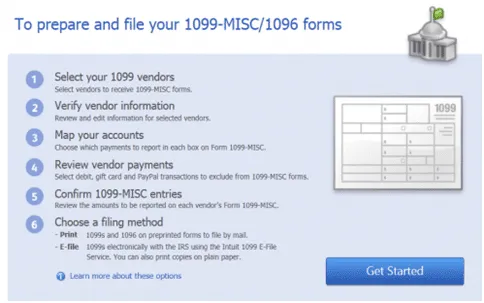
The entire process of moving 1099 from ADP to QB Online is very easy. You just need to prepare your data in ADP, after which you can transfer it to QB Online. Furthermore, you can review your 1099 forms after import and send them to your vendors and the Internal Revenue Service (IRS).
Let’s continue exploring the blog to learn how to implement the precise steps to move 1099 to QBO from ADP.
What Are the Benefits of Importing 1099 From ADP to QBO?
The following points describe key advantages that you can gain once you import 1099 from ADP to QuickBooks Online:
- You don’t need to enter your data manually and it is easy to ensure high accuracy levels during the entire process.
- When you transfer 1099 forms to QBO from ADP, you can easily navigate through your financial data, resulting in higher efficiency.
- You can make sure that a centralized record is maintained for all your financial data. As a result, you can manage the 1099 forms and explore your payroll data easily and effectively.
- The most significant advantage of using ADP integration with QuickBooks Online is that you can streamline your tax filing process. Furthermore, you can quickly generate summaries and reports of all your tax data.
- You can achieve effective vendor management and foster better vendor relationships and negotiations once you integrate and utilize ADP with QBO.
- The entire process of transferring 1099 forms to QBO from ADP makes your overall financial management easier. Thus, you can direct your focus on other crucial aspects of your business.
We have now understood all the major advantages that we can gain when we import 1099 from ADP to QuickBooks Online. Alright, then, scroll down to the next section to learn what you need to do before beginning the import process.
2 Things to Do Before Importing 1099 From ADP to QBO
Before starting the import process of 1099 from ADP to QB Online, you need to do the following:
1. Install the Latest Windows Updates
You should install the newest Windows updates on your computer. This will ensure that you can effortlessly run QB Online during the import process. Furthermore, having the latest Windows version will allow you to use critical security patches and offer greater stability.
2. Clear the Cache and Cookie Data From Your Browser
Erasing the cache and cookie data from the browser will allow faster access to QBO. Below are the different processes that you can implement to erase the cache and cookie data from different web browsers. You should follow the process depending on the web browser that you currently use to access QB Online.
1. Google Chrome
You can remove the cache data from Google Chrome by implementing the following steps:
- Access Google Chrome and navigate to the top-right corner to click the More icon.
- Choose Delete Browsing Data, and after that, you have to select the time range to erase the browsing data, such as Last hour/All Time.
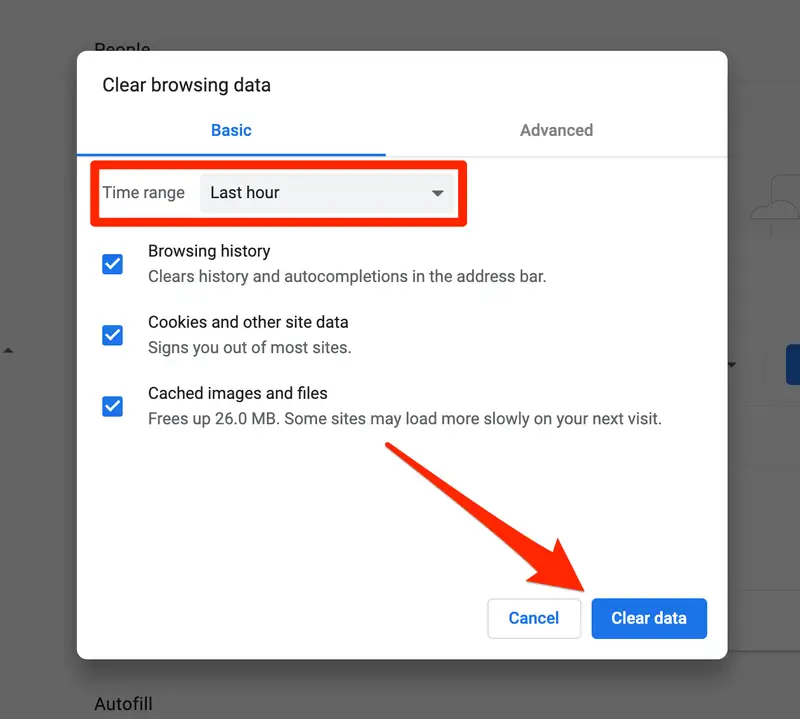
- After selecting the time range, you can tap the Delete Data button to remove the cache data.
B. Mozilla Firefox
Here are the steps that you can implement to remove the cache and cookies data from Mozilla Firefox:
- Firstly, access Mozilla Firefox and tap the Menu icon located at the top-right corner of the window.
- Choose Settings, and after that, click Privacy & Security.
- Jump to the Cookies and Site Data section and you should tap Clear Data.
- At this point, move to the Clear Browsing Data and Cookies window and select Everything using the dropdown menu.
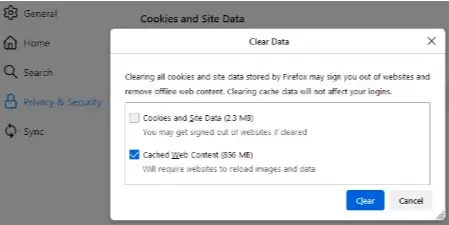
- Check the Temporary Cached Files and Pages checkbox and you need to click Clear.
- Finally, you will be able to remove all the cache and cookie data from Mozilla Firefox.
C. Safari For Mac
To remove the cache and cookie data from Safari for Mac, you can do the following:
- Launch the Safari app on your Mac, and after that, you should select Safari.
- Click Settings, and after that, you must tap Privacy.
- At this point, click Manage Website Data and tap Remove All.
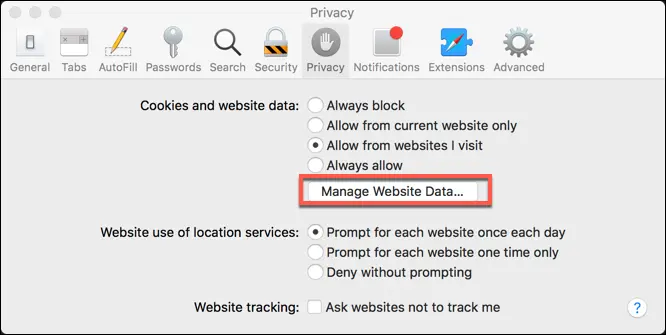
- Finally, you will be able to completely erase cache and cookies from the Safari app.
D. Safari For iPad and iPhone
The following steps will help you remove the cache and cookie data from the Safari app on your iPad and iPhone:
- Access the Safari browser on your iPad and iPhone and click Settings.
- Tap the Clear History and Website Data option and wait until all the cache & cookie data are erased.
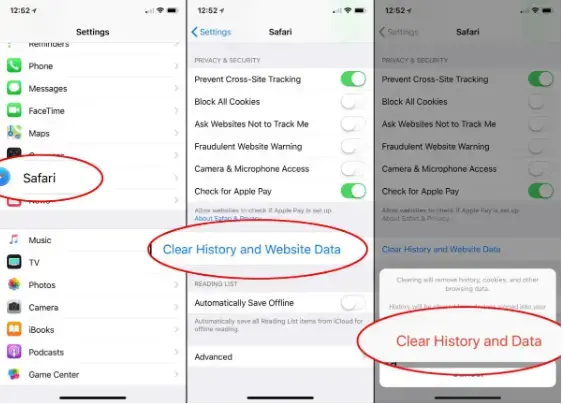
- Finally, you can run QBO on the Safari app to finish various tasks.
E. Microsoft Edge
You can effortlessly remove the cache and cookie data from Microsoft Edge by following the steps detailed below:
- Access the Microsoft Edge browser and jump to the Settings and More tab.
- Click Settings, and after that, you should select the Privacy, Search, and Services option.
- Go to the Delete Browsing Data section, and after that, tap the Clear Browsing Data Now option.
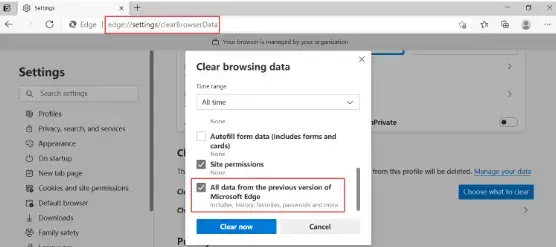
- Using the Time Range dropdown, you can select the period to erase the cache and cookie data.
- Finally, tap Clear Now and wait until you have completely erased the selected cache and cookie data.
Now that you have cleared the cache and cookies from your browser, let’s navigate to the following section to discover the crucial steps that you need to implement to import 1099 from ADP to QBO.
Related Post: QuickBooks Clean Install Tool
Essential Steps to Import 1099 From ADP to QuickBooks Online
Here are the steps that you must implement to successfully import 1099 from ADP to QuickBooks Online:
Step I: Prepare Your 1099 Forms Data in ADP
Before you begin the process of importing 1099 forms in QBO, you need to choose the relevant file format for your data. Here’s how you can do so:
- Firstly, access your ADP account using appropriate login credentials.
- Now, go to the Reports section in your ADP account.
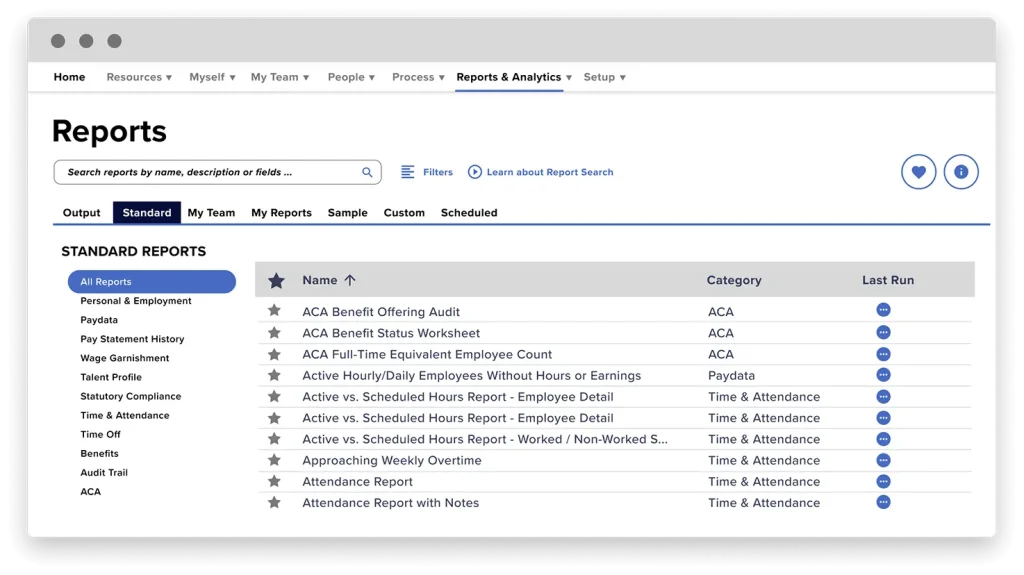
- Select the 1099 form that you want to export to QB Online.
- At this point, you have to select the desired format for your 1099 form data. You can either choose CSV or Excel format to export your data to QBO.
Step II: Configure the Data For QuickBooks Online
In this step, you need to format your 1099 form data to match all the QB Online import requirements. Here’s how you need to do so:
- First and foremost, open the Excel or CSV file to view your 1099 data.
- QB Online requires specific columns to import your 1099 data. Generally, you will need to verify the following columns in your file: Vendor Name, Vendor Tax Identification Number (TIN), Address Information, and Amount Paid to the Vendor.
- You can also rearrange the columns and erase all the irrelevant data to match QBO requirements.
Step III: Import 1099 From ADP to QuickBooks Online
Now that you have configured your 1099 data to match the standard requirements of QB Online, let’s successfully import it using the following points:
- Firstly, open your QB Online account and move to the Settings menu.
- Now, choose Import Data, after which you need to select the relevant option to import your 1099 form data.
- Follow the prompts on the screen to import your Excel or CSV file that you have already prepared.
- At this point, QuickBooks Online will guide you to accurately map all the 1099 form data fields with various columns. You need to make sure that you finish the mapping process correctly.
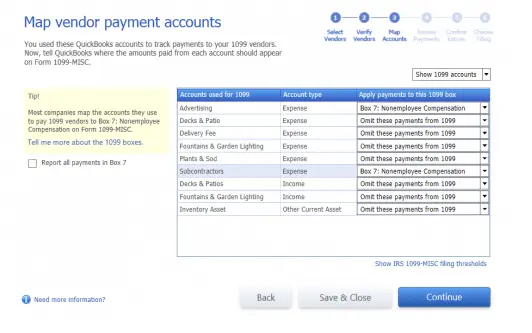
- After you have mapped all the fields in QB Online, tap the Import button.
- Finally, QB Online will process your 1099 form data and import it seamlessly.
Step IV: Review Your Imported Data in QB Online
When you have finished the process of importing 1099 from ADP to QuickBooks Online, it is crucial to review all the imported data. Here’s how you can do so:
- You need to go to the 1099 section in QB Online to confirm that all the entries were imported properly. This means that you should verify all the mapping of 1099 form data fields with the columns available in QB Online.
- You need to check all the vendor names, tax amounts, and all the related fields. You should ensure that there are no discrepancies in the imported data. If you find any discrepancy, you need to modify the relevant fields directly in QuickBooks Online.
Step V: Finalize and Submit Your 1099 Form
When you have completely reviewed the 1099 form data in QB Online, you need to do the following:
- Prepare and send the 1099 form to the IRS by January 31 of the following year. You can submit the 1099 form electronically or by mail.
- It is also necessary to send a copy of the 1099 form to the relevant individual or organization that you paid by January 31.
Once you have submitted the 1099 form, your tax management process for the financial year will be completed.
Conclusion
In this comprehensive article, we showed you how to effortlessly import 1099 from ADP to QuickBooks Online. Hopefully, you can now ensure flawless financial management through prompt submission of 1099 form data. If, however, you still need more guidance, you can connect with an experienced QB professional immediately.
Frequently Asked Questions
You need to import 1099 from ADP to QuickBooks Online to ensure accurate tax reporting and flawless financial record keeping. Furthermore, it will be easy to reconcile accounts and generate reports once you shift 1099 form to QB Online from ADP.
To import 1099 from ADP to QuickBooks Online, you have to first verify your 1099 form data in ADP. After that, you should import your data into QB Online, and you can thereafter submit it to the IRS.
You need to correctly verify your 1099 form data before starting the import process. Furthermore, it is necessary to ensure valid mapping of various fields when you import 1099 from ADP to QuickBooks Online and when you upload transactions into QuickBooks through CSV files.
