If you are facing difficulties getting the payroll updates and verifying payroll subscription due to QuickBooks error PS036, this will be the perfect troubleshooting guide you have been looking for.
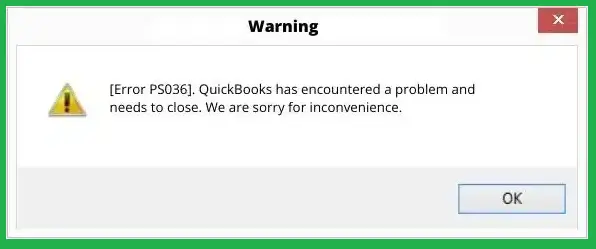
Sometimes, QuickBooks stops calculating payroll taxes and starts notifying you that you need to verify your payroll subscription; you instantly proceed to verify it. However, doing so results in an error message that reads, ‘Error PS036: QuickBooks is having trouble verifying your payroll subscription.’ If you are also stuck with error PS036 in QuickBooks and can’t proceed with regular payroll operations, keep reading this guide for instant troubleshooting solutions.
Being unable to run payroll due to QuickBooks payroll error PS036 can be frustrating. Connect with our certified experts at +1-(855)-955-1942, who have years of experience dealing with errors in QuickBooks, for instant support
Reasons that Trigger QuickBooks Payroll Error PS036
Resolving the error becomes quite simple if you can identify the exact cause of it. The following is the list of all possible reasons that have the potential to trigger PS036 error in QuickBooks.
- When you try downloading the payroll updates with an inactive payroll subscription.
- Several active payroll agreements with an inactive Direct Deposit agreement can also be a reason for the PS036 error in QB.
- You are running an outdated QuickBooks program.
- If QuickBooks Desktop is not compatible with your Windows Operating system.
- You might face QuickBooks error PS036 if your QuickBooks Desktop is not ‘Registered.’
- When you enter an incorrect service key to verify your payroll subscription.
- If the Employer Identification Number (EIN) in the company file is invalid.
- If the PSID in the QB company file is incorrect.
- If the Windows Firewall is blocking you from downloading the latest payroll updates on the system.
- If there is data damage in QuickBooks Desktop, it can interrupt the payroll updates in the form of error PS036.
Note: If you encounter the QuickBooks PS036 error message while having an active Direct Deposit for the payroll service, we advise you to call us at +1-(855)-955-1942.
Instant Methods for Rectifying QuickBooks Error PS036
After discussing every potential reason for the occurrence of Error PS036 in QuickBooks Desktop, let’s discuss the solutions that can help rectify it quickly.
1st Method: Check and Verify if you have an Active Payroll Subscription
An active payroll service subscription is essential to download the latest payroll updates in QB Desktop. The following are the steps to check if you are getting a PS036 error in QuickBooks because of an inactive payroll subscription.
- Close all the company files and QuickBooks Desktop, and restart the system.
- Launch the QuickBooks application, move to the Employees section, and click the My Payroll Service option.
- Select Manage Service Key, and under it, verify that the Service Name and Status are correct and show as Active.
- If the service key is incorrect, click Edit and enter the correct service key. You can find the service key in the email used to purchase the subscription.
- Choose Next, uncheck the box to Open Payroll Setup, and finally click Finish.
Retry to download the payroll updates after verifying the subscription. However, if you still see the QuickBooks payroll error PS036, try the next troubleshooting solution.
Related News: Quick Fixes for QuickBooks Payroll Update Error PS038
2nd: Rename the Damaged Paysub.Ini File
The Paysub.ini file contains all the necessary information about the payroll subscription. If the QuickBooks Error PS036 is a result of corruption in this file, you can rename it and prompt QuickBooks to recreate a new one.
Important Note: The Paysub.INI file is a hidden file on Windows. To rename it, you must set Windows to show hidden files and folders.
View hidden files and folders on Windows 10 and 11 operating systems
- Press Windows + E and click the three dots at the top.
- Select Options, and under the View tab, checkmark the Show hidden files, folders, and drives option.
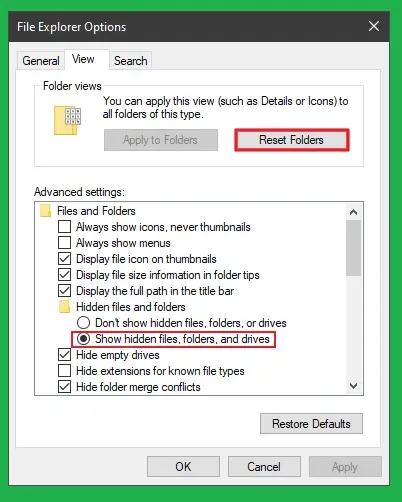
- Click Apply and OK to save the changes.
View hidden files and folders on Windows 8 and previous operating systems
- Under the File Explorer window, click the Organize option, and from there, select the Folder and Search options.
- Select the Hidden Files and Folders option under the View tab and then tick mark the checkbox beside the Show Hidden Files, Folders, and Drives option.

- Choose Apply and then OK.
Now that your Windows displays hidden files and folders, proceed with the instructions below to rename the Paysub.ini file.
- Choose the My Computer/This PC option from the File Explorer window. After that, type Paysub.ini in the search panel and hit Enter.
- By right-clicking on the Paysub.ini file, click the option to Rename
- Rename the file extension from .ini to .old, and hit Enter.
- Repeat the steps to rename all the Paysub files you can find.
After renaming the Paysub.ini file, relaunch QuickBooks and check if the error PS036 is resolved.
3rd Method: Register and Update the QuickBooks Software
To run QuickBooks smoothly on the system, it is crucial to get recent security and software improvements through regular updates. First, check if the QB software is registered:
Open the Product Information window and hit the F2 key.
Besides the license number, it must show Activated.
Note: If the status is not Activated, register QuickBooks Desktop. For detailed instructions to register QB, go to the FAQs section at the end.
Step 1: Install the Latest Released Updates for the QuickBooks Desktop Program
After registering the QB software, it will automatically download the updates. You will see the Update Available option in the status bar at the top right corner as the updates are downloaded. The next step is to install the QuickBooks Desktop software updates. The updates will be installed even if you close the product and keep the system on. To install the update manually, follow the instructions below:
- Click the Update Now option under the Update Available tab and wait until the updates are installed.
- Launch the QuickBooks application.
Step 2: Download the Payroll Tax Table Updates
Follow the steps below to know your current tax table version and download the updated version, if available:
- Under the Employees tab, select Get Payroll Updates.
- If you want to know the tax table version:
- Besides, You are using the tax table version; check the payroll tax table version.
- Check out the latest payroll news and updates to determine if it is the most recent. You can also select Payroll Update Information for more details on the tax table version.
- To download the latest version:
- Choose the Download Entire Update option, click Update, and an informational window will appear on the screen when the download is complete.
Check if you have rectified QuickBooks Error PS036; if not, move on to the next troubleshooting solution.
Also Check Related Post: Learn the Quick Way to Fix QuickBooks Error PS077
4th Method: Re-activate the Payroll Subscription
To get rid of QuickBooks error PS036, you should re-activate the expired subscription for the payroll services. Here, we are going to provide you with two easy ways to initiate the re-activation process. But before you start, ensure you have a supported and updated version of QuickBooks Desktop.
Through the QuickBooks Company File
The best way to enable the payroll service subscription again is directly from the QuickBooks Desktop company file; let us see how:
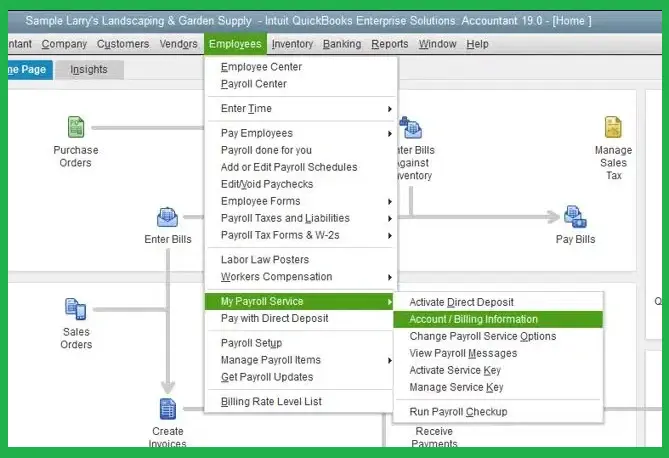
- Open the company file, select the Employees tab, and then choose Payroll Service.
- Click Account/Billing Info from there and log in with the Intuit Account credentials.
- As you enter the login credentials, the QuickBooks Account page will appear.
- Move to the Status tab, choose Resubscribe, and follow the on-screen instructions to reactivate the payroll service.
Through the Intuit Account
The following are the steps to reactivate the payroll service from the web.
- Sign in to the Customer Account Management Portal (CAMPs) using the Intuit account.
- Under the Status tab, select the option to Resubscribe.
Follow the on-screen instructions and reactivate the payroll service to eliminate QuickBooks error PS036.
Note: It might take 24 hours to reactivate your payroll subscription. Check the activation status once the 24-hour window is completed.
5th Method: Run the Quick Fix My Program Utility from QB Tool Hub
Running the Quick Fix My Program will help you detect and resolve minor application issues that can result in payroll update errors. This utility will close the background processes that QuickBooks currently uses on the system and then run a quick repair on the QB program. To do it, follow these steps:
- Download the QB Tool Hub file by clicking this LINK as you close all the company files and QuickBooks program.
- You can save the downloaded file on the desktop or access it from the Downloads folder (the default location where every downloaded file is saved).
- As you double-click the file to open it, follow the on-screen installation instructions, and then agree to the Terms and Conditions.
- After installing the QuickBooks Tool Hub, double-click the Tool Hub icon to open it.
- Under the Program Problems, click the option to Quick Fix My Program option.
To check if error PS036 in QuickBooks Desktop is fixed, try to update the payroll service again.
6th Method: Re-configure the Windows Firewall to Update QB
QuickBooks could be treated as a threat to Windows until it is added to Firewall’s list of safe programs. If you try downloading a recent payroll update without creating a firewall exception for QuickBooks, it might provoke QuickBooks error PS036. To re-configure your firewall settings do follow all the steps given below:
Step 1: Adding Firewall Port Exception for QB Desktop
If you are currently running multiple versions (years) of the QuickBooks Desktop application on a single system, then implement the following steps for each version:
- Launch the Windows Start menu by pressing the Windows key.
- In the search panel, type Windows Firewall and hit Enter.
- As the Windows Firewall window is displayed on the screen, click the Advanced Settings option.
- By right-clicking the Inbound Rules, choose the option to create a New Rule.
- Select Port and then click Next.
- Also, you must ensure that TCP is selected.
- In the Specific local ports field, you must type the following ports required for your specific QuickBooks year version currently being used:
- For the QB Desktop software 2020 and 8019, XXXXX.
- For the QB Desktop software 2019: 8019, XXXXX.
- For the QB Desktop software 2018: 8019, 56728, 55378-55382.
- For the QB Desktop software 2017: 8019, 56727, 55373-55377
An Important Note: You must know that the QuickBooks program 2019, 2020, and all the forthcoming versions now use dynamic ports. These ports are the specific firewall ports that will be assigned during the installation of the QuickBooks application. It certainly makes sure that QB gets exclusive use of a given port.
How do you obtain a dynamic port number?
After entering the port number, choose the Next option.
Click Allow the Connection and click Next.
After that, ensure all profiles are marked and select Next again.
Create a new rule and name it. For example: QBPorts(year).
Lastly, click Finish after making all the changes.
Note: You must repeat all the steps to create outbound rules, like the Inbound rule.
Step 2: Creating Firewall Exceptions for QuickBooks Software
In QuickBooks, executable files (.exe) play an essential role in performing various tasks. For QuickBooks to run smoothly, it is necessary that Windows Firewall exceptions are created for each of the executable files. To make it easy to add the executable files, we have given all of them below in the table:
- Open the Windows Start menu, type in Windows Firewall in the search panel, and then hit Enter.
- Choose the Advanced Settings option, and from there, right-click the Inbound Rules. From the drop-down list, select the New Rule option.
- Click Program, then Next.
- Choose the This Program Path option and then click Browse to search and select each one of the executable files given in the table below. Click Next.
- Again, click Next after choosing the Allow the Connection option.
- After that, you must check if all profiles are marked and click Next when prompted.
- Finally, create a new inbound rule named QBFirewallException(name.exe).
- Remember to repeat all the steps precisely for Outbound Rules.
Executable files
| Executable files | Location |
| AutoBackupExe.exe | C:\Program Files\Intuit\QUICKBOOKS YEAR |
| Dbmlsync.exe | C:\Program Files\Intuit\QUICKBOOKS YEAR |
| DBManagerExe.exe | C:\Program Files\Intuit\QUICKBOOKS YEAR |
| FileManagement.exe | C:\Program Files\Intuit\QUICKBOOKS YEAR |
| FileMovementExe.exe | C:\Program Files\Intuit\QUICKBOOKS YEAR |
| QuickBooksMessaging.exe | C:\Program Files\Intuit\QUICKBOOKS YEAR |
| QBW32.exe | C:\Program Files\Intuit\QUICKBOOKS YEAR |
| QBDBMgrN.exe | C:\Program Files\Intuit\QUICKBOOKS YEAR |
| QBServerUtilityMgr.exe | C:\Program Files\Common Files\Intuit\QuickBooks |
| QBCFMonitorService.exe | C:\Program Files\Common Files\Intuit\QuickBooks |
| QBLaunch.exe | C:\Program Files\Common Files\Intuit\QuickBooks |
| QBUpdate.exe | C:\Program Files\Common Files\Intuit\QuickBooks\QBUpdate |
| IntuitSyncManager.exe | C:\Program Files\Common Files\Intuit\Sync |
| OnlineBackup.exe | C:\Program Files\QuickBooks Online Backup |
Note: If you see the Program Files (x86) folder, it means you are currently using a 64-bit Windows OS.
7th Method: Fix Data Damage with the Verify-Rebuild Tool in QB
With the help of the verify and rebuild tool, you can easily eliminate QuickBooks error PS036. First, you must verify the integrity of the data, and if the tool finds any damage, you need to rebuild it. Let’s learn how to do it with the help of the two-step process given below:
Step 1: Check to Verify for Data Damage
- Move to the Window tab in the QB Desktop program and click the Close All option.
- Click Utilities under the File tab and then choose the option to Verify Data. After the process of verifying data is over, you will see one of the three options:
- QuickBooks detected no problems with the data- It means the data is clean, and you do not have to take further action.
- If an error message appears— You can manually search for this error message on the QB Desktop support website and then find how to rectify it.
- Your QuickBooks data has lost integrity- It means the Verify tool has found damage in the data, and you must rebuild the data.
Step 2: Repair the Damaged Data
- Under the File menu, choose the Utilities option and then select the option to Rebuild Data.
- QuickBooks always asks you to create a company file backup before it rebuilds it. Select OK. It is advised to back up before you start to rebuild.
- Choose a location on the system where you wish to save the backup and click OK.
- In the File name field, enter a New Name and select Save. Ensure that you do not replace the previous backup of the company file.
- After you see the message stating Rebuild has been completed, choose OK.
- You can also use the Verify tool again to check for additional data damage. To do that, move to the File tab, choose the Utilities option, and then select Verify Data.
If the tool finds more damage, you must manually repair it. However, if you do not find any error, retry the payroll update and check if the error is resolved.
8th Method: Clean Install QB Desktop in Selective Startup Mode
This method can help you resolve QuickBooks error PS030 by rectifying any issues with the QuickBooks Desktop installation.
Note: Prior to implementing clean installation in the selective startup mode, create a backup of the company file to protect the data from accidental loss. Keep the QuickBooks software license registration information with you, as you will require it while re-registering the product.
Switching the Windows OS to Selective Startup Mode
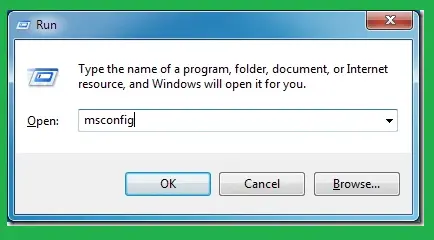
- Press the Windows and R keys together to get the Run command box.
- In the command box, enter MSConfig and choose OK.
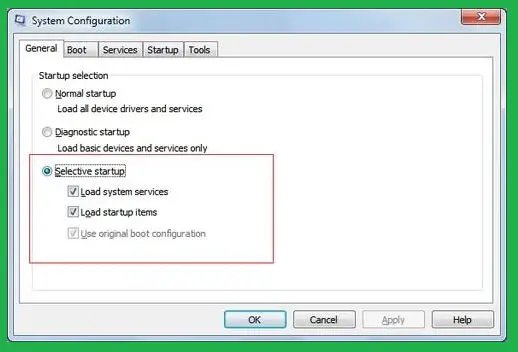
- Move to the General tab and then click the Selective Startup and Load System Services option.
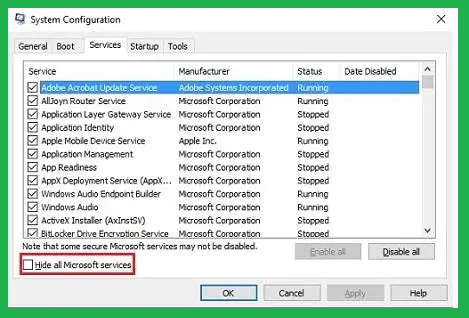
- Under the Services tab, select Hide All Microsoft Services and click Disable All afterward.
- Remove the tick mark next to the Hide all Microsoft services and click Windows Installer from the list of services.
- Click OK.
- Lastly, choose Restart in the System Configuration window.
Uninstalling the QuickBooks Program
- Search for the Control Panel in the Windows Start menu.
- As the Control Panel window is displayed, click the Programs and Features or Uninstall a Program option. Choose either one of the options.
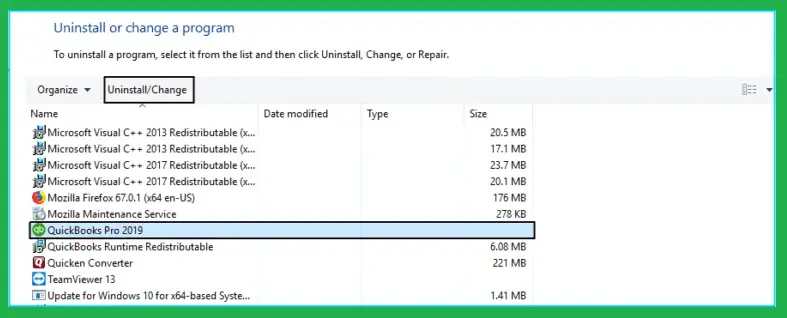
- Under the list of installed programs on the system, click the version of QB Desktop you want to uninstall.
- Click the option to Uninstall/Change, Remove, and then Next.
Note: If you cannot find the Uninstall/Change or Remove option, then sign back in as a Windows Admin.
Re-installing the QuickBooks Software
- Download the Installer for the QuickBooks version from the QuickBooks Downloads and Updates Page.
- Double-click the downloaded file, and an installation wizard will appear on the screen.
- Carefully follow the instructions to install QB and agree to all the Terms and Conditions.
- Installing QuickBooks again automatically installs new folders and renames the old ones.
Go Back to the Normal Startup Mode
- Open the Run command box by pressing the Windows and R keys, enter msconfig in the search box, and click OK.
- Under the General tab, choose Normal Startup and select OK.
- Finally, reboot the system and check if QuickBooks payroll error PS036 is rectified.
Summing Up!!
After implementing the above-mentioned solutions, you might have eliminated QuickBooks error PS036. However, if none of the troubleshooting methods work for you, the issue must be more severe than anticipated. We recommend dialing +1-(855)-955-1942 for further guidance. Our experts will thoroughly analyze the issues triggering the PS036 error in QuickBooks and provide instant solutions.
Frequently Asked Questions
Ans: After installing the QuickBooks software on the system, you will get a prompt to activate it. If you wish to activate it, follow the steps below.
1. Launch the QuickBooks application and move to the Help tab.
2. Choose the option to Activate QuickBooks Desktop and then follow the steps on your desktop screen to verify all the necessary info.
Ans: QuickBooks error PS036 falls under the PSXXX series error related to the QB payroll service issues. This error prevents you from either updating QuickBooks payroll or verifying the payroll subscription. Until this error is rectified, you won’t be able to calculate payroll taxes and process employees’ wages.
Ans: The following are the eight ways to get rid of the QuickBooks PS036 error message:
1. Register the QuickBooks Program and update it to its latest release.
2. Rectify the damaged data in the company file by running the Verify and Rebuild tool.
3. Try running the Quick Fix My Program to repair QB Desktop.
4. Enter the correct Payroll Service Key while verifying the payroll subscription.
5. Re-configure the Firewall settings on the system.
6. Re-active the expired payroll subscription.
7. Rename the Paysub.Ini file
8. Reinstall QuickBooks in selective startup mode.
Ans: You face the QuickBooks error PS036 if the payroll tax table is not updating. Then, in that case, you have to check for the following things to fix the error.
1. Check your login credentials for your QuickBooks account.
2. Update QuickBooks Desktop to the latest release.
3. Install Windows update as well.
4. Also, verify the Employee Identification Number (EIN).
