
Installing and updating QuickBooks Desktop can sometimes become a great hassle due to various problems. One of the frequently occurring issues is QuickBooks error 1920 which can also arise when you try to update QB Database Server Manager. Here’s the message that is likely to pop up on your system’s screen:
| “Error 1920: Service QuickBooks Database Manager (QBCFMonitorService) failed to start” |
In addition, you can get the following messages on the screen if QBCFMonitorService cannot function due to any problem:
| “QBCFMonitorService.exe has encountered a problem and needs to close” |
| “Access violation at address FFFFFFFF in module QBCFMonitorService.exe. Read of address 00000000” |
| “QBCFMonitorService.exe has stopped working. Windows is checking for a solution to your problem” |
| “QBCFMonitorService.exe has stopped working. A problem caused the program to stop working correctly. Windows will close your program and notify you if a solution is available” |
This glitch mainly occurs when the QB Database Server Manager is unable to access the hard drive & establish a secure connection to different company files. Once this error occurs, the QB installation & update process abruptly stops on your computer. Fortunately, there are various resolutions that you can easily implement for this issue.
Alright, then, let’s go through the blog to understand why we run into this problem and explore how we can fix it seamlessly.
If you want instant help to troubleshoot QuickBooks error 1920, dial +1-(855)-955-1942 to contact a QB professional.
Why Do You Encounter the 1920 Error Code in QB Desktop?
The error message for the QuickBooks error code 1920 clearly indicates that the main reason for its occurrence is the failure of QB Database Manager Service to start. The other reasons for the error code 1920 are given below:
- There is a malfunction in the Operating system of your device.
- You might have experienced a failed installation or uninstallation of QuickBooks.
- There might be some invalid entries in your Windows registry.
- Your computer might have gotten infected with a virus or malware.
- Improper shutdown of the system due to power failure can also be a possible reason for the QuickBooks error 1920.
- You might have mistakenly deleted some important system files or registry entries from your device.
- When you try to install the QuickBooks application on your system without having full Admin rights.
Now that you know about the common reasons behind this issue, let’s scroll down to the following section to discover how to resolve it.
Casewise Solutions to QuickBooks Error 1920
Once you are aware of the reason behind the occurrence of QuickBooks Error 1920, you can easily follow the corresponding steps to troubleshoot it. Follow the solutions based on the instances you have faced the QuickBooks Error 1920.
Section A: 1920 Error Occurs When Installing or Updating QuickBooks
Whenever you face the 1920 error code when installing or updating QB Desktop, you should implement the steps detailed below.
Step I: Uninstall QuickBooks Desktop Application
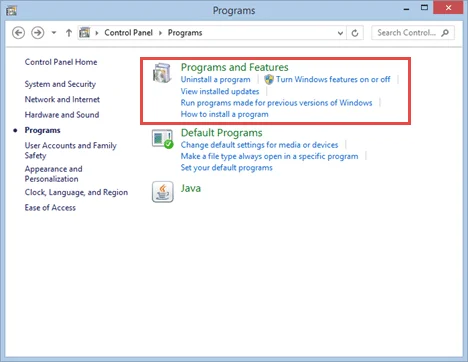
- Press the Windows + R key and open the control panel.
- Then opt for the programs and features tab followed by the uninstall a program option.
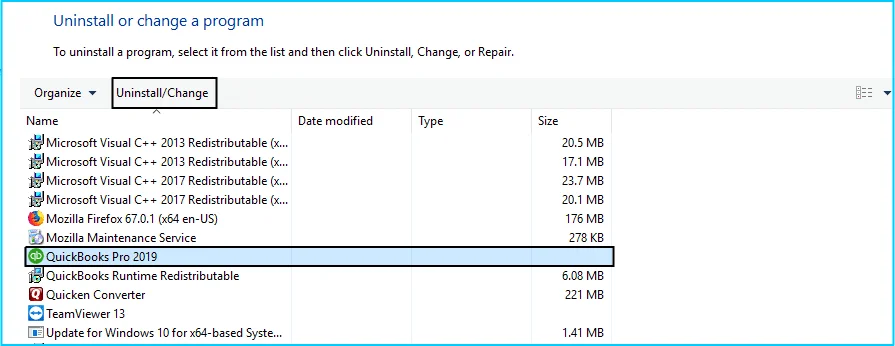
- After that, from the list of installed programs, you have to opt for QuickBooks desktop.
- Lastly, go for the option of uninstall or change and follow the onscreen instructions.
Step II: Rename the QB Installation Folders
For this step, if you do not find the QuickBooks application data or program data folder, then you have to opt for the option to display the hidden files and folders. Also, if you have multiple Intuit apps installed on your device, then make sure to uninstall or rename only the QuickBooks version folder in the Intuit folder. Follow the given instructions to rename the installation folder:
- First, navigate to the installation folders and then refer to the list given below.
For Windows 10/8/7
- C:\Program Data\Intuit
- C:\Program Data\Common Files\Intuit
- C:\Users[Username]\AppData\Local\Intuit
- C:\Program Files\Intuit
- C:\Program Files\Common Files\Intuit
For Windows 10/8/7
- C:\Program Data\Intuit
- C:\Program Data\Common Files\Intuit
- C:\Users\AppData\Local\Intuit
- C:\Program Files\Intuit
- C:\Program Files\Common Files\Intuit
- Next, press the Windows key along with the R key to open the run command.
2. Next, press the Windows key along with the R key to open the run command.

- Now, enter the folder location and hit the Enter key.
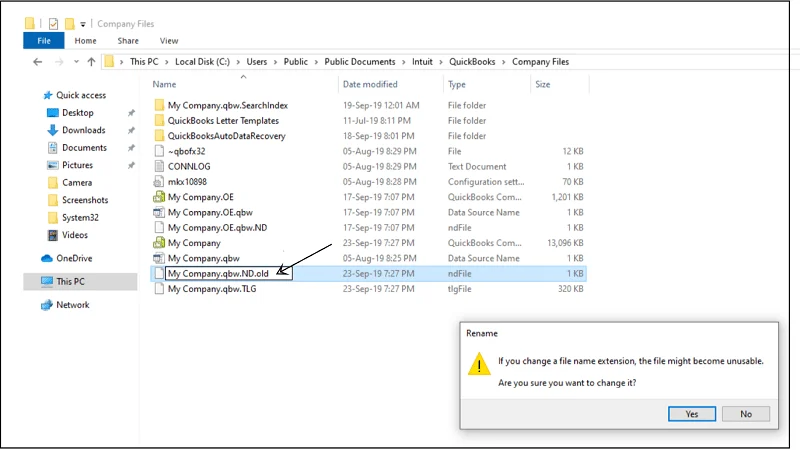
- Then, click right on the folder and choose the Rename option from the list.
- Finally, you need to rename the folder by adding the .OLD at the end and then by clicking Yes.
Step III: Install QuickBooks Desktop
After you have carried out the previous two steps, you need to install the QuickBooks Desktop application again.
- First, prepare the Installation of your QuickBooks software.
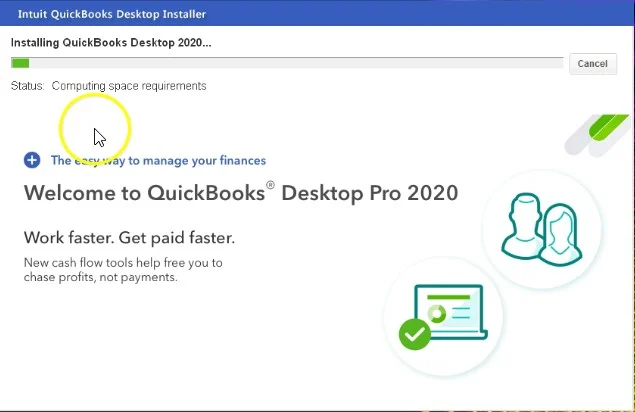
- Then install the QB desktop on your PC.
- For this, first, open the downloaded file. This file would be QuickBooks.exe.
- Then pay attention to the on-screen instructions and accept the software license agreement.
- After that, choose the Next option and enter your QuickBooks Product and License numbers and hit Next.
- Then, you have to decide the right install type for you. You have two options for you. One is Express install, and the other is Custom and Network install.
- Lastly, you need to Activate your QuickBooks Desktop.
Step IV: Set Up QuickBooks Desktop to Use the New Company File Name
- For this, first, open the QuickBooks desktop application.
- Then move on to the QB company file and then click on the option to open or restore an existing company.
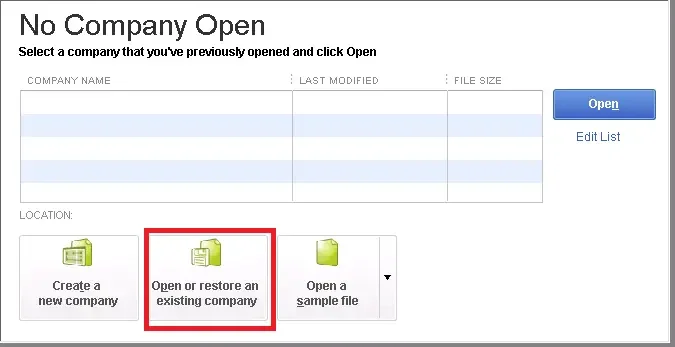
- Then, you need to open a company file by pressing the Next tab.
- Once done with it, you have to choose a new name for the company file.
- And then hit the Open button.
Step V: Process to Manually Rename the QB Company File
- The first step is to rename the QuickBooks company file.
- Then open the QuickBooks desktop and then open the company file.
- Next, press the F2 key or Ctrl +1 keys so as to open the product information window.
- Then, navigate to the location of the company file in the file location and Close the QuickBooks desktop.
- Now, move the company file location by following the given steps:
- For Windows 10, 8.1, and 8, you have to click on the Windows Start button and select the file explorer.
- For Windows 7 and Vista, you have to click right on the Windows Start button and then open Windows explorer.
- Then click right on the file menu and then select the rename tab.
- After that, type a new name for the company file and hit Enter tab. If Windows asks you to confirm you to perform an action then tab Yes.
Read Also- How to resolve QuickBooks Error 100 (Database Manager Not Working)
Section B: 1920 Error Manifests When Updating QB Database Server Manager
Here are the steps that you should follow if you run into the 1920 error code when updating QB Database Server Manager on your server system.
Step I: Uninstall QuickBooks Database Server Manager
- To start the process, press the Windows + R keys.
- Then enter the appwiz.cpl and hit the OK button after the run dialog box appears.
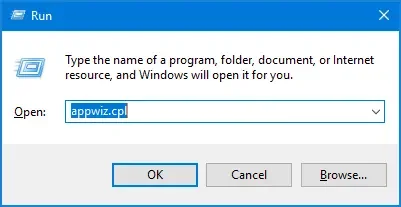
- Next, go to the QuickBooks database server manager.
- Lastly, click on the uninstall/change the option and then carry out the instructions given on the screen.
Step II: Rename the Installation Folders
This step is similar to the above-mentioned step. You have to go to the Intuit apps folder and select the QuickBooks version folder located inside it. If you are unable to see the app data there, you need to display the hidden files and folders also.
- First, visit the installation folder and then refer to the chart given below:
| Windows 10/8/7 | Windows Vista |
| C:\Program Data\Intuit | C:\Program Data\Intuit |
| C:\Program Data\Common Files\Intuit | C:\Program Data\Common Files\Intuit |
| C:\Users\[Username]\AppData\Local\Intuit | C:\Users\\AppData\Local\Intuit |
| C:\Program Files\Intuit | C:\Program Files\Intuit |
| C:\Program Files\Common Files\Intuit | C:\Program Files\Common Files\Intuit |
- Next, press the Windows + R key and open the Run command.
- After that, enter the folder location and hit Enter.
- Then click right on the folder and select the Rename option.
- Lastly, you need to end the process by adding the .Old to the folder name.
Step III: Reinstall QuickBooks Database Server Manager
The last step in this process involves reinstalling the QuickBooks database server manager and setting up the file sharing. The database server manager helps to run the Quickbooks desktop with Multi-user access. It also helps in working with the same company file at the same time. The steps to download and install the QuickBooks database server manager are as follows:
- The first step involves downloading and installing the database server manager on the server system. The server system is the computer that hosts the company file.
Note: Remember that if you are a professional accountant or bookkeeper or have hosted more than one version of QuickBooks desktop on your network, you have to install them in order. This means that first install the older version, then the recent one.
- First, you need to terminate all the open programs on the server device, including QuickBooks.
- Next, open the downloaded file Setup_QuickBooks.exe file and install it.
- Then follow the onscreen instructions one by one to proceed ahead with the process.
- After that, QuickBooks will ask you to select an install type followed by the custom or network options. Then move to the Next tab and remember not to choose the express option.
- Next, hit click on the preferred option to set up the network and again click Next. Both options will help you install the database server manager.
- If you want to have both the QuickBooks database manager and QuickBooks on the server system, you are required to click on the I’ll be using as well as store QuickBooks desktop on this device option.
- But in case you do not want the QuickBooks desktop and just using the database server manager on your server system, then you have to click on the option saying I will not be using QuickBooks desktop option.
- Then move ahead with the on-screen instructions, then when you are all set, click on the install tab. Windows might ask you for permissions; grant it all the permissions.
Utilize These Preventive Steps For QB Installation Issues
Here are the preventive steps that you can follow for different QB Desktop installation & update problems, including the 1920 error message:
- Regularly Update QuickBooks: Ensure that you always use an updated QB Desktop version on your system.
- Create Frequent Backups Of Your Company Data: You must save the backup company files to ensure full protection for your crucial data.
- Monitor User Permissions: Check that only authorized users have full access to various company files.
- Review Network Stability: Ensure that your network is properly configured & stable.
- Check System Requirements: Verify that your computer meets the necessary requirements for QB installation.
- Deactivate Security Apps: Disable various security programs, such as Windows Firewall, before installing & updating QB.
Winding Up
In this detailed article, we walked you through different solutions for QuickBooks error 1920. Hopefully, you can now seamlessly install & update QB Desktop on your computer. If, however, you still run into various problems or have a query, you can connect with an experienced QB professional for real-time support.
Frequently Asked Questions
QuickBooks Error 1920 occurs when the QuickBooks Database Manager Service (QBCFMonitorService) fails to start during installation or update. It’s usually caused by insufficient permissions or conflicts with system services. Here’s how to resolve it:
1. Log in as Admin: Always install or update QuickBooks with full administrator rights.
2. Stop QBCFMonitorService manually: Go to Services, locate QBCFMonitorService, and stop it before reinstalling.
3. Rename QuickBooks folders:
Rename C:\ProgramData\Intuit\QuickBooks,
C:\Users[Username]\AppData\Local\Intuit.
4. Install in Selective Startup: Run msconfig, enable Selective Startup, and retry installation.
5. Restart your system after changes.
Still stuck? Call support at +1-(855)-955-1942 for expert help.
Start by uninstalling any existing QuickBooks version and clearing leftover folders from C:\ProgramData\Intuit and C:\Users\Public\Public Documents\Intuit. Then, restart your computer, log in as an administrator, and reinstall QuickBooks Desktop. If the database manager still refuses to run, reset Windows permissions, repair Microsoft .NET Framework, and install QuickBooks Tool Hub to use the Install Diagnostic Tool. This sequence resolves the problem in most cases.
