Developers have integrated convenient features in QuickBooks that allow users to pay their employees directly through the application. You can do this either through direct deposit or by printing pay stubs and paychecks. While some consider printing paychecks and pay stubs an outdated payment method, it remains popular among many small and medium-sized enterprises. You can easily print paychecks in QuickBooks Desktop and Online; however, the ways are distinct. Moreover, QuickBooks also gives the flexibility to choose whether you want to print the paychecks while running the payroll or postpone it for a later time. Go through this blog to learn the steps to print paycheck stubs in QuickBooks Desktop and Online.
Are you not able to process payroll for your employees because you can not print pay stubs in QuickBooks 2023? Then do not worry; just connect with our experts to get assured help. Dial the toll-free number +1-(855)-955-1942 now.
Print Paycheck in QuickBooks Online Payroll and Intuit Online Payroll
The method to print paycheck in QuickBooks Online Payroll Enhanced and all other QuickBooks Online Payroll versions has a minor difference. However, the steps required to print paychecks in Intuit Online Payroll Full service are totally different. The process of printing paycheck in QuickBooks and Intuit online versions can be divided into two steps- setting up the printing preferences and then printing the paycheck.
Important: The below-mentioned steps are specifically for those customers who already have pre-printed checks consisting of their bank information.
1. Print Paycheck in QuickBooks Online
Ensure that you are using either QuickBooks Online Payroll or QuickBooks Full Service Payroll. Your sign-in window will appear like this for the following:-
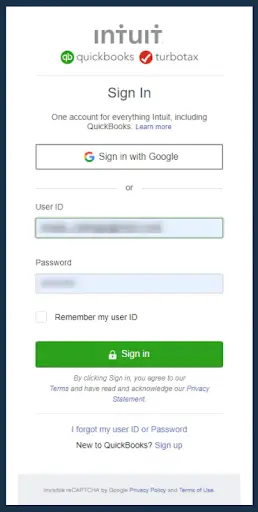
Now follow the below-mentioned steps to print paychecks in QuickBooks Online Payroll.
Read Also – How to Update QuickBooks Payroll Tax Table
Step 1- Setting Up The Paycheck Printing Preferences
The process of setting up paycheck printing preferences is a bit different for QuickBooks Online Payroll Enhanced and other QuickBooks Online Payroll versions.
QuickBooks Online Payroll Enhanced
- Tap on the Settings button and then choose Payroll Settings.
- Go to the Preferences section and select Paycheck Printing.
- Then tap on Preprinted QuickBooks-compatible voucher check stock.
- Choose Print 2 stubs or Print 1 stubs and then tap on OK.
QuickBooks Online Payroll (all other versions)
NOTE: These steps are valid for QuickBooks Online Payroll Full Service, QuickBooks Online Payroll Core, QuickBooks Online Payroll Premium, or QuickBooks Online Payroll Elite.
- Tap on the Settings button and choose Payroll Settings.
- Go to the Printing section and tap on the Edit icon.
- Choose Preprinted QuickBooks-compatible check paper.
- Then either select Print 1 pay stub or Print 2 pay stubs. (Select Align check if you are printing checks for the first time.)
- Finally, click on Save and Done.
Step 2- Printing Paychecks
The following steps are similar for all the QuickBooks Online Payroll versions.
- Go to the Payroll section and choose Employees.
- Then go to My Payroll Section and click on Paycheck List.
- Choose the paychecks you want to print then tap on the Print button.
- Now, a preview of the paycheck or paystub will open; select the printer icon available there to print.
2. Print Paychecks in Intuit Online Payroll Enhanced
Follow the below-mentioned steps to ensure that you are using Intuit Online Payroll Enhanced. Your sign-in window appears like this for Intuit Online Payroll:-
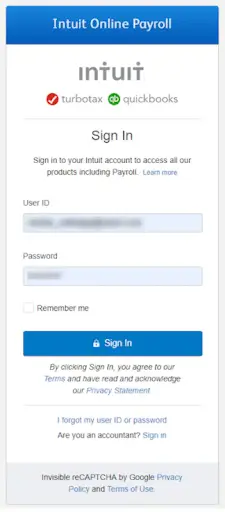
Step 1- Setting up the Paycheck Printing Preferences
- Click on Setup and choose Preferences.
- Tap on Paycheck Printing Settings.
- Then choose Preprinted QuickBooks-Compatible voucher check stock or Blank check stock.
- Now, either choose Print 1 stub or Print 2 stubs.
- Finally, tap on OK.
Step 2- Printing Paychecks
These are the steps you need to follow every time you want to print a paycheck in the Intuit Online payroll-
- Go to Payday and choose the Paycheck List.
- Choose the Paychecks you would like to print and then tap on View Print.
- Click on the Printer icon to print the pay stubs.
3. Print Paychecks in Intuit Online Payroll Full Service
Follow the below-mentioned steps after you are sure that you are using Intuit Online Payroll Full Service. The sign-in window for the same appears like this:-
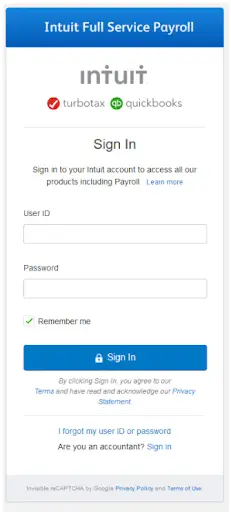
Step 1- Setting Up Your Paycheck Printing Preferences
You need to contact experts in order to change your preferences in Intuit Service Payroll. Give us a call.
Step 2- Printing Paychecks
These are the steps you need to follow every time you wish to print paychecks in Intuit Payroll Full Service:-
- Click on View Paycheck List.
- Choose the paychecks you would like to print and then tap on Print.
- Click on the Printer icon to give the print command.
You can also re-print the paychecks and pay stubs in QuickBooks Online Payroll.
Steps to Reprint paychecks or paystubs in QB Online Payroll
- Go to the Payroll section, then to Employees.
- After this, select the Paycheck list option below the Run payroll option.
- Then, select the paycheck that you want to print. Now, select the Filter option and change the Date Range or Employee.
- Now, under the Action column, hit Print.
You will get a preview of the paycheck or pay stub; select the Pinter icon given there to print.
Print Paycheck in QuickBooks Desktop
You have the option to print the paychecks in QuickBooks Desktop either while running the payroll or you can mark them to print later. However, you need to execute the same process to print the paychecks.
Step 1- Verify Your Printer Setup
You need to verify that your printer has been set up properly. These are the steps you need to follow:-
- Click on the File tab and choose Printer Setup.
- Go to the Form Name section and click on Check/Paycheck.
- Click on the Settings tab and check the following
- Printer Name- It should be the name of your printer.
- Printer Type– It should be your printer.
- Check Style- Choose the 3-part checks (Paycheck having two pay stubs)
- Then tap on OK.
NOTE: Do a trial run on your printer to check how exactly you should load your checks. Use a blank paper for the trial run. Follow these steps in order to do so:
- Take a white paper and write Top and bottom on it, and then flip the paper. Write Back on the flipped side.
- Load the test paper to your printer and follow the steps to print any one check.
- Now check the paper, it will help you understand the right process of loading your check stock.
Step 2- Go Ahead and Write the Checks
- Click on the Banking section from the main menu bar at the top of your dashboard.
- Then, select the Write Checks option from the drop-down list.
- Alternatively, you can also get the Write Checks option from the Banking section of your home page.
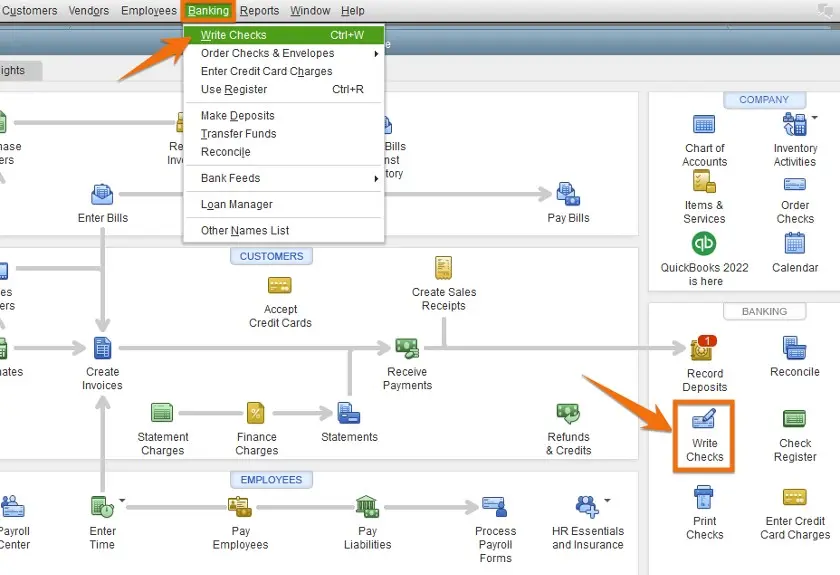
Step 3- Create the Checks
- You will now get a new window that displays the Write Checks information.
- Here, to create your checks, you need to provide the information needed in QuickBooks Desktop.
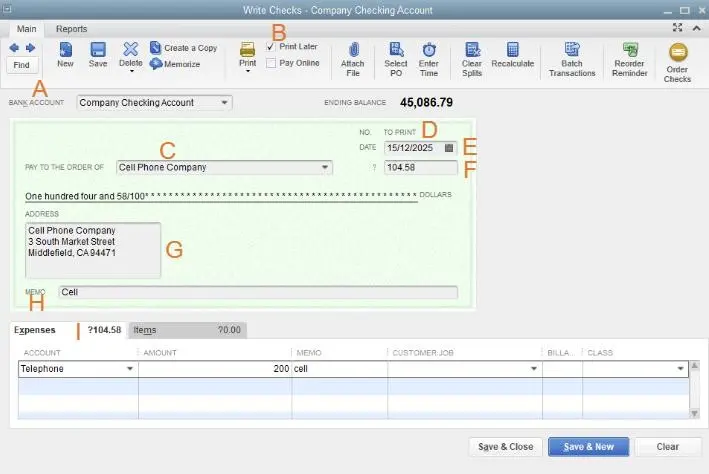
Write the Checks window in QuickBooks Desktop.
This required information includes
- Bank Account: You need to select the bank account from which you want to deduct the money.
- Print Later: Now, you need to check the box if you want to create the checks now but want to print them later. Remember, checking this box will replace the option to input the check number on the check with the message “TO PRINT.”
- Pay to the Order of: Now, you need to enter the payee name, and it will automatically complete the address information.
- Date: Then you need to enter the date when you want to issue the check.
- Amount: Enter the amount.
- Address: The address field will automatically be completed after entering the information during the payee setup.
- Memo: Though it is an optional step, you can use it to provide other additional information like the account number and the purpose of the payment.
- Expenses or Items tab: Now, assign the check to one or more QuickBooks Accounts or Items.
- Now, click the Save icon on the top of the Write Checks screen, but make sure not to close the screen yet.
Step 4- Print the Paychecks
Printing Paychecks While Running Payroll
- Setup Scheduled/Unscheduled Payroll.
- Go to the Enter Payroll Information window and select the following:-
- Print Paychecks on check stock in order to queue paycheck for printing.
- Handwrite & Assign Check Numbers if you want to write paychecks by hand.
- Go through the paycheck information and then tap on Continue.
- Click on Create Paychecks.
- Go to Confirmation & Next Steps and choose Print Paychecks.
Marking Checks as Print Later
- Tap on the Employees menu and choose the Payroll Center.
- Go to the Transaction tab to select Paycheck.
- Select the date range covering the period when paychecks were issued.
- Double-click on the checks you want to print later.
- Tap on the Print Later box next to the Print icon and then click on Save and Close.
Printing Paychecks that were saved to Print Later
- Click on the File tab and choose Print Forms.
- Choose Paychecks and select the payroll bank account.
- Cross-check that the number in the First Check Number field matches the number of the first check-in on your printer.
- Choose Paycheck and then tap on OK to print.
Steps to Reprint Paychecks in QuickBooks Desktop
If you ever want to reprint a single paycheck and multiple paychecks in QuickBooks Desktop, then implement the following steps:
Steps to Reprint One Paycheck
- Go to the Lists menu, then select Chart of Accounts.
- Then, click twice on the bank account you want to use for payroll.
- After that, click twice on the paycheck you wish to reprint.
- Then, hit the Print button.
- Now, enter the check number and hit OK.
- After this, choose the printer settings, check style, and then hit Print.
- When done, click Save and Close.
Steps to Reprint Multiple Paychecks at Once
- Go to the Lists menu, followed by Charts of Accounts.
- Then, click twice on the bank account you are using for payroll.
- Now, you need to double-click on the paychecks you want to reprint.
- Then, hit Print Later and Save and Close.
- Repeat these steps for each check that is not marked to print.
- Then, select the File section and go to Print Forms.
- After this, select the Paychecks and then the paychecks you wish to print.
- Hit OK, review the print settings, and then click Print.
Let Experts Help You Print Paycheck in QuickBooks!
These were all the methods to Print Paycheck in QuickBooks Online and Desktop versions. We have discussed the steps you need to follow for different versions and printing paychecks as per the user’s preference. If You still have any doubts or are stuck at any step, reach out to an expert at QuickBooks Data Service Solutions Helpline number +1-(855)-955-1942 and they will provide you with all the required technical assistance.
Frequently Asked Questions
A. Printing a paycheck in QuickBooks Desktop is simple once payroll is set up. First, go to the Employees menu and select Payroll Center. Then choose the employee whose paycheck you want to print. After processing payroll, open the Print Checks window and select the correct paycheck. Make sure your check stock is loaded in the printer and choose Print. QuickBooks also allows you to preview the check before printing, which helps avoid mistakes. Always verify the routing number, account number, and employee details to ensure accuracy before finalizing.
A. Yes, QuickBooks allows reprinting of paychecks. To reprint, go to the Employee Center, select the employee, and open the paycheck you want to reprint. From the paycheck window, click Print Later, then go to the File menu and choose Print Forms → Paychecks. Select the check you want and print it again. This is especially useful if the check was damaged, lost, or voided by mistake. Be sure to use the same check number sequence to avoid confusion during payroll reconciliation.
A. Absolutely. QuickBooks allows employers to print pay stubs as an alternative to full checks, especially when employees are paid via direct deposit. To do this, go to File → Print Forms → Pay Stubs, select the employee and date range, and print them on plain paper. Pay stubs include details like gross pay, deductions, net pay, and year-to-date totals, which help employees keep track of their earnings. Employers often distribute pay stubs electronically or with payroll reports for convenience.
