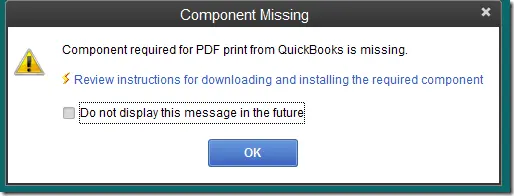
QuickBooks integrates with several third-party add-ons and software for the sole purpose of furnishing convenience to its users. One such third-party application that QuickBooks utilizes is Adobe Acrobat Reader. It is used for printing the QuickBooks files and reports as PDFs. However, damages in the Adobe Acrobat Reader or issues with the QB software might show you the QuickBooks Missing PDF Component notification. It is an error message that will pop up on the screen of QB users while they attempt to print, email, and save a PDF in QuickBooks Desktop. But, do keep in mind that multiple reasons trigger the ‘component required for PDF Print from QuickBooks to be Missing’ error message. If you want to know more about PDF-related issues in QuickBooks, read this article carefully till the end. Moreover, you will also find some of the most effective troubleshooting solutions to rectify it.
Cannot print and save the files as PDFs in the QuickBooks application? If printing crucial documents is a part of your regular operations in the company, we understand how frustrated you must be. If you want answers about why the QuickBooks PDF component missing, call us at +1-(855)-955-1942 now!!
What are the Key Reasons for QuickBooks Missing PDF Component Message?
You know by now that missing PDF component in QuickBooks Desktop will prevent you from printing the files in the QuickBooks application. So, before we start following the troubleshooting methods, let us understand the reasons for the issue.
- When the Adobe Reader application is missing or damaged.
- If the version of the Adobe Reader program you are using on the system is outdated.
- In case the QuickBooks Desktop software is outdated.
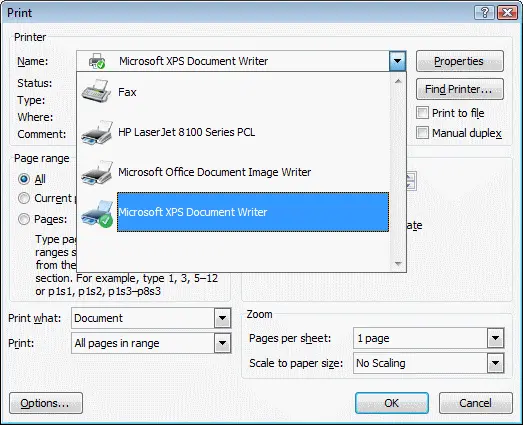
- When in the Windows Settings, the Microsoft XPS Document Writer is disabled.
What are the QuickBooks Errors/Issues Can Print and PDF Repair Tool Rectify?
The Print and PDF Repair Tool primarily fixes the missing PDF component issue. However, you can even eliminate numerous other errors/issues with the help of this vital utility. The following is the list of all the issues that you can fix by running the Print and PDF Repair Tool:
- If you have problems connecting with the selected printer, MS XPS Document writer is on the XPS port.
- If you cannot Print PDF Invoices in the QuickBooks Desktop application.
- Error message ‘QB can’t complete the current action due to a missing component.’
- When the QB application is unresponsive while printing.
- If the PDF Converter is showing offline.
- If QuickBooks PDF Converter cannot directly print any PDF
- ‘The device is not ready’ error message.
- If you cannot save the file as a PDF and the form or reports as a .pdf.
- If you are in the process of reconciling the accounts and QuickBooks Freezes.
- When for the 32-bit Applications, Print Driver Host is not working.
- For QuickBooks Unrecoverable error while printing.
- For the Error -20, -30, or -41, PDF Converter Activation
- If you see QuickBooks Error 1722 or 1801 while installing PDF Converter.
- If there are problems when printing transactions or reports.
- In case the reconcile window disappears.
How to Get Rid of QuickBooks PDF Component Missing Notification?
If you constantly see the QuickBooks Missing PDF Component error message, implement the troubleshooting methods below. These methods will help you get rid of this message from QB Desktop permanently.
1st Troubleshooting: Using QB Tool Hub to Run QB Print and PDF Repair Tool
If you haven’t downloaded the Tool Hub on the system, follow step one. Downloading and installing QB Tool Hub is quick. Then, employ the print & PDF repair tool to get rid of the QuickBooks Missing PDF Component error message.
Step 1: Download the Tool Hub file and Install it
Several utilities in QuickBooks Tool Hub are used to rectify QuickBooks errors. If you are utilizing QuickBooks software, close it to download the Tool Hub.
Note: If you install QB Tool Hub on Windows 10 64-bit, you will get a better experience while running it on the system.
- You should begin by downloading the QB Tool Hub’s latest version (1.6.0.3) from the official website of Intuit.
- After downloading the QuickBooksToolHub.exe file, save it on the system. The file will automatically get saved in the downloads folder. If you wish, you can manually change the download location of the file to anywhere on the system.
- Then, launch the downloaded file on the system to install it.
- To proceed with the process of installing the QB Tool Hub, follow the installation wizard carefully.
- Then, click OK to further agree to the terms and conditions.
- Lastly, launch the QB Tool Hub from the desktop icon once the installation is completed.
Step 2: Let’s Run the QB Print and PDF Repair Tool
- As you launch the QuickBooks Tool Hub on the system, choose the Program Problems option.
- Then, click the QuickBooks Print & PDF Repair Tool and wait until the tool fixes all the identified issues with the print components.
- Finally, try to print, email, or save as a PDF from the QB Desktop application again.
2nd Troubleshooting: Repairing the QuickBooks Program on Windows
You can repair the QB Program from within in the Tool Hub and then update the application for the latest features and security updates to fix several issues. To repair QB, utilize the Quick Fix My Program. The Quick Fix My Program tool will close all the recent background processes that QuickBooks employs and run a quick repair on the QB program.
- Initially, launch the Tool Hub and click Program Problems.
- Next, choose the option that says Quick Fix My Program.
- Then, launch the QB Desktop application and see if the QuickBooks Missing PDF Component notification is gone.
Note: While repairing missing PDF Component Error, If you see wrong display PDF setting, you may check Article on Why QuickBooks is Unable to Locate a PDF viewer.
3rd Troubleshooting: Updating the QuickBooks Program
If the QB program is not updated, it can provoke numerous issues and errors. QB Users can see a notification stating QuickBooks Missing PDF Component in case the QB Desktop application is outdated. Therefore, it becomes more crucial to update the QB program. However, always keep in mind to correctly close the Company file and then close the QB program before you initiate the update process. Let us show you how:
- First, launch the QuickBooks application.
- Then, click on the File tab and choose the Close Company or Logoff option.
- Then, click Exit under the File menu.
- You should right-click the QB Desktop icon to access its drop-down list.
- Further, choose the option to Run as administrator.
- Now, click the Help menu and then select Update QuickBooks.
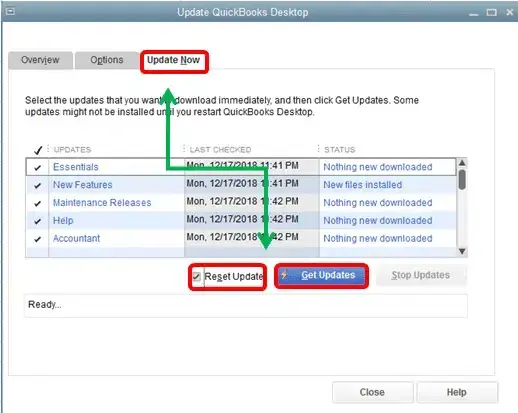
- Further, in the Options tab, select Mark All.
- Next, under Update Now, click Reset Update.
- Now, click Get Updates.
- After that, close and re-launch the QB program.
- Now, click Yes on the installation prompt.
- Lastly, reboot the system, launch the application, and see if the error message stating QuickBooks Desktop Missing PDF Component is eradicated.
4th Troubleshooting: Update and Repair the Adobe Acrobat Reader
A missing PDF component in QuickBooks Desktop error message might sometimes appear because of an outdated or damaged Adobe Acrobat Reader. You must update the software and then repair it to eliminate this issue. Let us see how with the help of the instructions below:
Step 1: Updating the Adobe Acrobat Reader
- Begin by clicking on the Windows Start menu.
- Proceed to type Adobe in the search panel and hit Enter.
- Then, choose Adobe Reader from the list of installed programs on the system and launch it.
- Now, choose the Help tab, and from there, choose the Check for Updates option.
- After that, carefully follow all the instructions to install the new and improved updates.
If, even after updating the Adobe software, you still see the notification stating QuickBooks Missing PDF Component, move to step two.
Step 2: Repairing the Adobe Acrobat Reader
- Initially, you must close the Acrobat/Reader if running on the system. Also, close any opened web browser windows.
- Now, click the Start button.
- Then, type Control Panel as the command in the search box and press Enter.
- Under the Control Panel window, click Programs and Features.
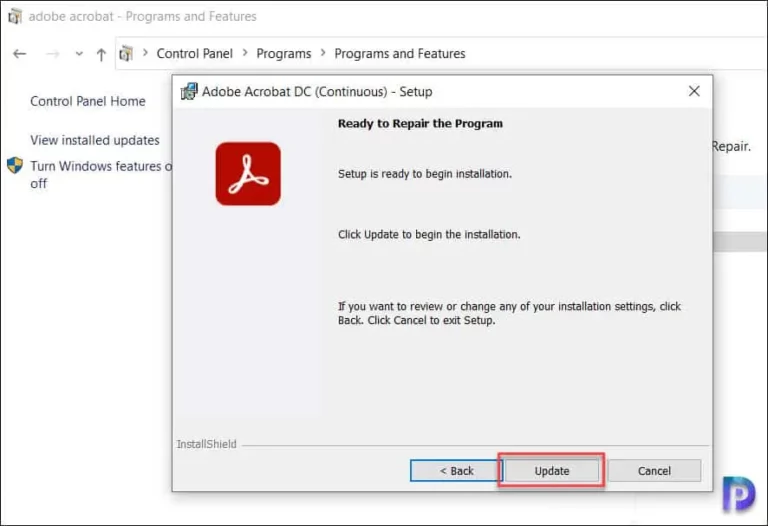
- After that, click Acrobat or Adobe Reader and click Uninstall/Change further.
- Now, choose Next in the Setup dialog box.
- Then, click Repair and then Next.
- Next, select the Install option, and as the process ends, click Finish.
- Finally, reboot the system and log in to the QB Desktop to print PDF.
5th Troubleshooting: Resetting the Permissions of the Temp Folders
First, reboot the system before resetting the permission to rectify the QuickBooks Missing PDF Component Windows 10 issue. If that doesn’t help you with this issue, follow the next step:
Step 1: Modify the Temp Folder Permissions
- Start by launching the Run Dilouge box after you hit the Windows and R Keys.
- In the dialogue box, type %TEMP% and click the OK option.
- As the temp folder window opens, right-click in the empty space and choose the Properties option.
- Further, click Security.
- Afterward, verify if the user names and groups in Security are set on Full Control.
- Try to save the document as a PDF in the QB software once again, as the permissions are set to Full Control.
Step 2: Testing if you can print to the XPS Document Writer
Note: This step tests the problems that appear while using the Save as PDF and Email option. XPS Document Writer is a product of
- Microsoft, and QuickBooks Desktop uses a few parts of it to save a PDF.
- First, open the Notepad on the screen and type Test.
- Now, choose the File option; under it, click the Print option.
- Then, click XPS Document Writer and then Print.
- Proceed to name the file. Save it and keep it on the desktop.
- Finally, on the desktop, view the XPS document that you printed from the Notepad earlier.
6th Troubleshooting: Reinstalling the XPS Document Writer
First, you must test the XPS Document Writer by using it to print outside QuickBooks Desktop. After that, remove the XPS Document Writer from the system. Then follow the steps below to install it again.
- Begin by launching the Run dialogue window on the screen. You must hit the Windows key + R together.
- Then, enter optional features as the command and then select OK.
- Make sure the box against the Microsoft XPS Document writer is tick marked. If not, then mark the box.
- Then, further, select the Start button
- Proceed to click the Gear icon to open the Settings.
- Now, choose the Apps option and then Apps & Features from the menu on the left side.
- Afterward, choose the Manage Optional Feature and click Add a Feature.
- Finally, find the XPS viewer tool under the list and install it.
After reinstalling the XPS Document Writer, you can perform additional troubleshooting solutions mentioned below to get rid of the QuickBooks missing PDF component error message.
Additional Troubleshooting
Step 1: Editing the settings of the security software
You can re-configure the security software settings on your system to fix this issue. For instance, if you have installed Norton Antivirus or McAfee Firewall, both can block the creation of .xps files. Therefore, to prevent it, verify the settings of the security software installed on the system and make sure the .xps files are not blocked.
Step 2: Modify the Windows User Permissions
In case a Windows User does not have the required permission to print through the XPS Document Writer, QuickBooks cannot convert the file to a .pdf format. Thus, it might be why you cannot print PDF invoices in QuickBooks Desktop. You must sign in on the system as an Admin to modify these permissions.
7th Troubleshooting: Turn-on the Microsoft XPS Document Writer
You cannot print PDF invoices in QuickBooks when the Microsoft XPS Document Writer on the system is disabled. So, find out if the feature is enabled or disabled using the instructions below.
- Start by launching the Run dialogue window on the system. For that, press the Windows + R keys.
- Then, proceed and enter ‘appwiz.cpl ‘in the text field.
- Now, hit Enter.
- Next, in the Program and Feature window, look at the left side and click the Windows Features on or off option.
- Lastly, checkmark the box beside the Microsoft XPS document writer to enable it.
8th Troubleshooting: Make the PDF Viewer as the Default for QuickBooks
If you do not select the PDF Viewer as a default application for the QB Desktop, there might be a possibility of getting the QuickBooks Missing PDF Component Windows 10 error message. To resolve it, set PDF Viewer as default.
- First, choose the Start menu and then click the Settings icon.
- Next, Choose Apps; under it, click the Default Apps option.
- Then, look for the .pdf file extension and then choose its default program.
- Proceed to select the Adobe Reader as the default PDF viewer on your system.
- Finally, you must select the option to Switch Anyway.
Summing Up!!
We tried our best to present you with some of the most effective troubleshooting methods to eliminate the QuickBooks Missing PDF Component error message. Implement these solutions by carefully going through each step. However, if you are facing trouble as the problem persists, know that you can always reach out to us. Call us at +1-(855)-955-1942, and our professionals will gladly help. Our team will furnish you with prompt answers, as they respect all your time and efforts.